The Ark
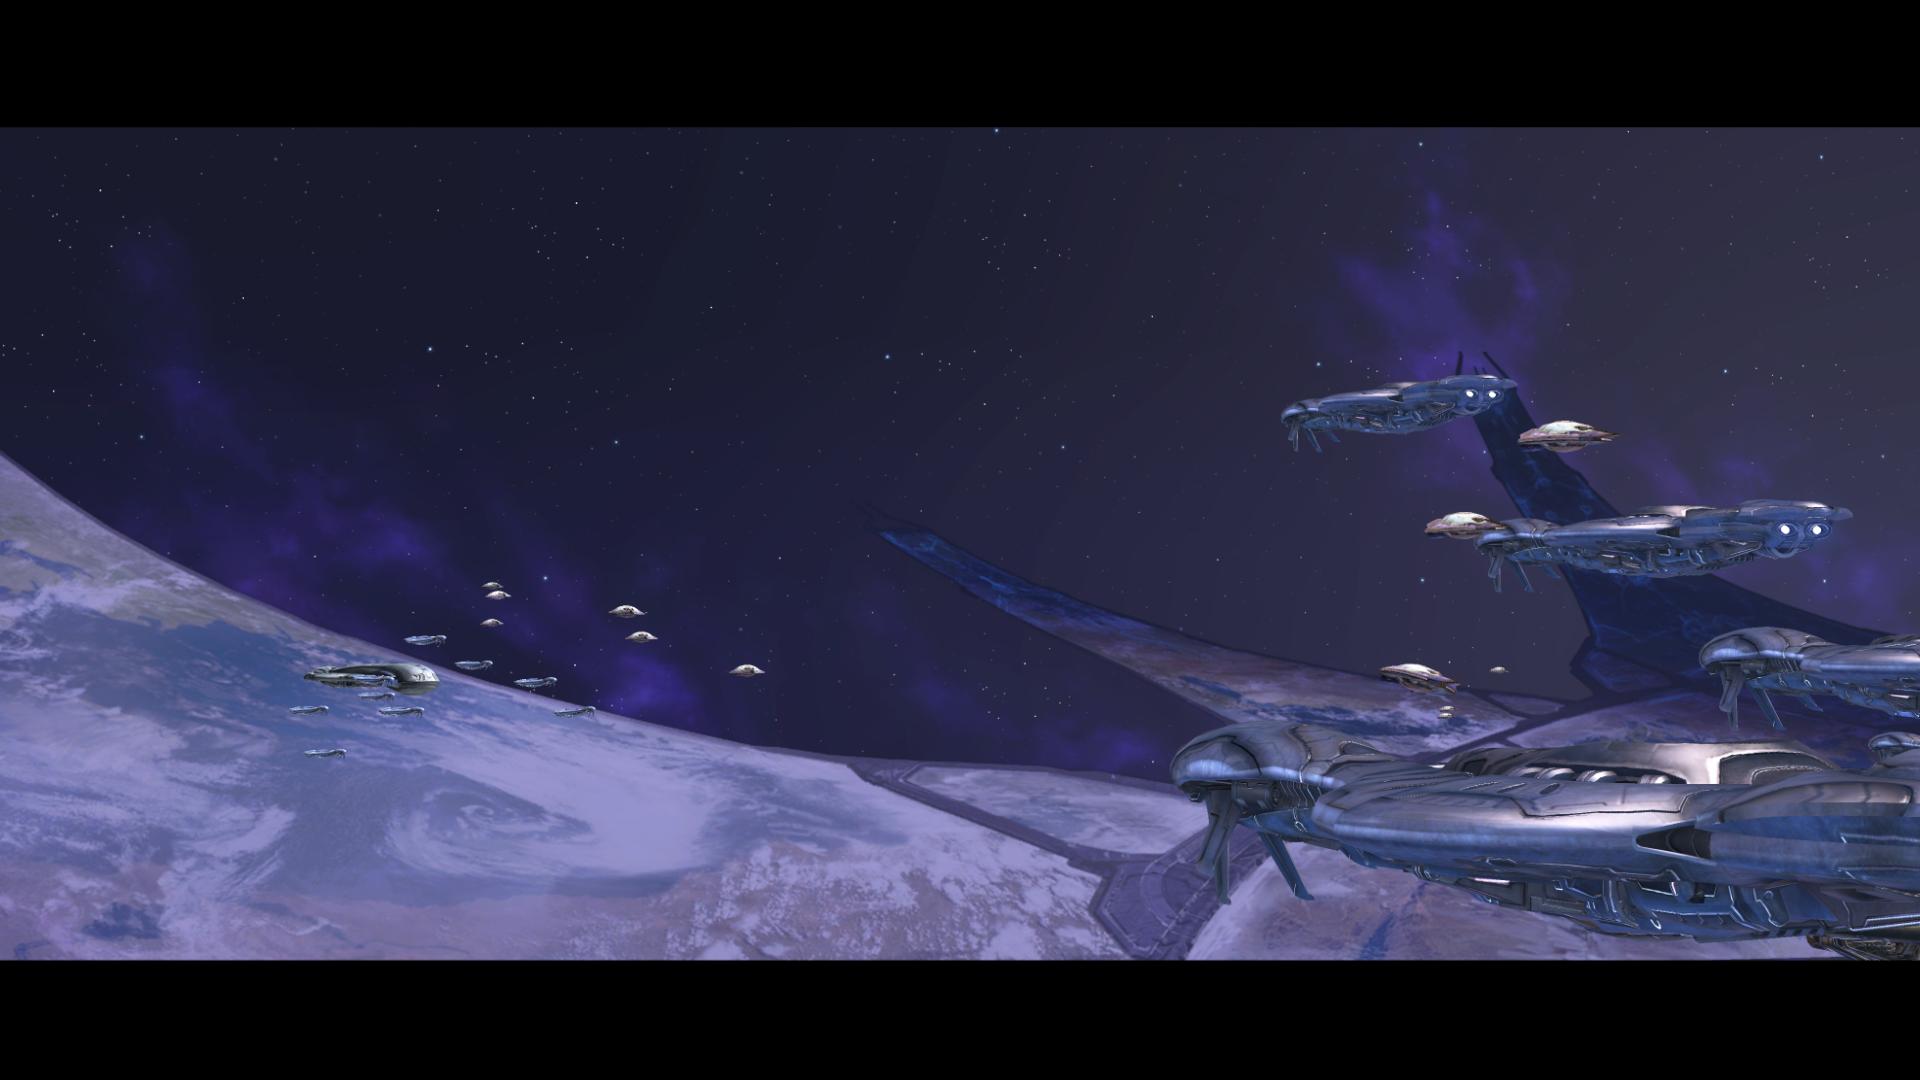
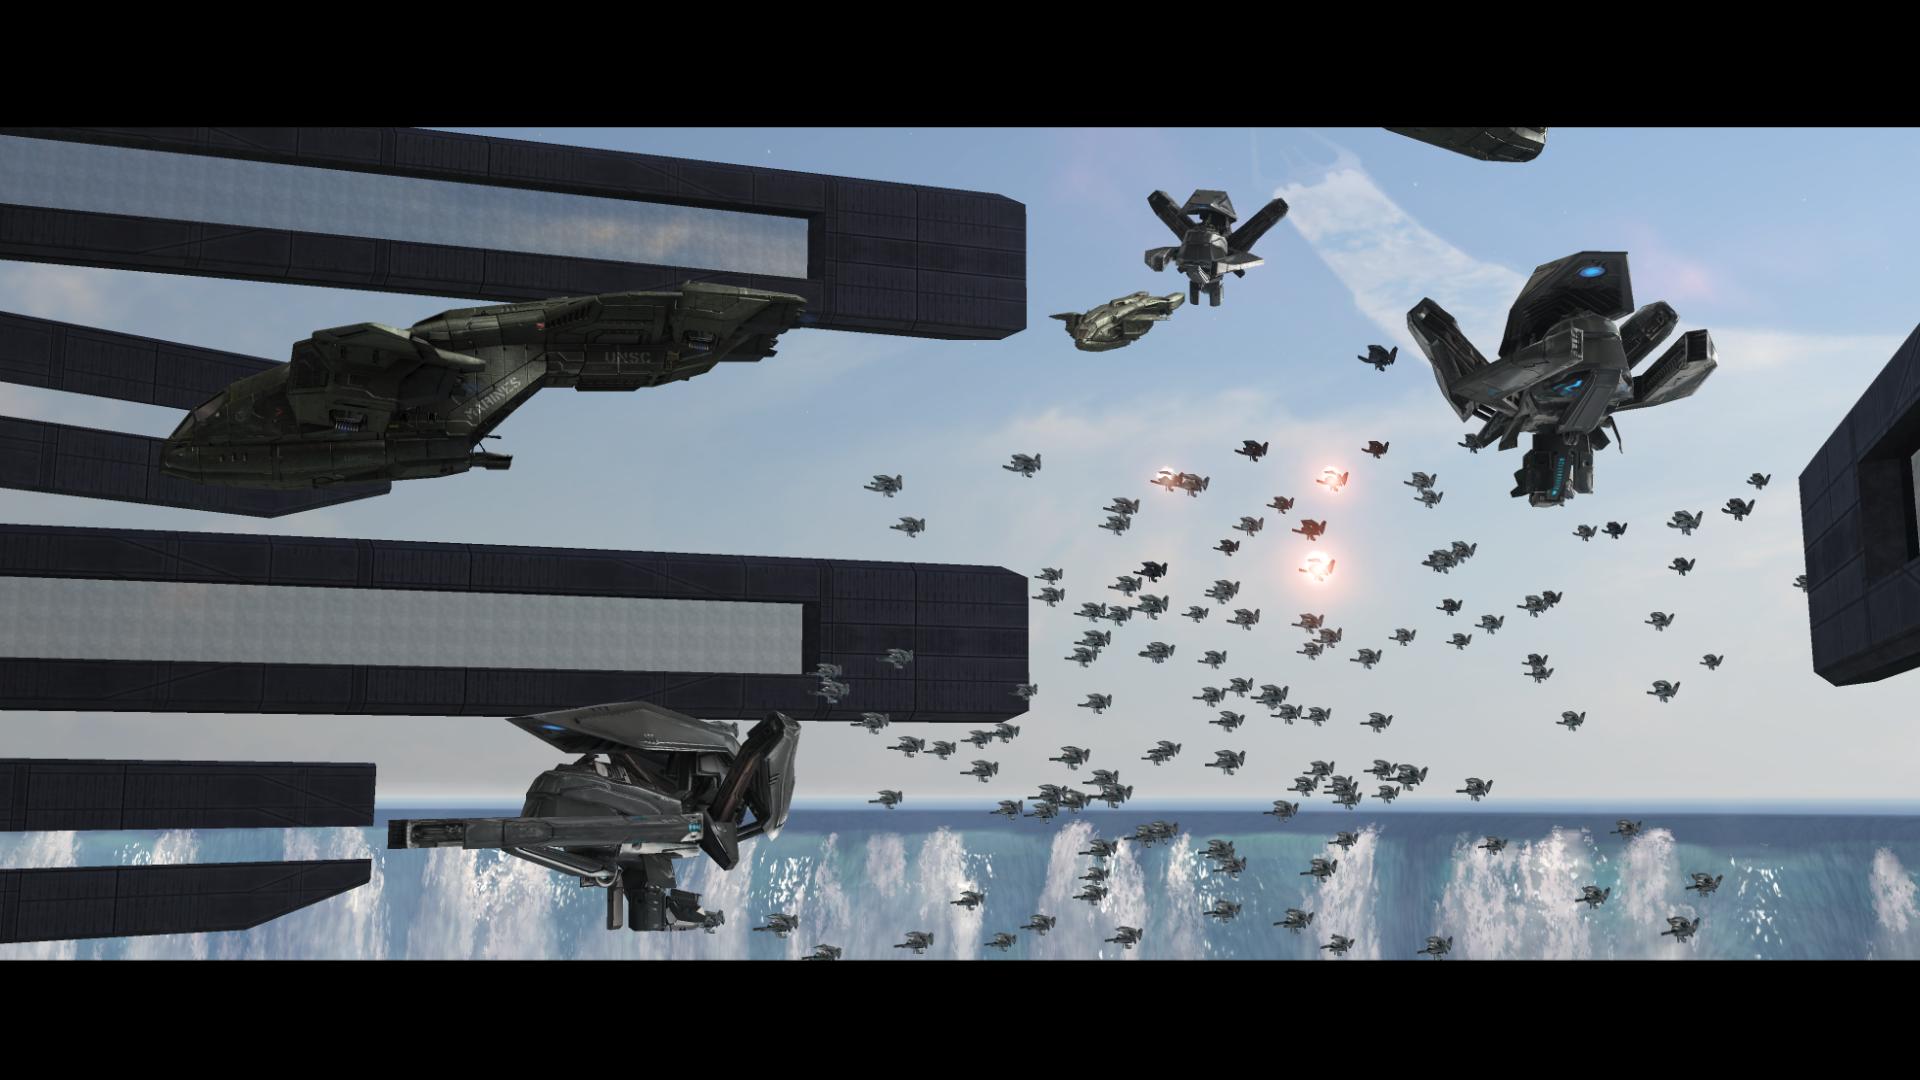
The Ark opens with what is arguably one of the Halo trilogy’s most cinematic cutscenes. Set to a theme that has now become iconic for its attachment to epic moments, the Sangheili fleet emerges from Slipspace above what, at first, appears to be a ringworld. A pause in the score, which could be compared to a gasp of surprise, occurs at the same moment that the camera pans far enough for us to see that it is certainly not another ringworld; it is a structure very unlike anything we have seen before. Not much time can be given for contemplating its existence, as, coming into view, is a menacing looking fleet of what must be Truth’s Jiralhanae forces.
“Brute ships – staggered line! Shipmaster, they outnumber us, three-to-one!”
“Then it is an even fight… all cruisers, fire at will! Burn their mongrel hides.” [The Ark, Halo 3]
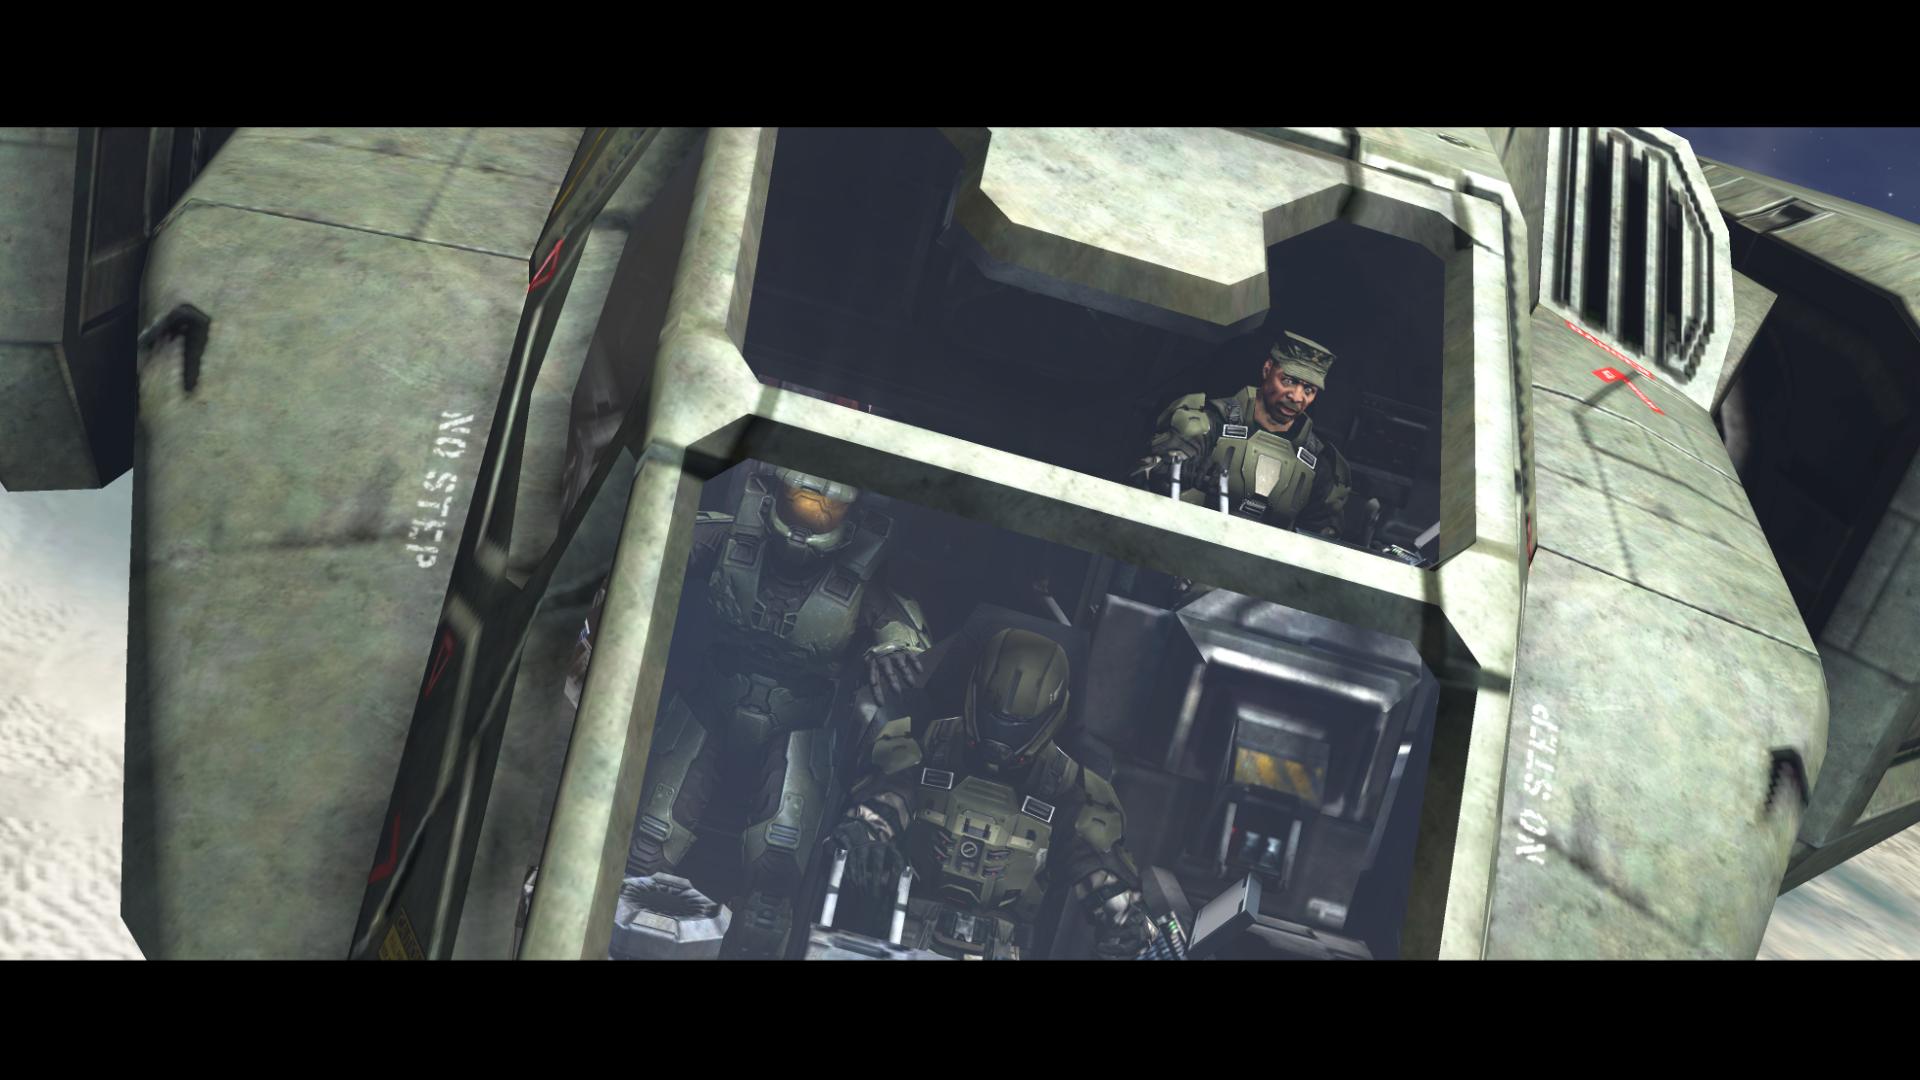
The shot cuts from Half-Jaw to the interior of a Pelican, with the Chief walking next to some seated Orbital Drop Shock Troopers – also known as ODSTs. A Chinese character can be seen on their armour, which, according to Halopedia, means “bad ass,” or “bastard.”
Miranda comes in over the radio, speaking to Johnson:
“Truth’s ship isn’t taking part in the attack. He must have gone to ground.”
“Roger that, ma’am. We’re on him. (To a Marine) Kick the door.” [The Ark, Halo 3]
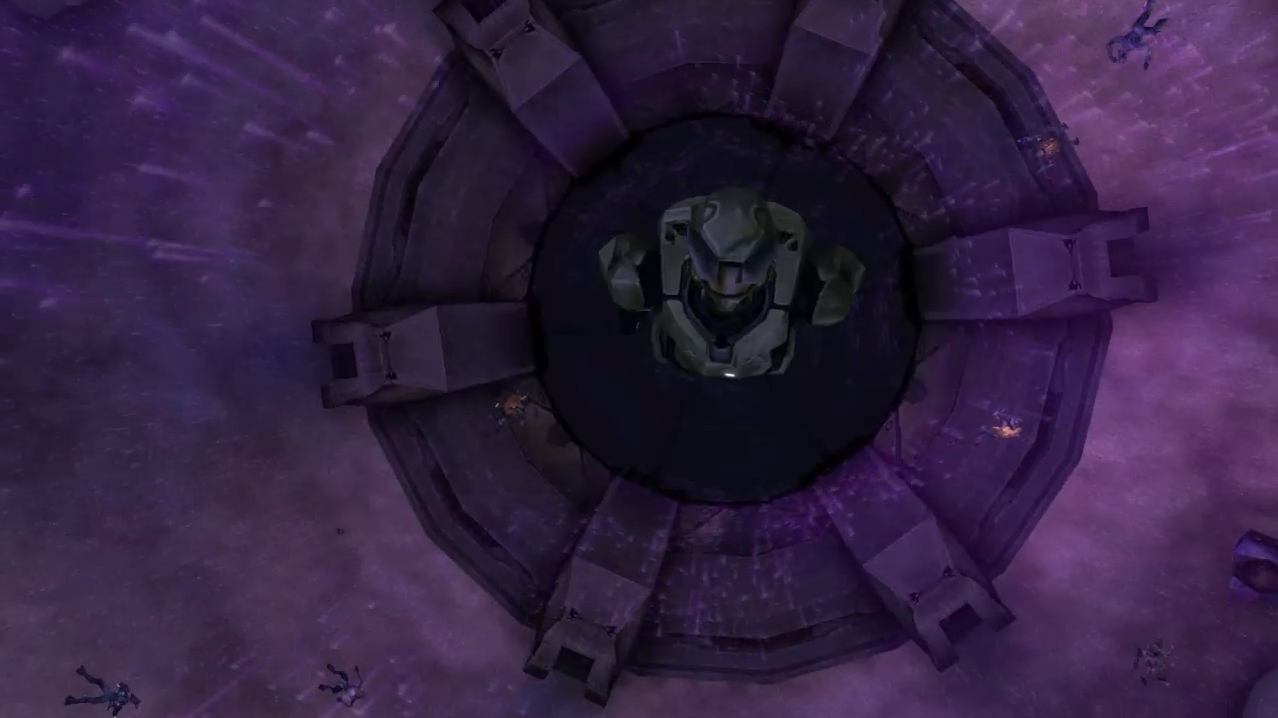
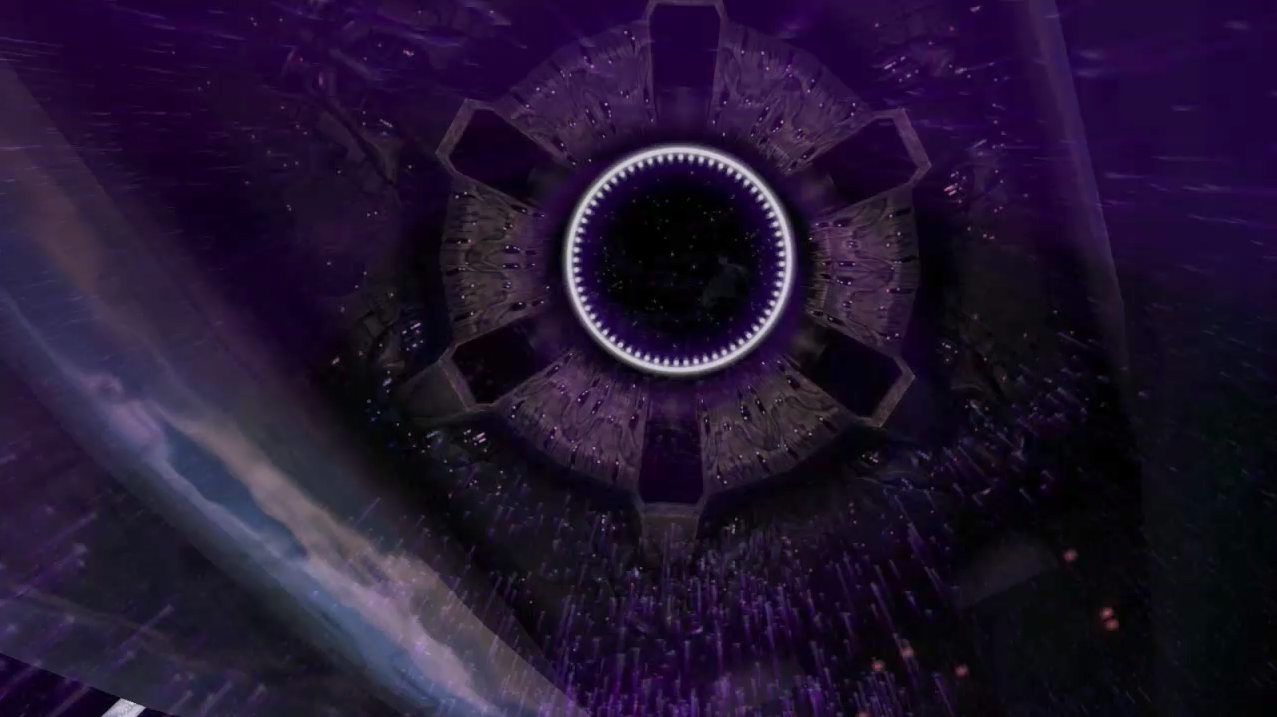
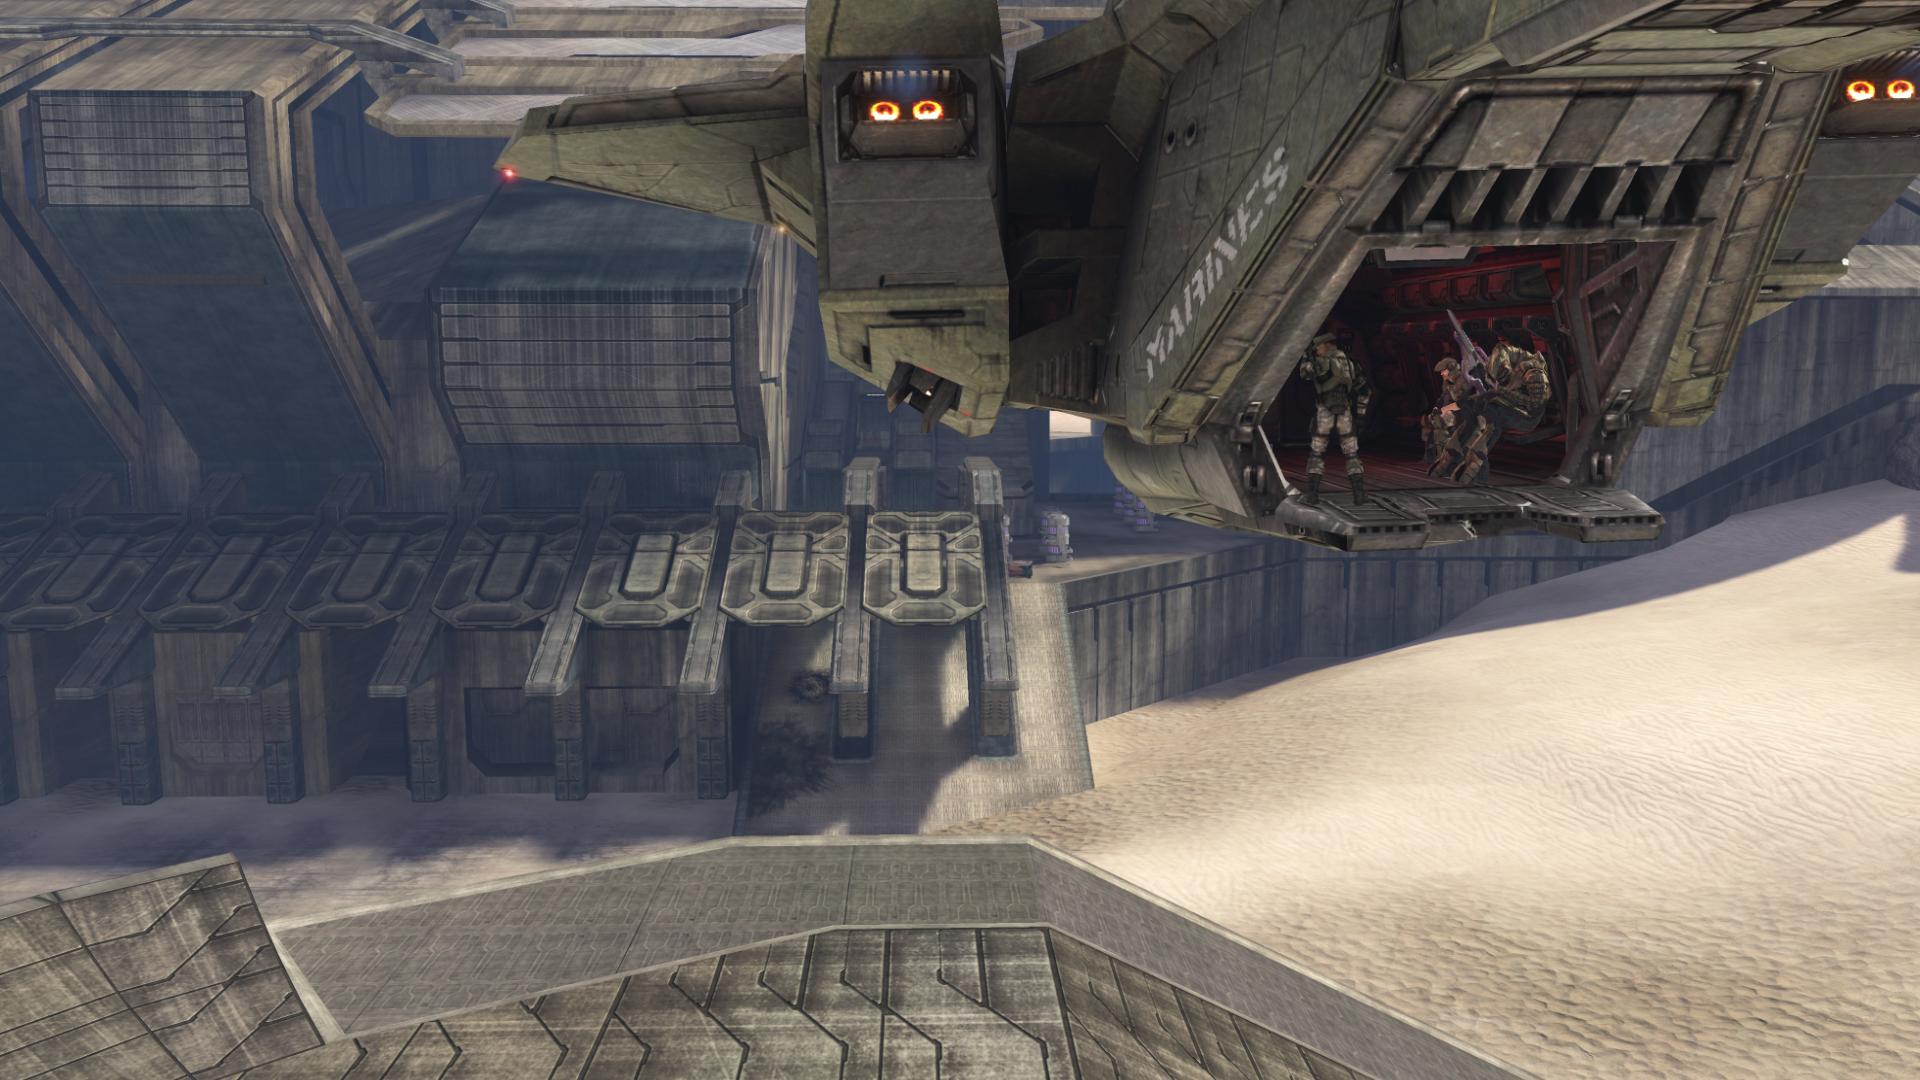
Johnson’s Pelican pilot, sporting his own symbol, nods and initiates the deployment sequence. The cinematography in this next shot is brilliant: one by one, we see the Pelicans ahead of our own drop suddenly and disappear offscreen, as they plummet to the earth below. My stomach literally dropped the first time I watched this – before our own Pelican even deployed; the way the shot was set up, you knew what was coming. Johnson and his crew float above their seats until the Pelican stabilizes it’s descent, and they drop back onto their seats. The camera view remains in the Pelican as it detaches from the Dawn and noses downward, catching a glimpse of some interesting architecture on its descent.
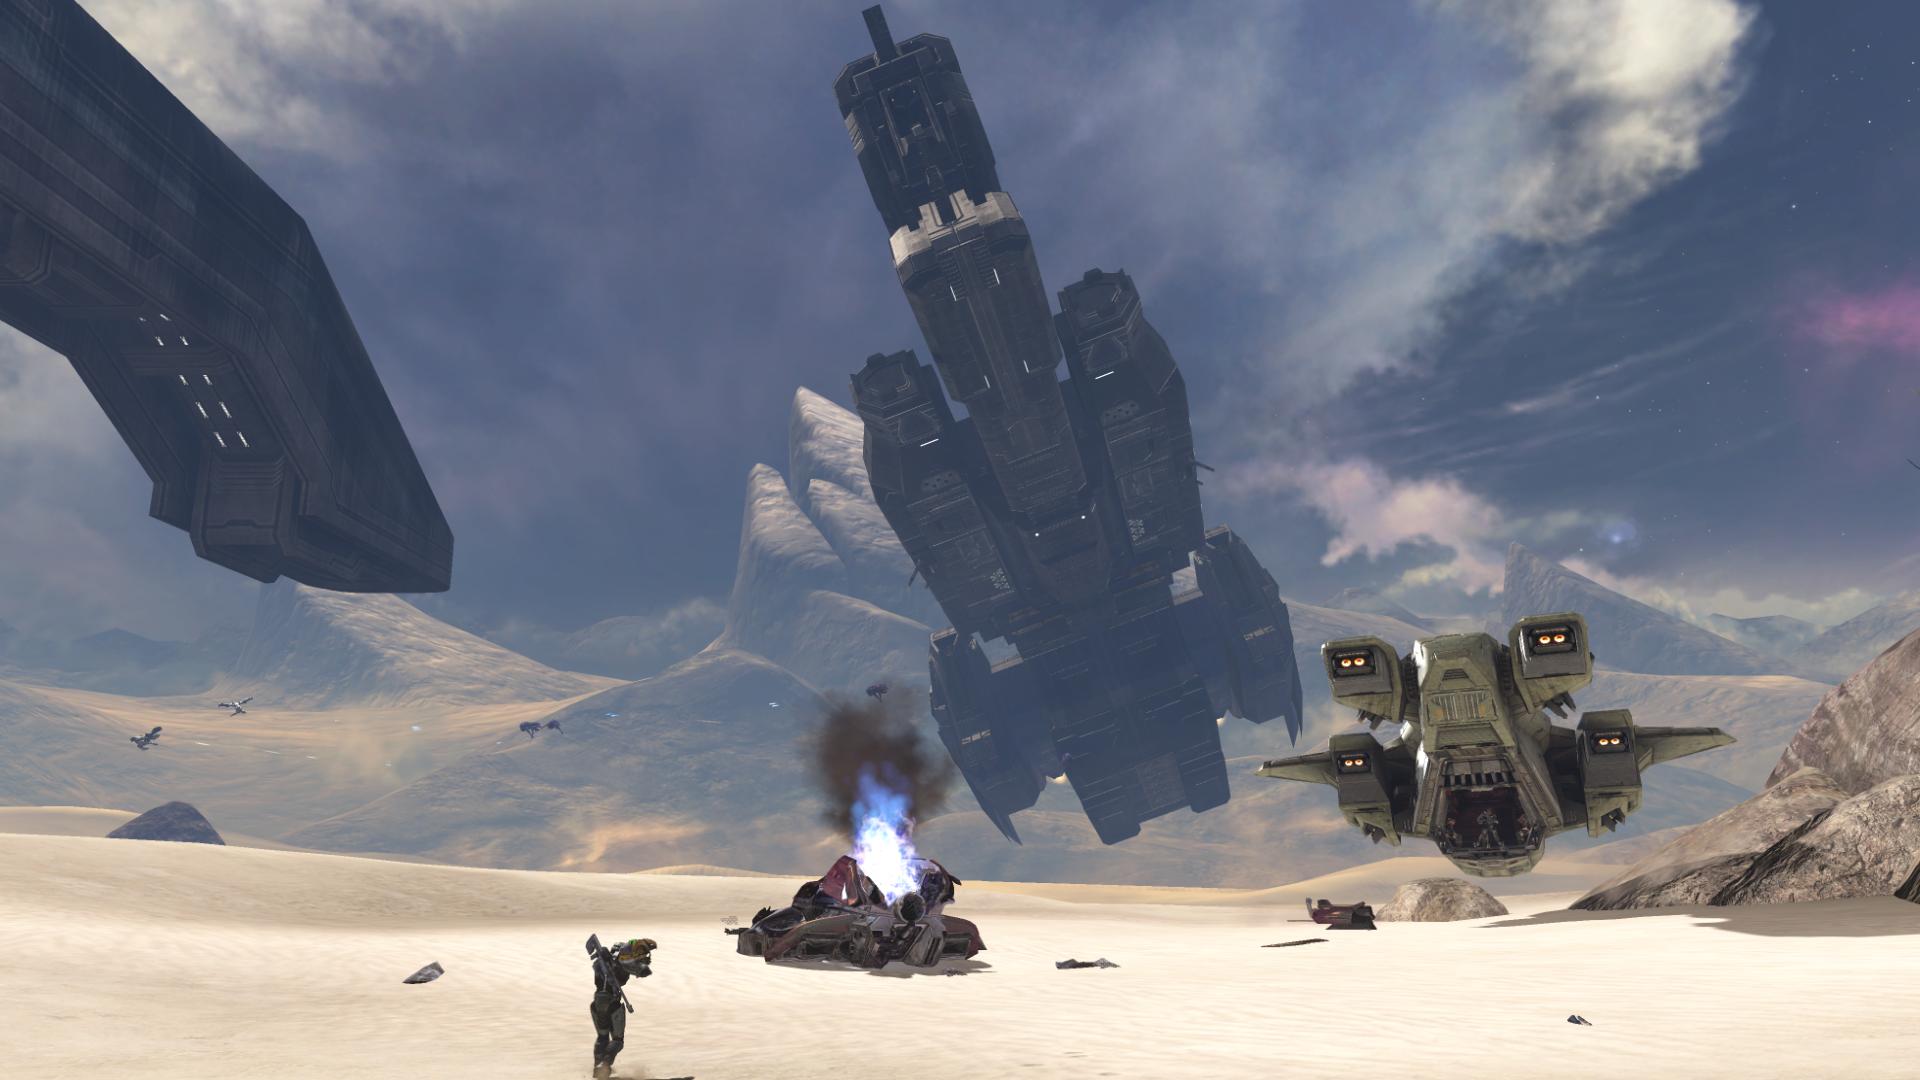
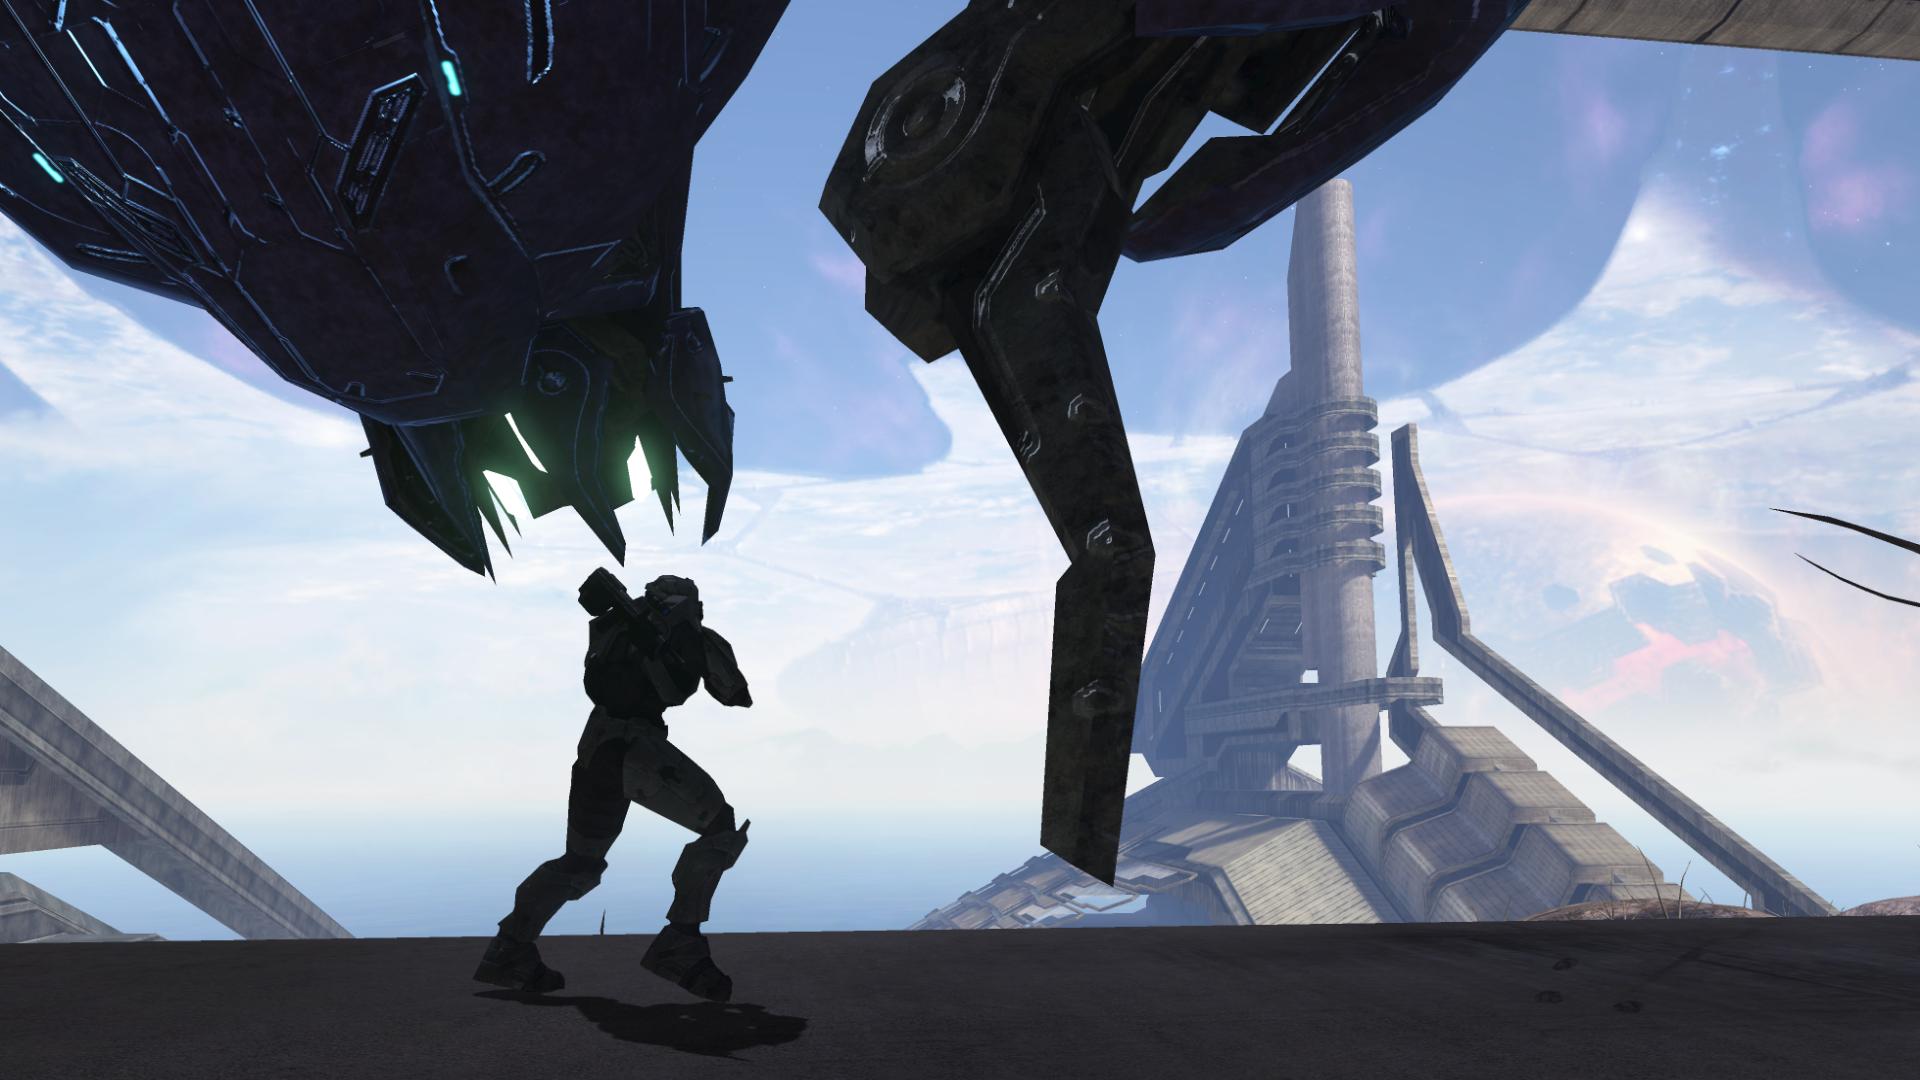
As the camera view changes, you can see some really interesting things:

At the top right of the screen, you can see what is presumably the Dawn, moving out from underneath the belly of the Elite Assault Carrier it has recently deployed from. If you’ll recall from the final cutscene of the previous level, the UNSC frigate had been resting inside of the carrier. This shot gives you another chance to attempt to grasp the scale of the ships that we’re dealing with – the Elites’ Assault Carriers are just unbelievably massive.
Secondly, you can see a circular piece of architecture near the bottom middle of the screen. As the shot widens, you can see the entirety of it. This structure is nearly identical to the gravity elevators we’ve seen in previous Halo games. Take the middle of the third level of the first Halo game, for example. Right before you enter the Truth and Reconciliation, the final battle takes place around the dropped base of this gravity device. The base can be seen here, and the empty hole in the ship here. The circular structure we can see in the Ark’s cutscene is presumably the same type of device – a gravity elevator with a base that lowers to the surface to ferry troops and supplies into the ship. The enormity of this particular base, though, is staggering. Entire UNSC frigates could rest on this base plate and be lifted up into the carrier. I suppose something of that magnitude is needed, though, to keep such a massive ship operating efficiently.
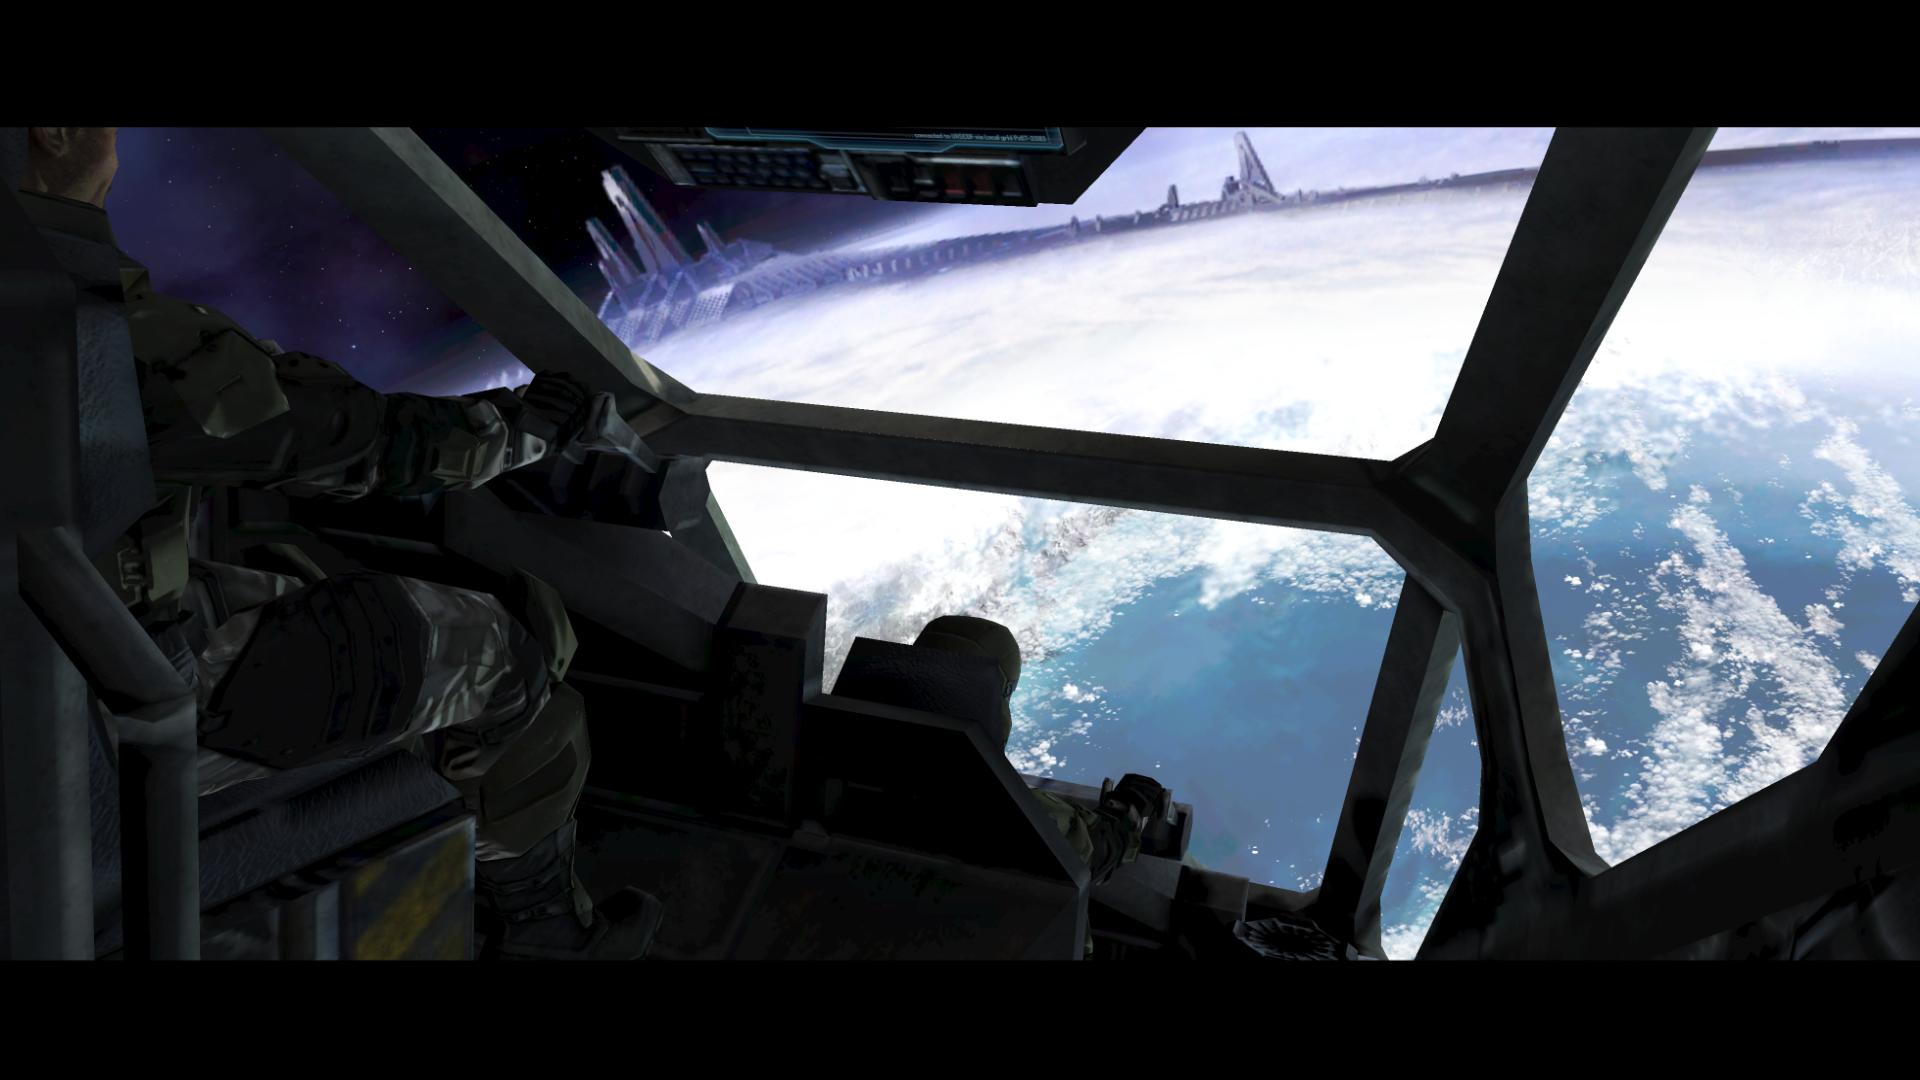
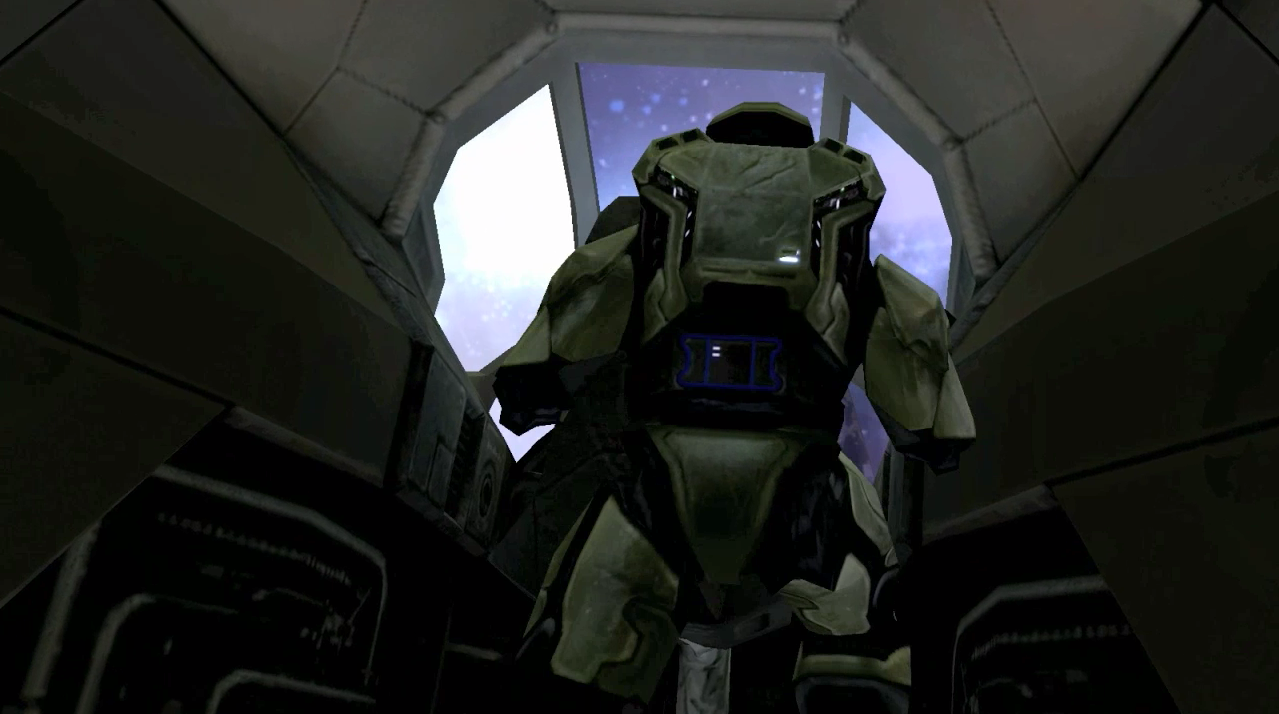
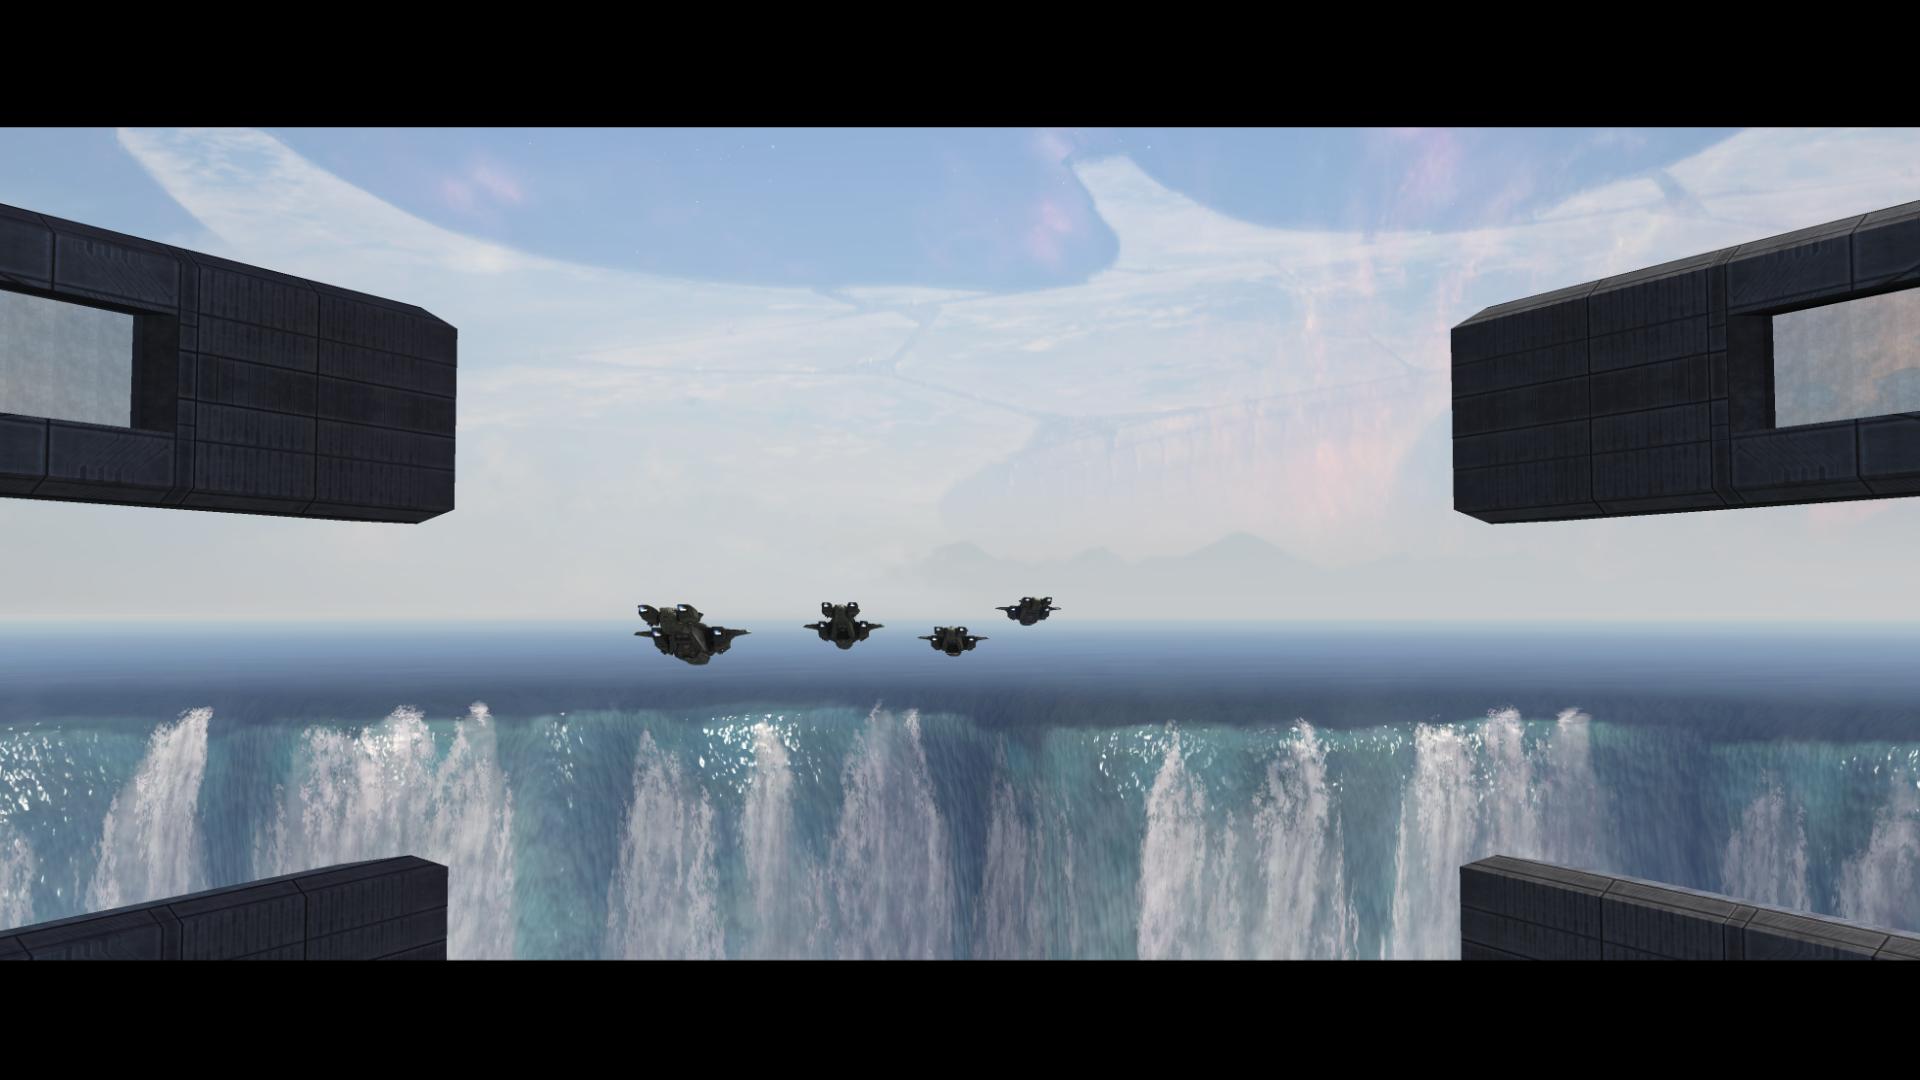
The score takes on an arpeggiating theme as we watch six Pelicans fly downward, toward the surface. One of them is hit and destroyed by a Brute Seraph. As the Chief’s Pelican heads through the atmosphere, I can’t help but be reminded of two separate things: first, the Banshee-in-space videos from the Halo 3 Public Beta. Only now, we’re doing the opposite. Secondly, the Chief edges his way into the front of the Pelican, wanting a look through the windows at what’s going on.
This reminds me distinctly of a previous time that he’s done this – when he was in the Pillar of Autumn’s dropship heading toward the surface of the first Halo. He just had to have a look, then, too (see here).
A beautiful combination of both lighting and depth-of-field takes place after the Chief makes his way to the back of the Pelican.
“That’s some view…”
“Enjoy it while you can, Marines. Soon as we land, we’re right back to it. Priority one: secure a landing zone for the Commander’s frigate. Keep your eyes and ears open! We need all the intel we can get… on wherever the hell we are. Stand to, Marines! Go, go, go!” [The Ark, Halo 3]
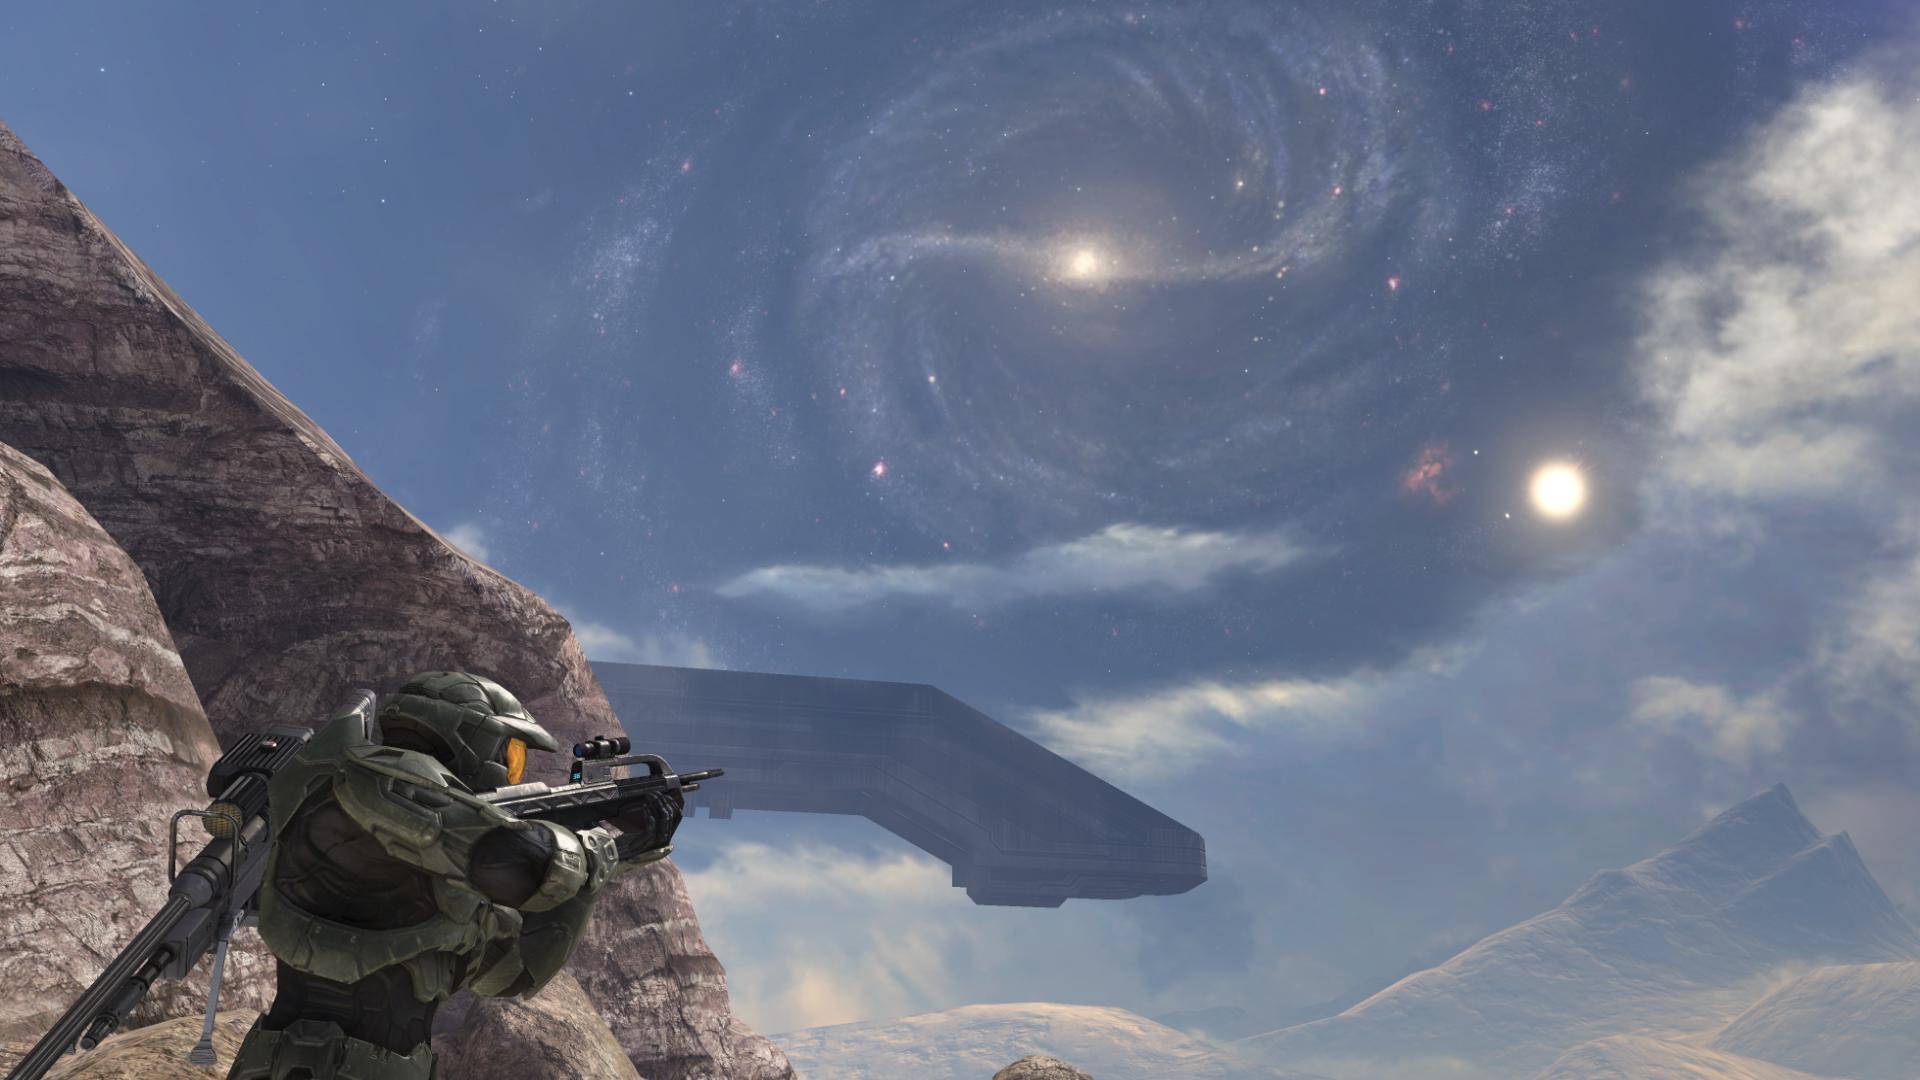
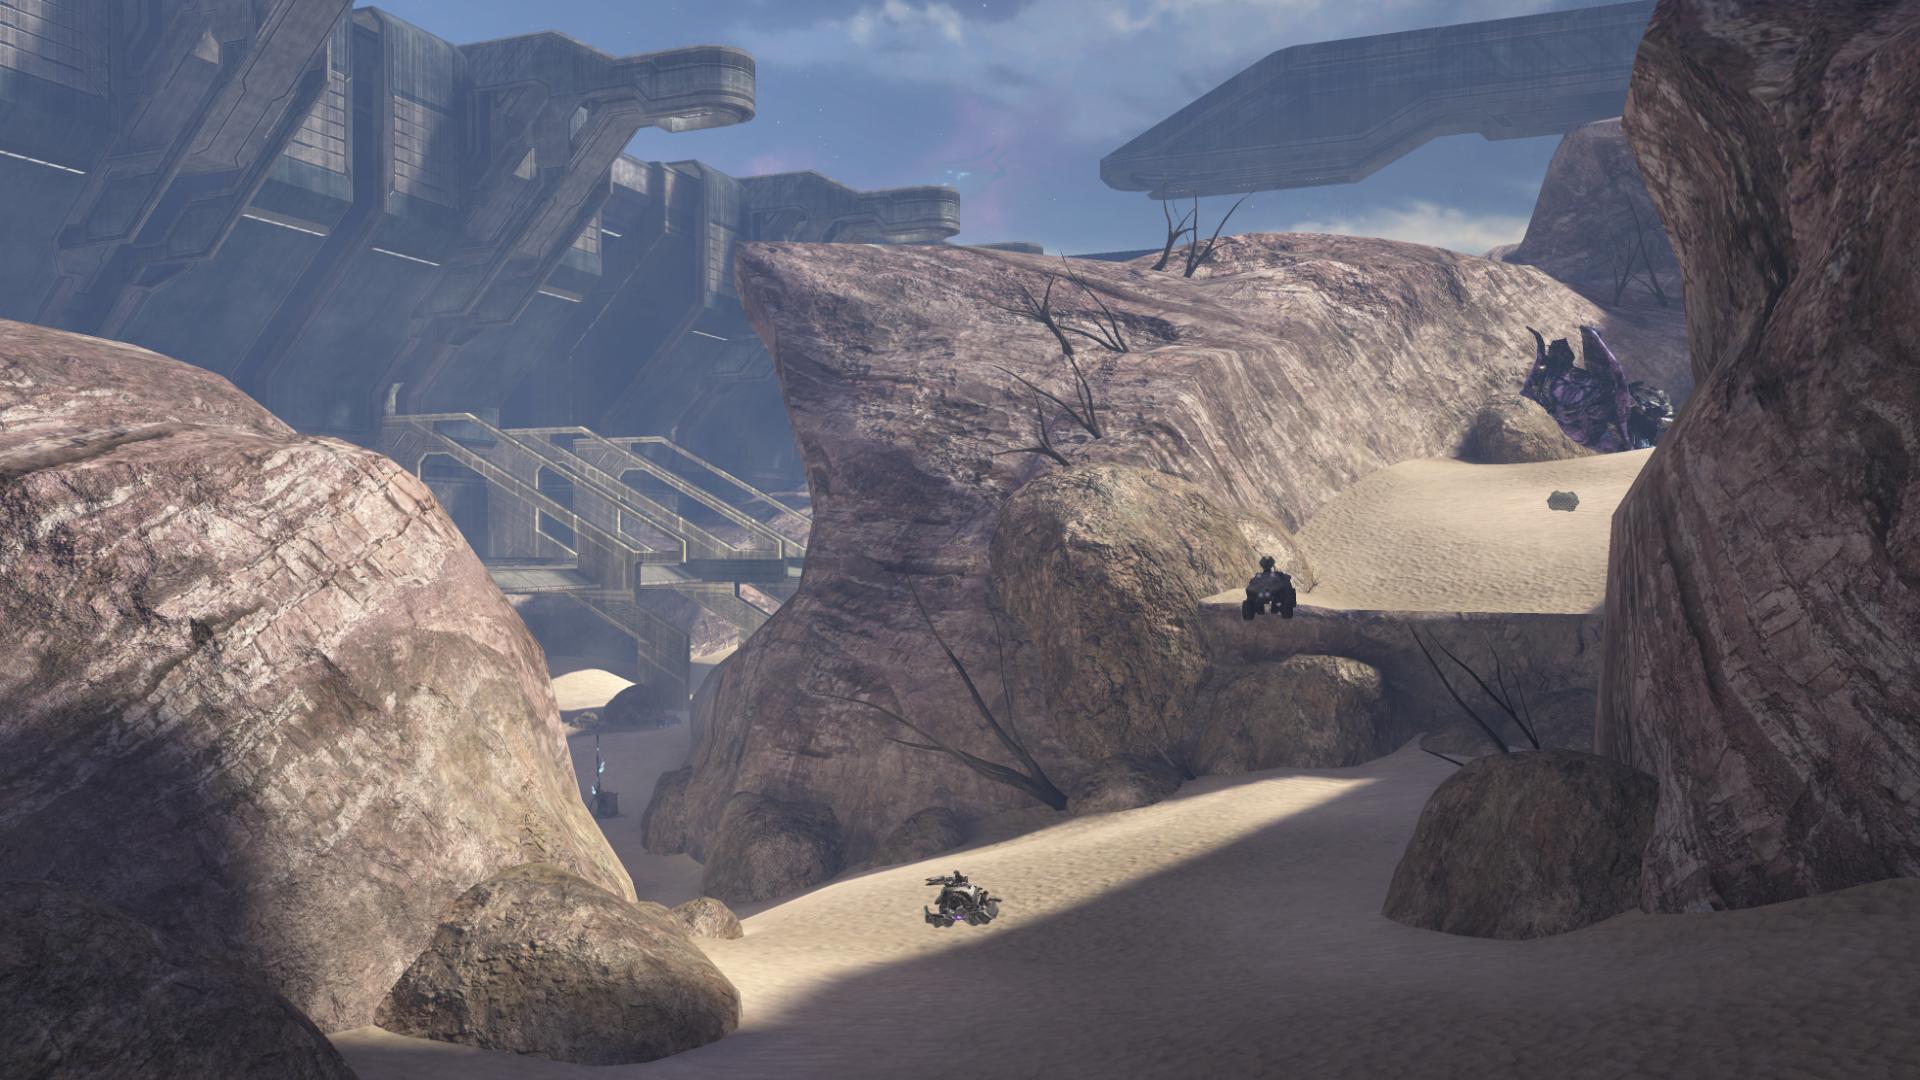
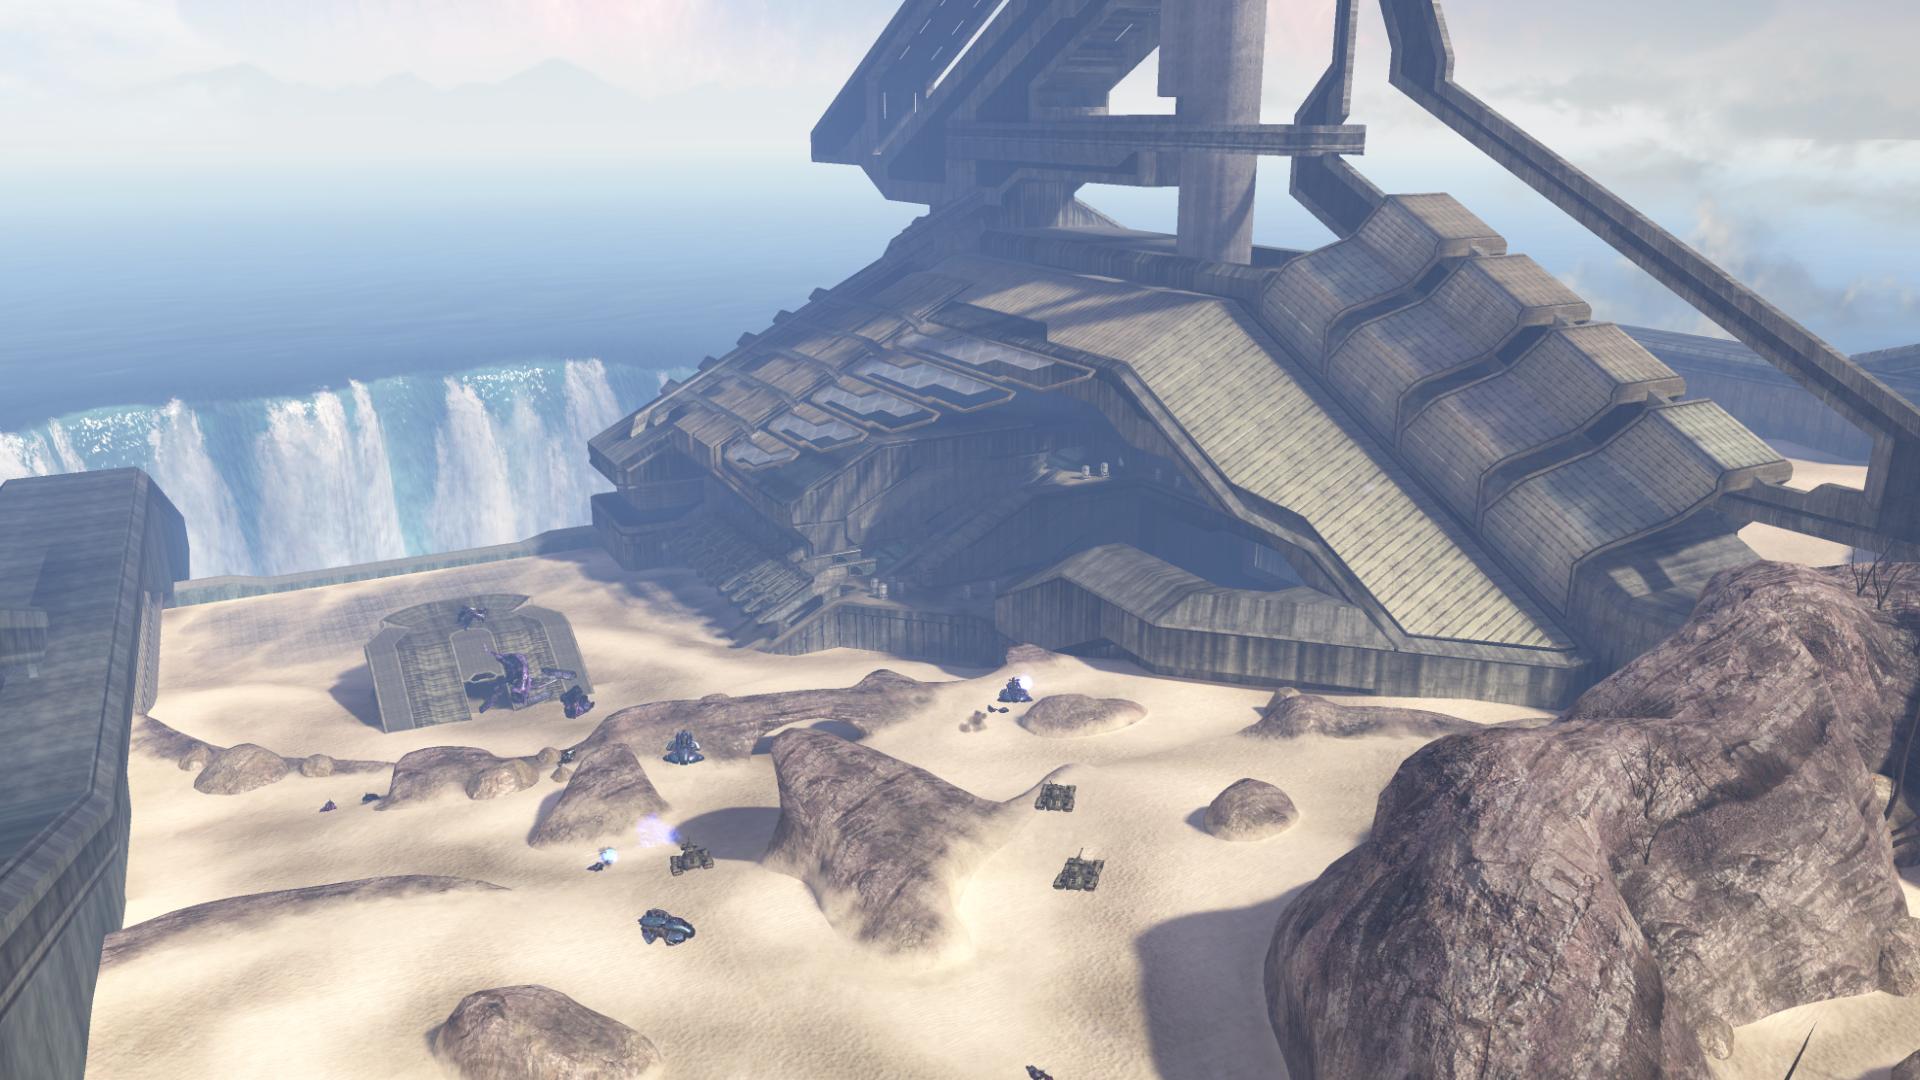
Johnson gives this little speech as we wait in the back of the Pelican, skirting over a landscape as of yet unseen in the Halo universe – a desert wasteland, with mountains towering in the distance.
As you exit the Pelican and are given free reign to look around, you can very quickly appreciate the unbelievable environment that you’ve been dropped into.
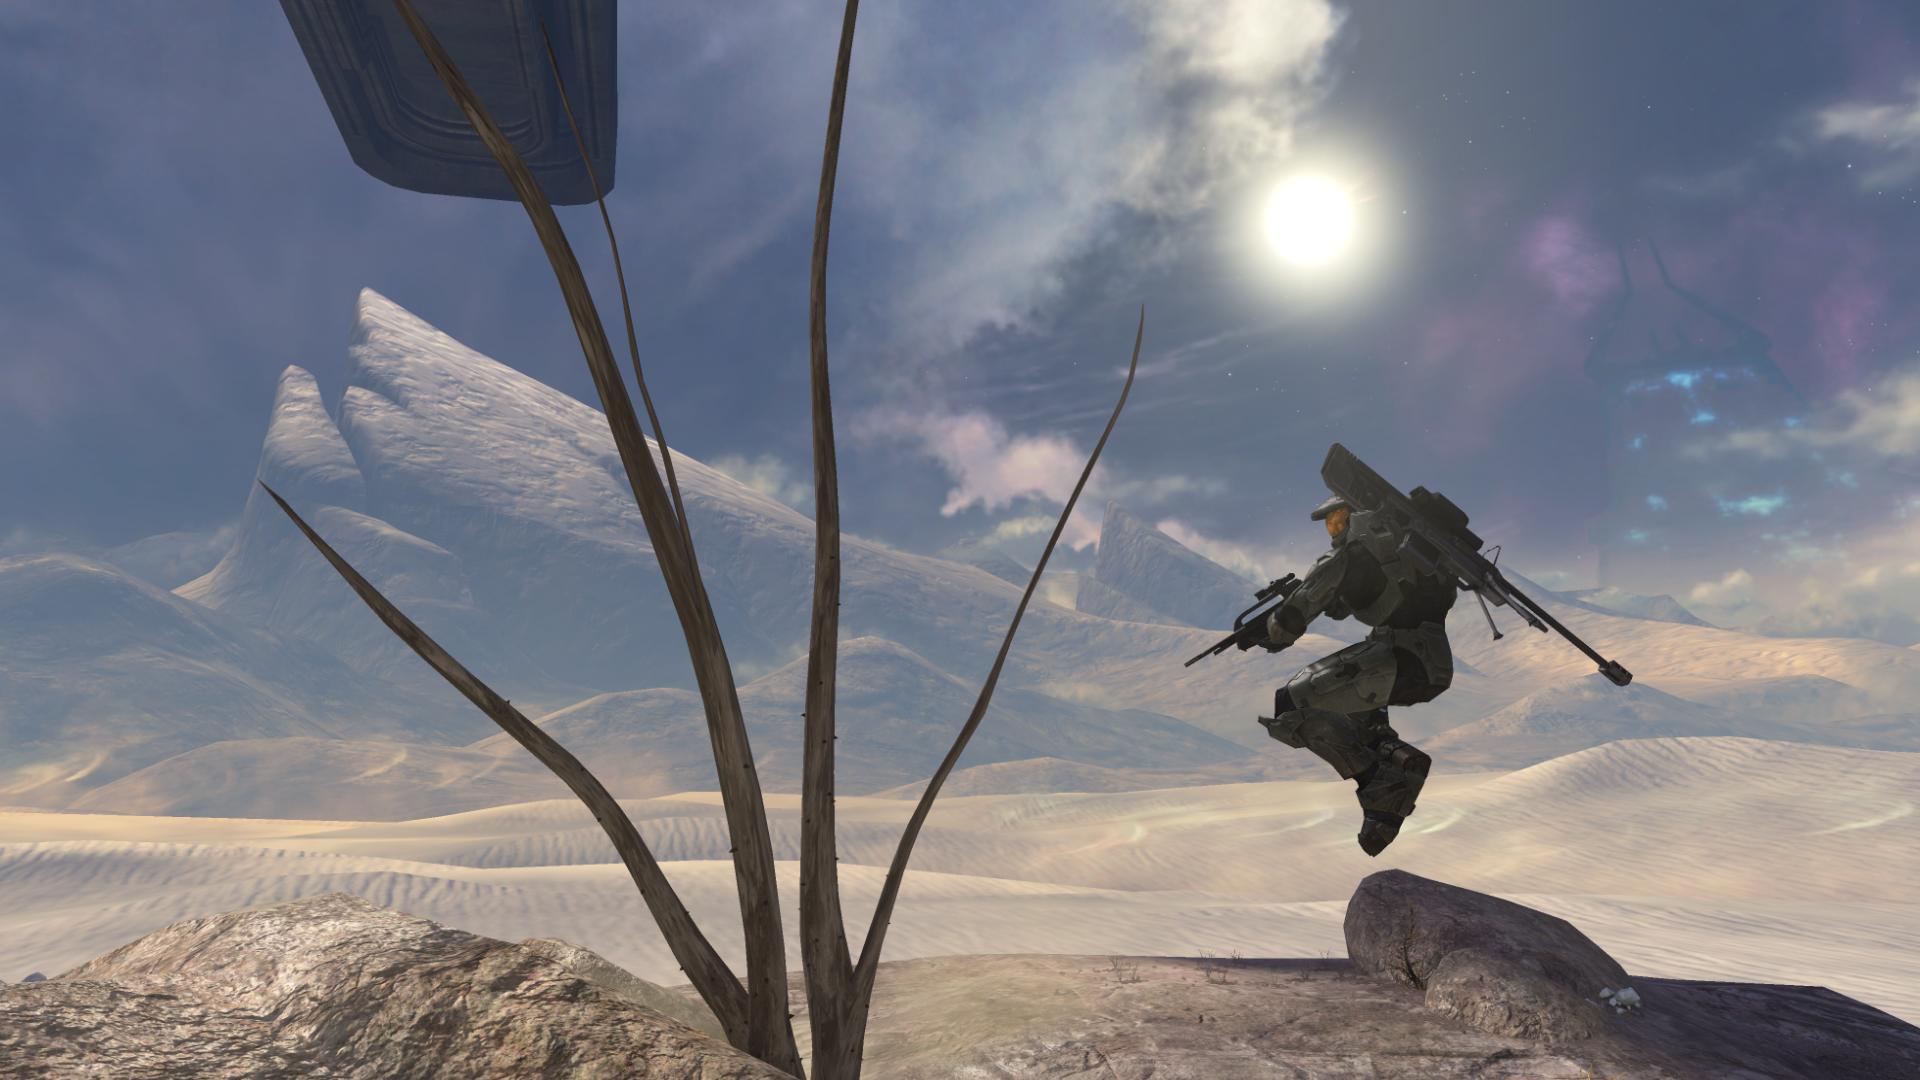
The Marines seem intrigued by it, as well.
“Hey, check it out – in the sky. Is that-”
“Hey, focus. We got a job to do.” [The Ark, Halo 3]
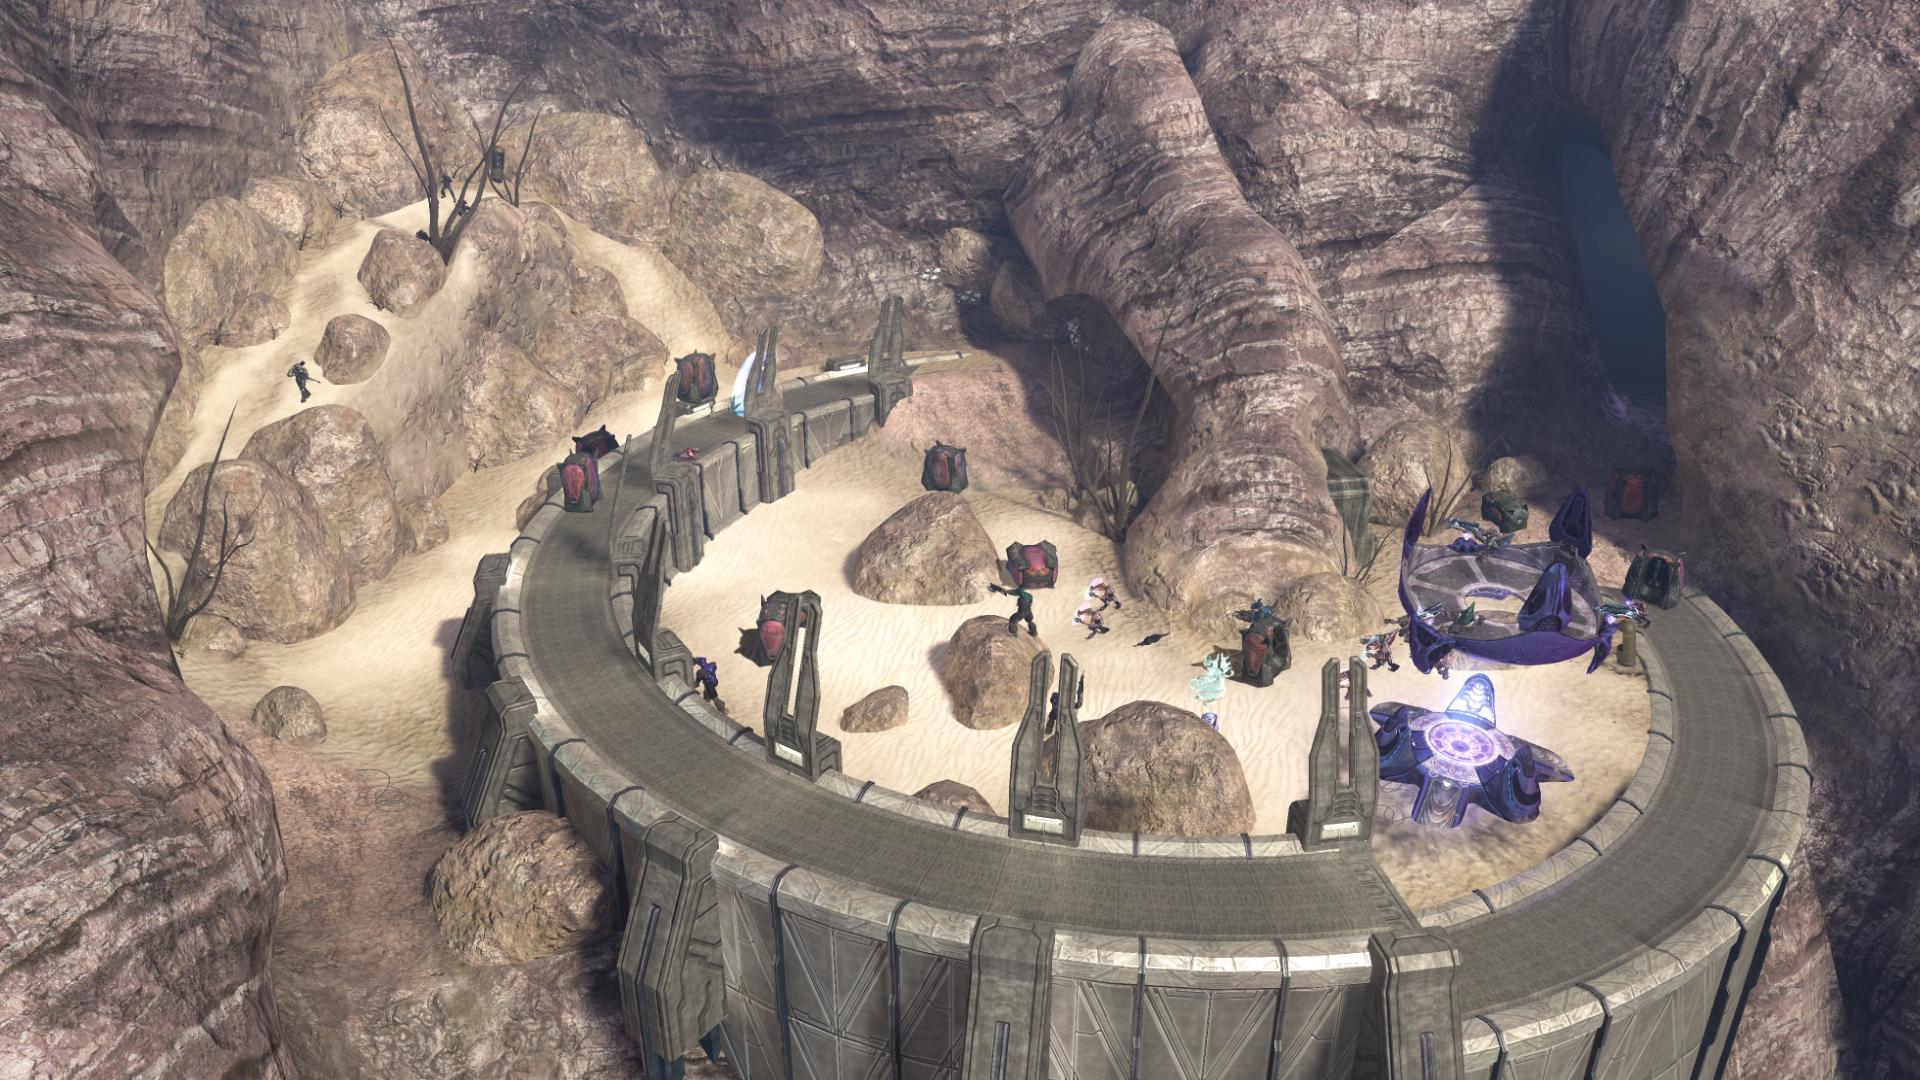
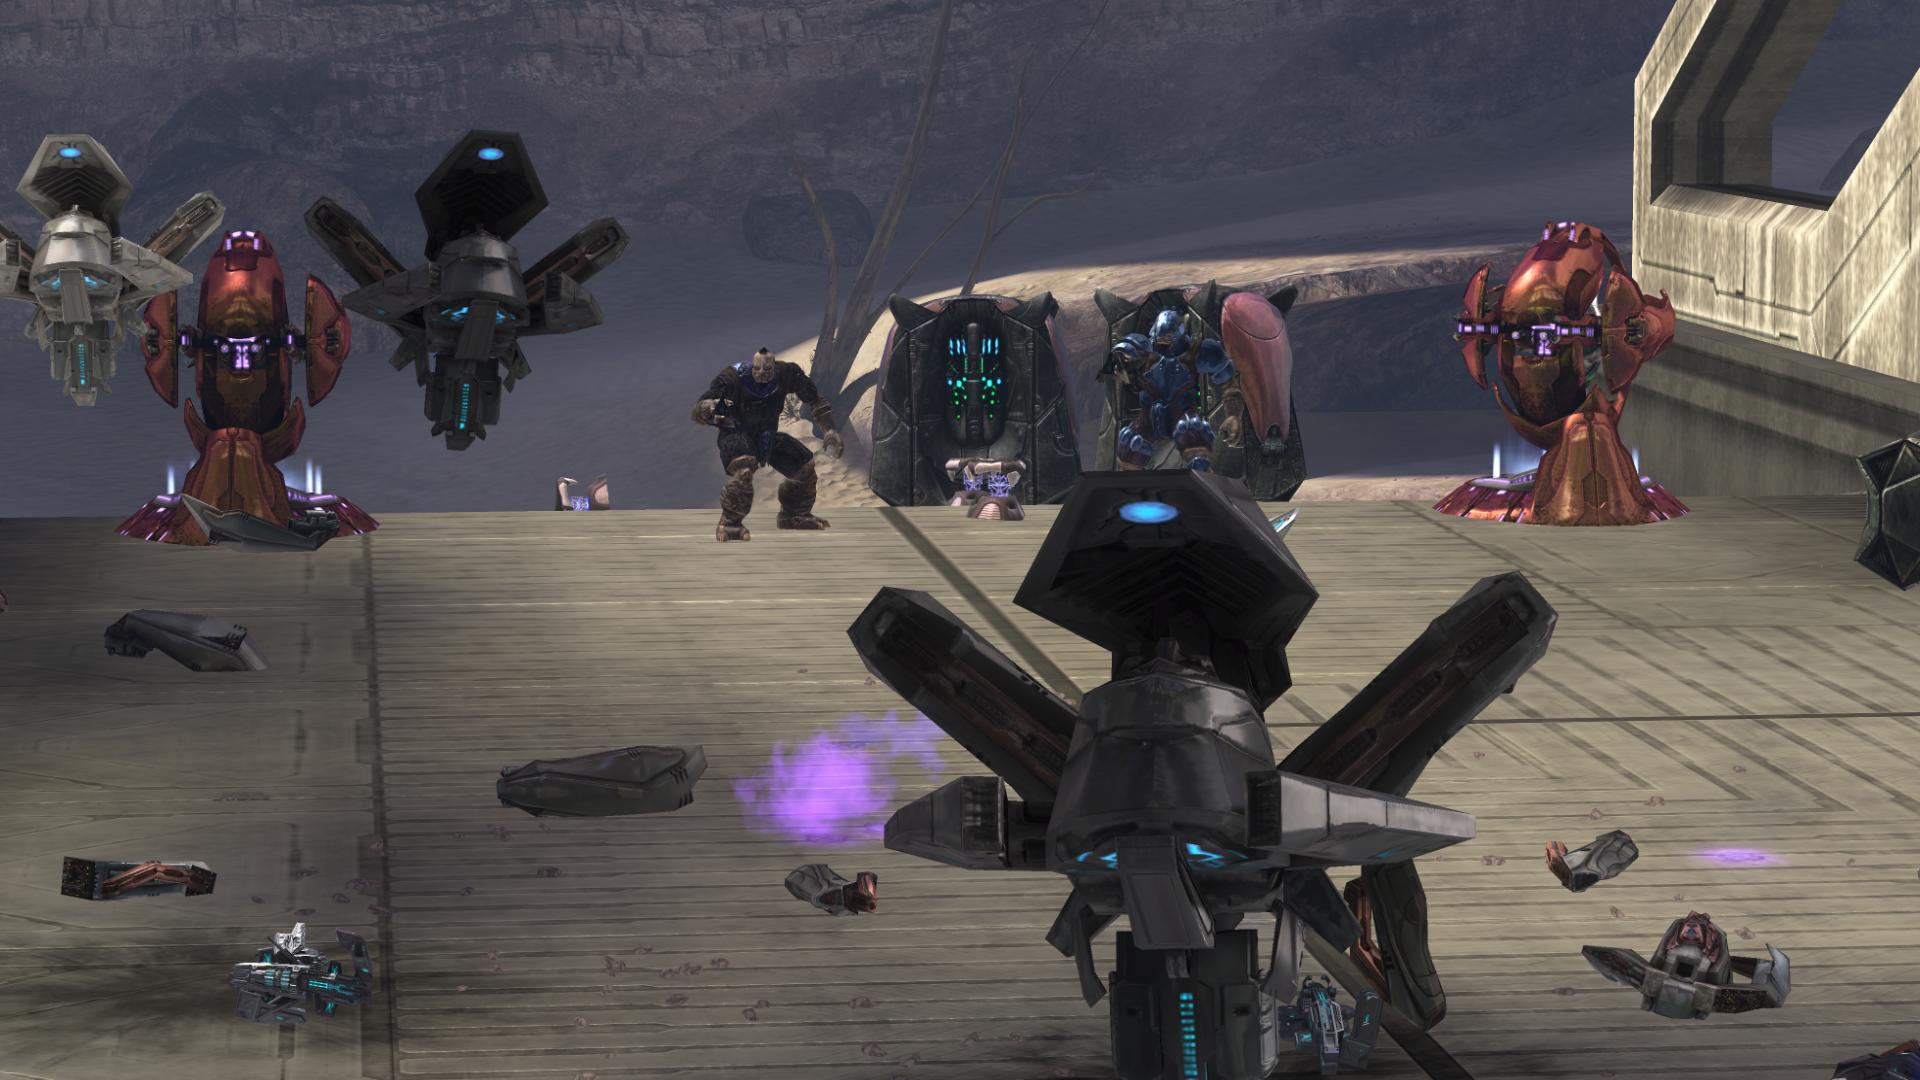
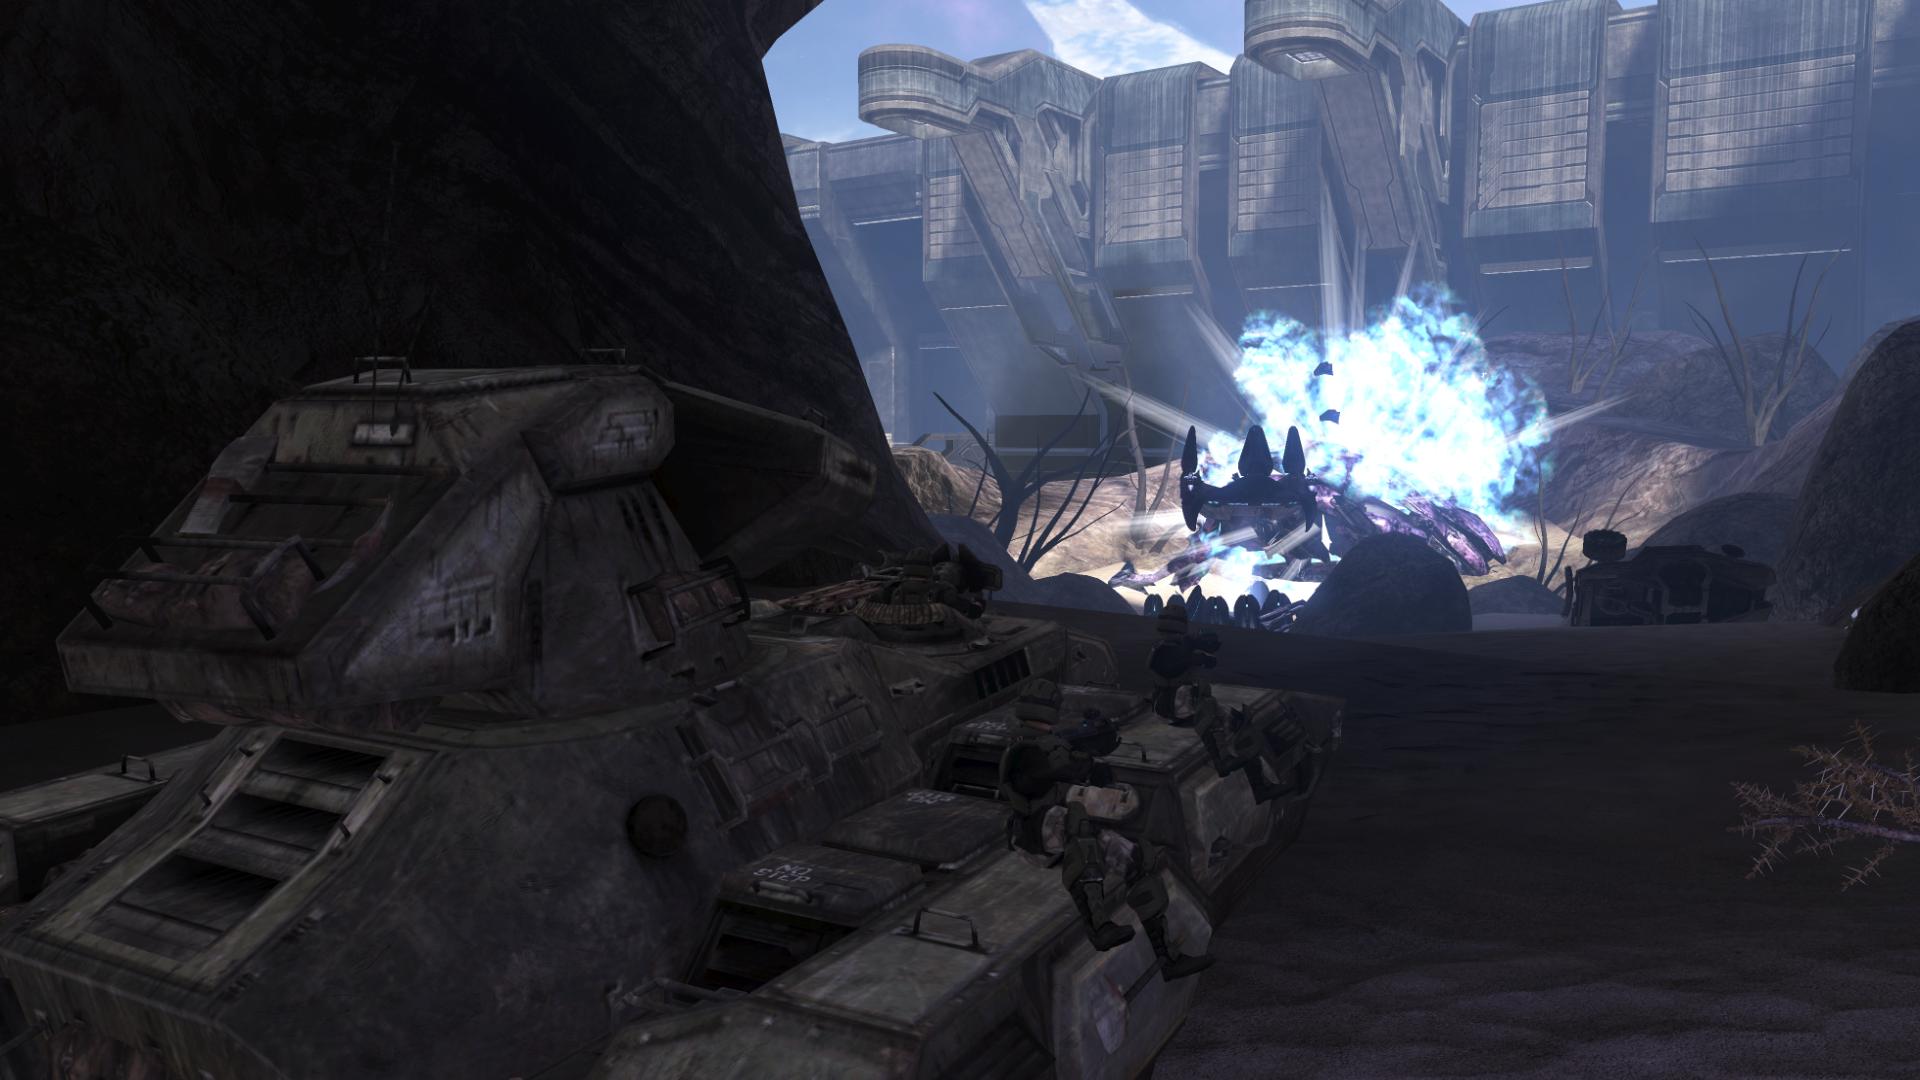
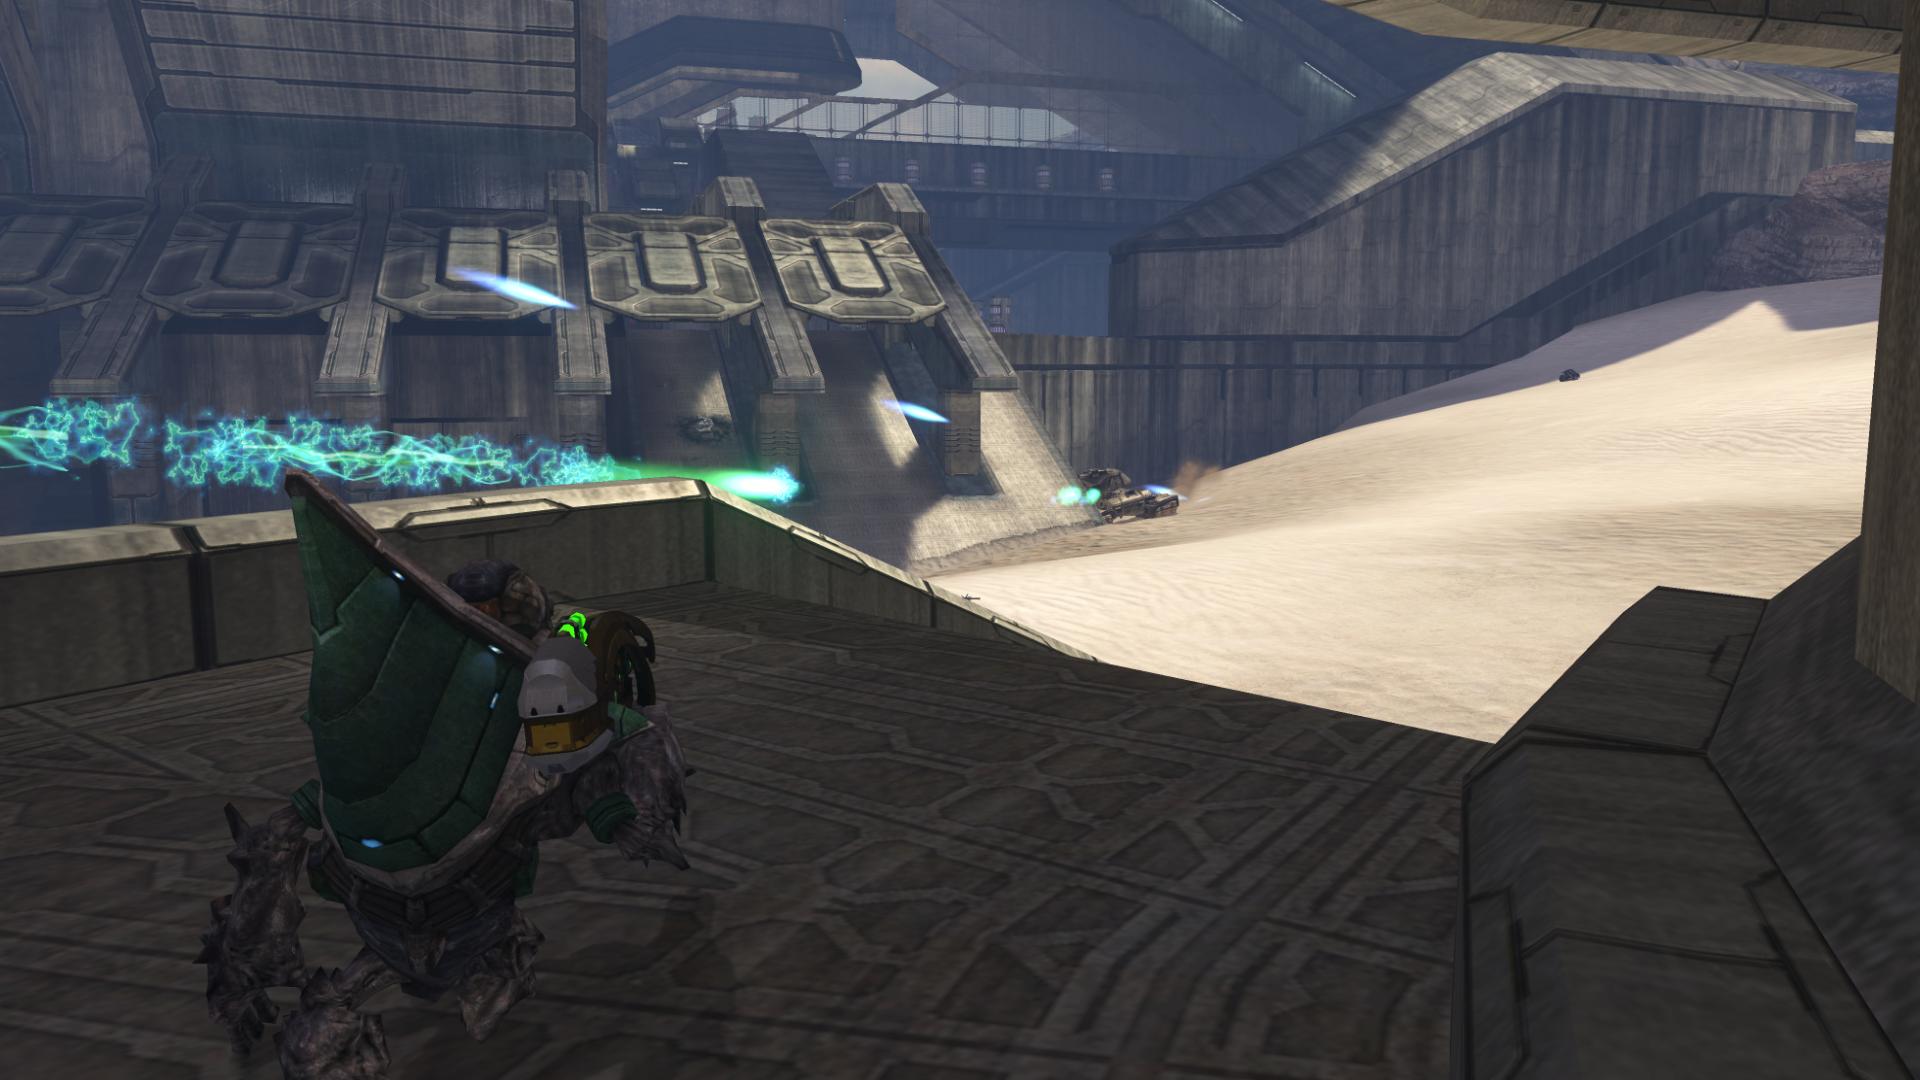
As you make your way through a small sheltered area, a Marine waits for you. He lets you know that there are enemies ahead. Instantly, I am brought back to the beginning of Truth and Reconciliation; I have the higher ground, a fully-loaded sniper rifle and enemies unaware of my presence. The environment is perfect for this encounter. The spires coming up out of the half-unearthed structure provide great cover, as well as the structure itself serving as a barrier to hinder movement between the enemies and your present location. A gravity platform near the back does give them a bit of angle on you, forcing you to keep moving. And when you add in Bubble Shields and Plasma Shields, you’ve got a fantastic encounter.
More Brutes will come around the bend as the tide of the battle starts to turn in your favor. Near the end of the encounter, the holographic pedestal of Truth begins to transmit:
“My Dreadnought cannot rise. Even now it is engaged, turns deftly in the wards of this new world. Do not relent until the Heretic’s ships are smashed!” [The Ark, Halo 3]
Truth may not realize it, but “his” Dreadnought cannot rise because it is most likely not under his control. Twenty-seven years earlier, when the Covenant first discovered humanity, an Oracle (that we presume to be Mendicant Bias) had been lying dormant inside of the Dreadnought, which was being used to supply power to High Charity. When the Prophets of Truth and Regret (although not holding those titles at that time) brought information of the discovery of humanity to the Oracle for guidance, it sprang to life:
< THIS IS NOT RECLAMATION > the Oracle boomed. < THIS IS RECLAIMER > [Halo: Contact Harvest, pg. 274]
< AND THOSE IT REPRESENTS ARE MY MAKERS > [Halo: Contact Harvest, pg. 275]
Just then, the abbey began to shudder. Many decks below, the Dreadnought’s mighty engines sprang to life, shaking free of the limiters that kept them generating the comparatively meager energy High Charity required. Soon the engines would build to full capacity, and then…
“Disconnect the Oracle!” Fortitude shouted, knuckles white upon his cahri. “Before the Dreadnought launches and destroys the city!” [Halo: Contact Harvest, pg. 275]
< MY MAKERS ARE MY MASTERS > The Oracle’s teardrop casing rattled inside its armature as if it were trying to take flight with its ship. < I WILL BRING THEM SAFELY TO THE ARK > [Halo: Contact Harvest, pg. 276]
From those excerpts, it is made clear that the Oracle controls the Dreadnought. However, for an unknown reason, the Forerunner ship ceases its launch and returns to its dormant state. But the Oracle’s intent is clear: it ultimately desires to bring humanity to the Ark, where it can “make amends.” So I don’t believe it is unreasonable to believe that the Dreadnought, having arrived at the Ark, is now under its Oracle’s control – or has been under its control since it left High Charity.
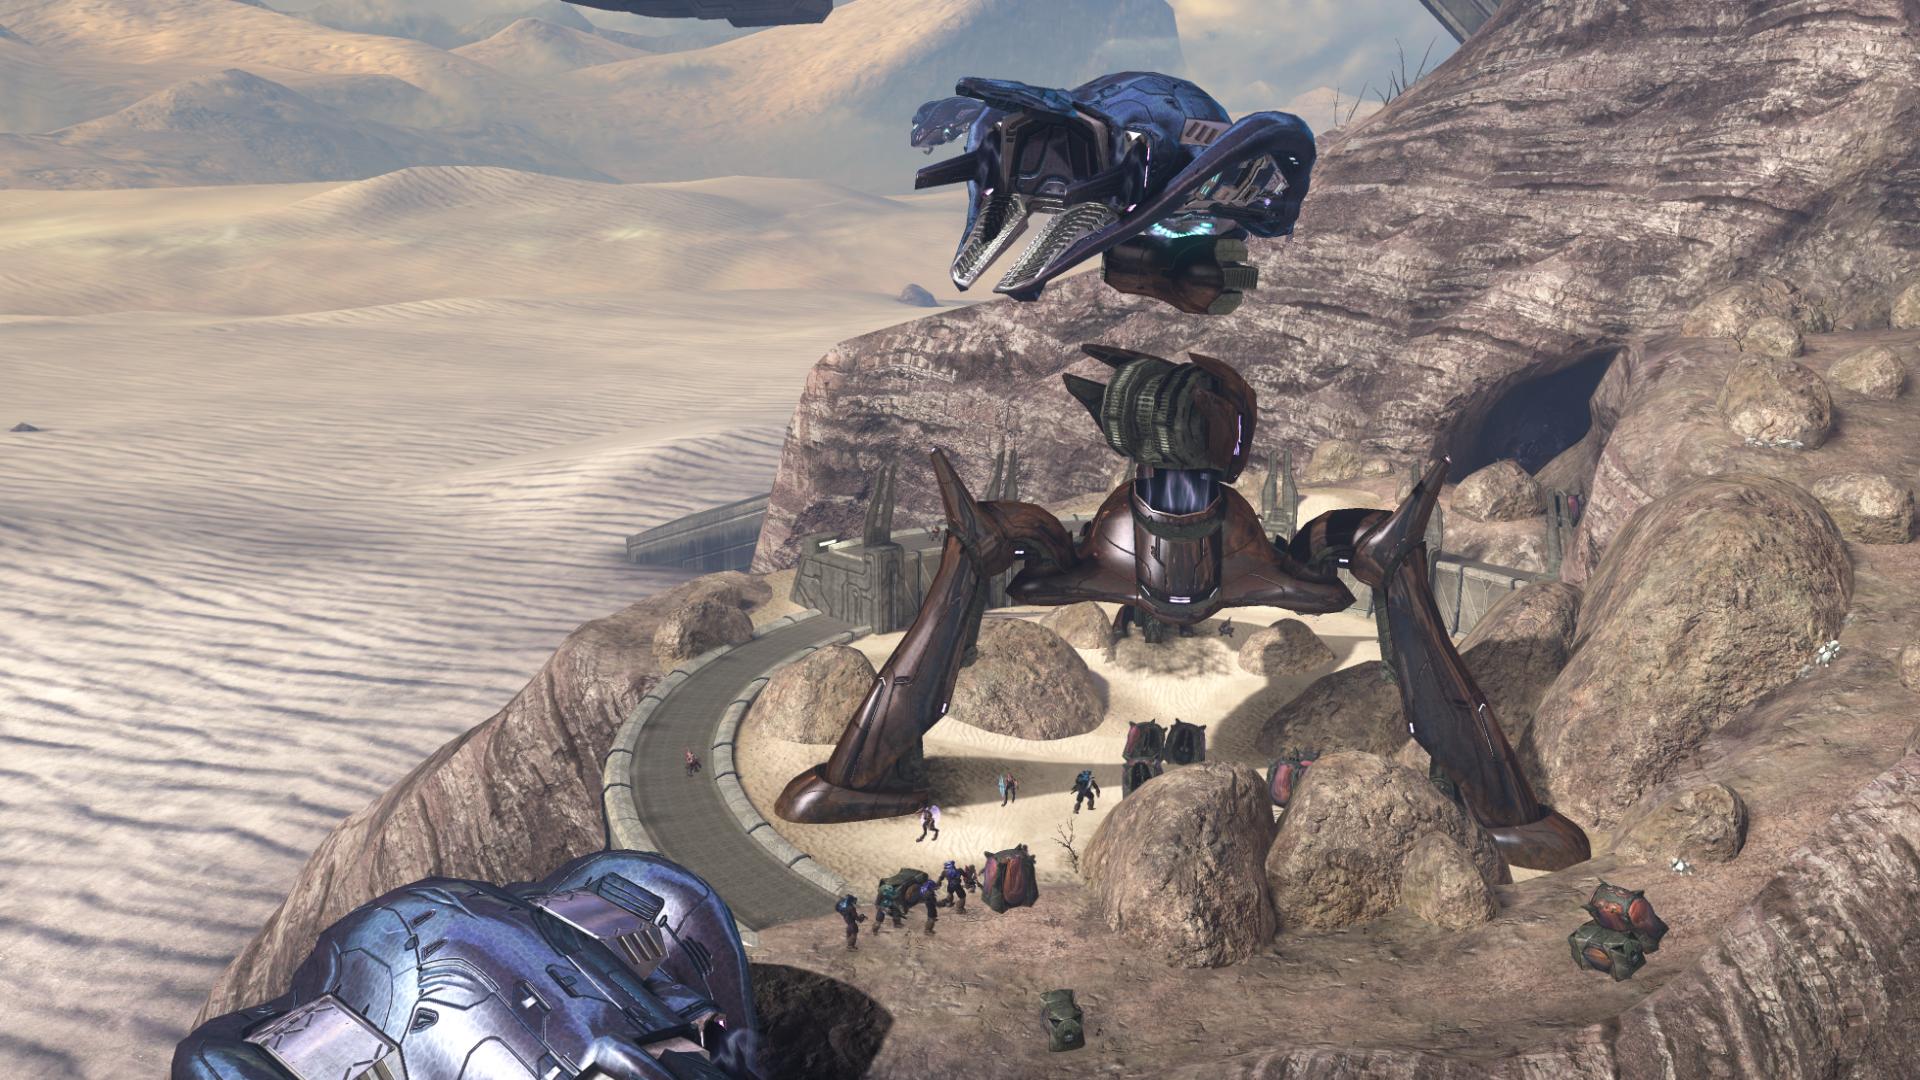
As you move through a tunnel into the next area, you come upon a Phantom in the process of assembling an anti-aircraft turret, which a Marine informs you will probably be used to take shots at the Dawn as it tries to land.
In typical Halo fashion, the music takes on a more percussion-oriented feel as the battle heats up.
The AI of the Marines is often overlooked or forgotten, even by myself. I noticed, during this battle, as the last of the Brutes were being taken out and the Jackals started to retreat, a Marine shouted: “Everyone on offense, they’re falling back!”
When it seems like battle is almost finished, a Phantom flies in and drops off two Hunters. I wish these guys had stuck with the Elites, like at the end of Halo 2! Even with Brute Shots and grenades, they are some tough beasts to take down.
Heading up the ridge, a group of Grunts trudge down toward you, followed by their Brute leader; I wonder what this poor fellow did to be stuck with a platoon of all Grunts.
Miranda radios in, reminding you of your current objective:
“Chief, I’m giving the Brutes all I’ve got, but this is a heavyweight fight. The Dawn’s only got the tonnage to last a few rounds. Find me a place to set her down, over.” [The Ark, Halo 3]
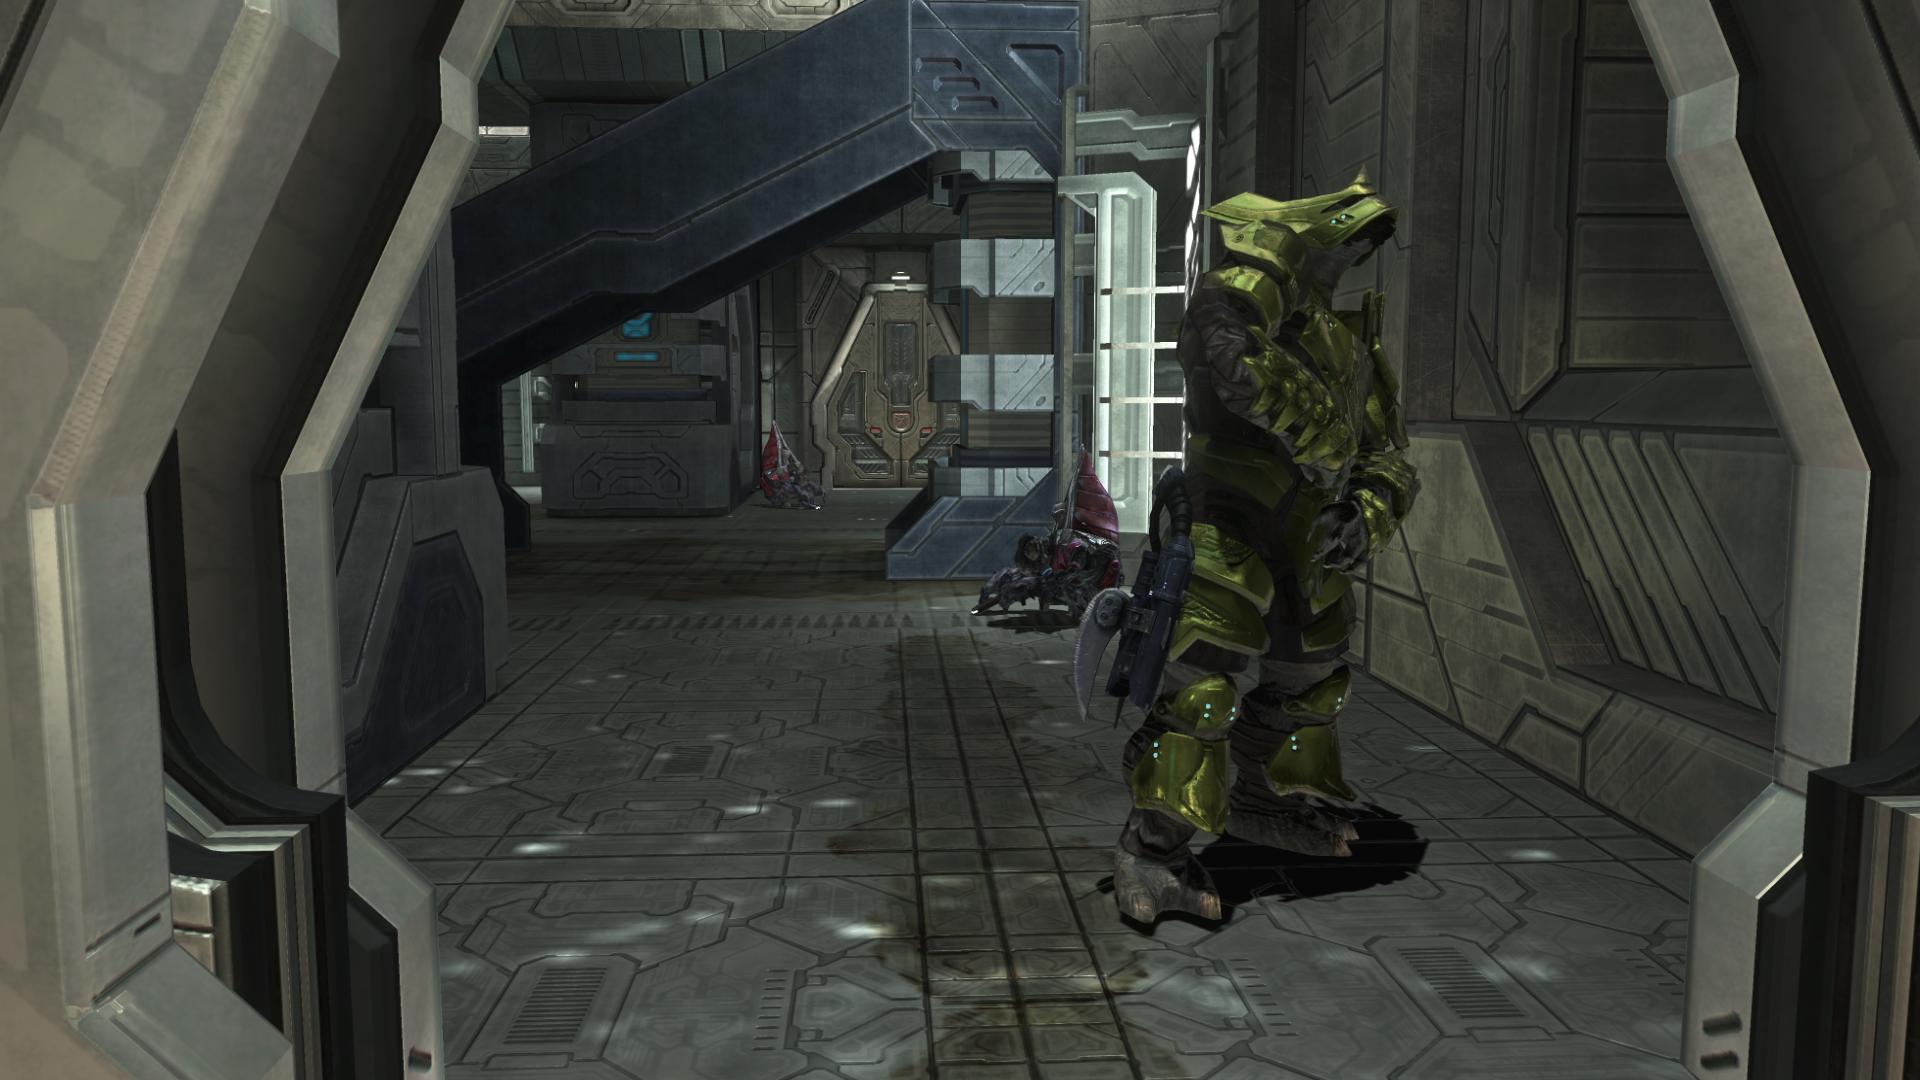
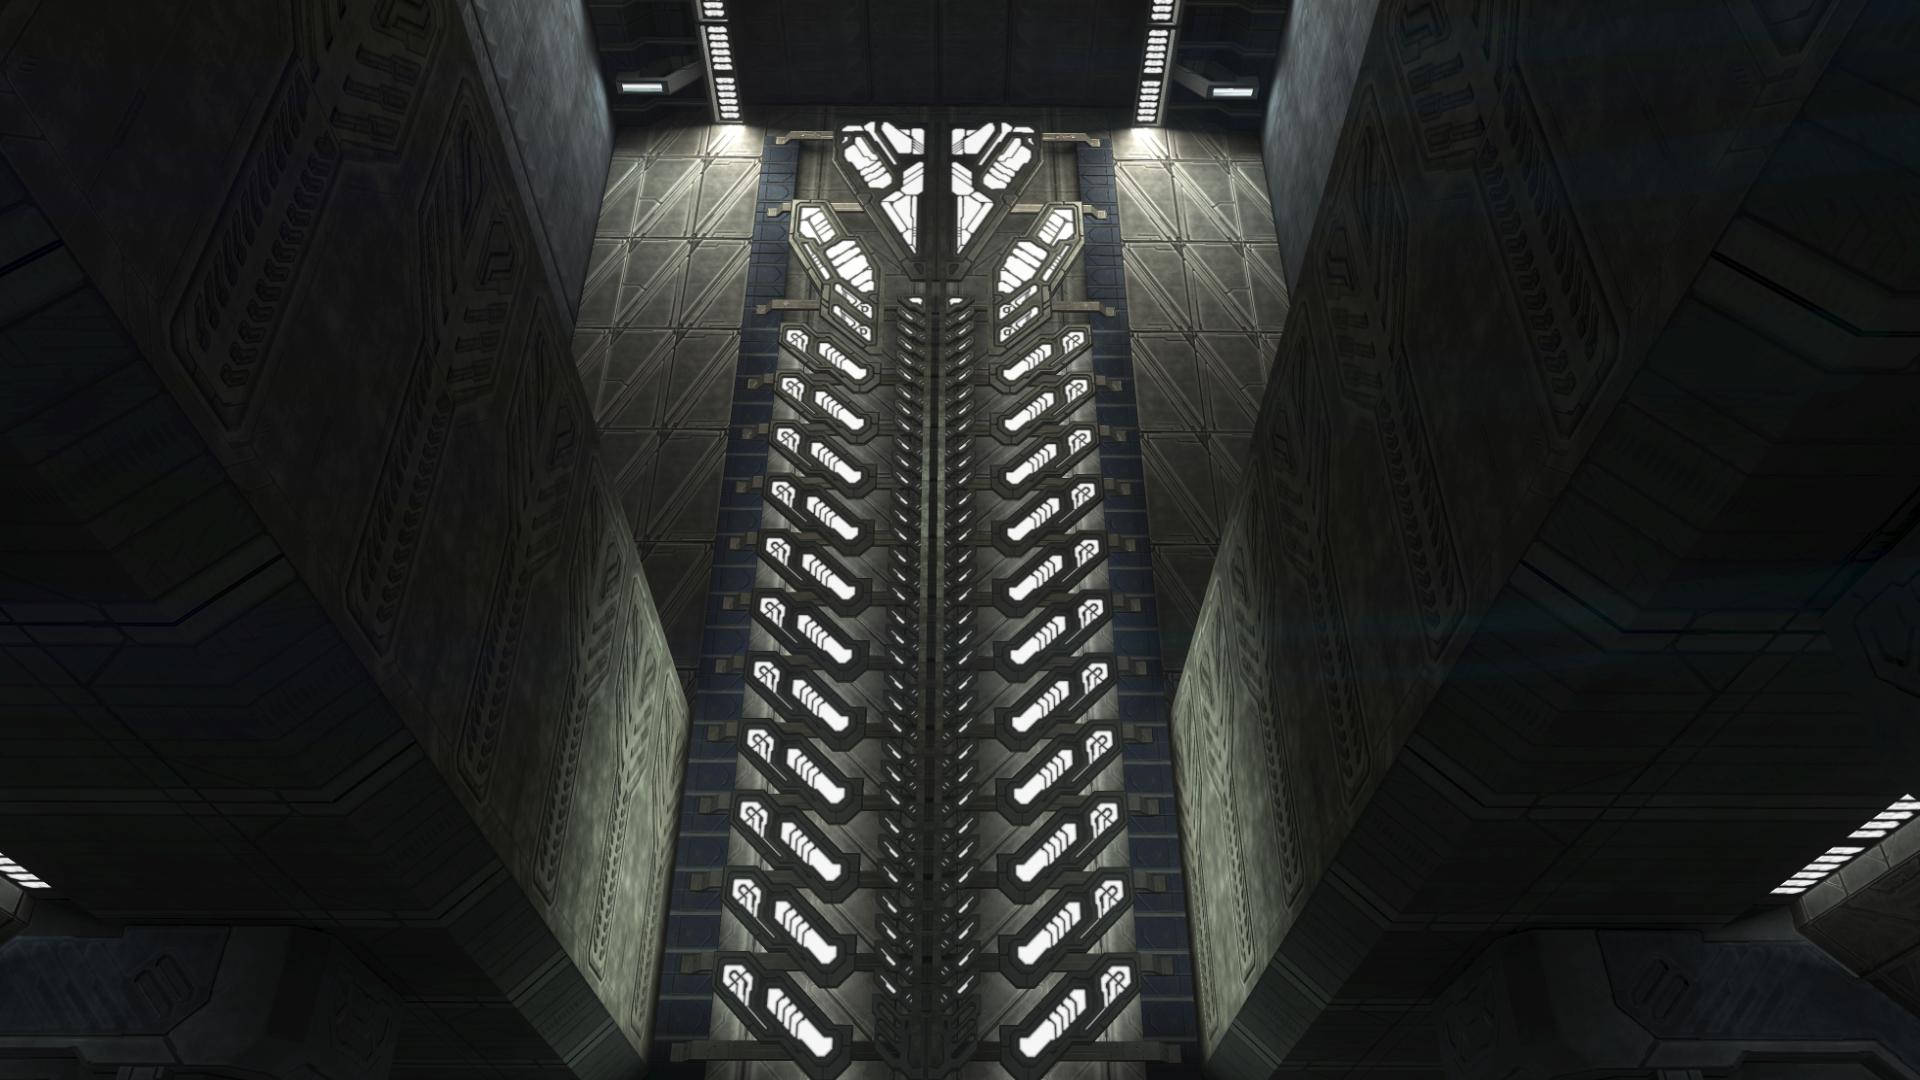
The interior of the next area is unmistakably Forerunner.
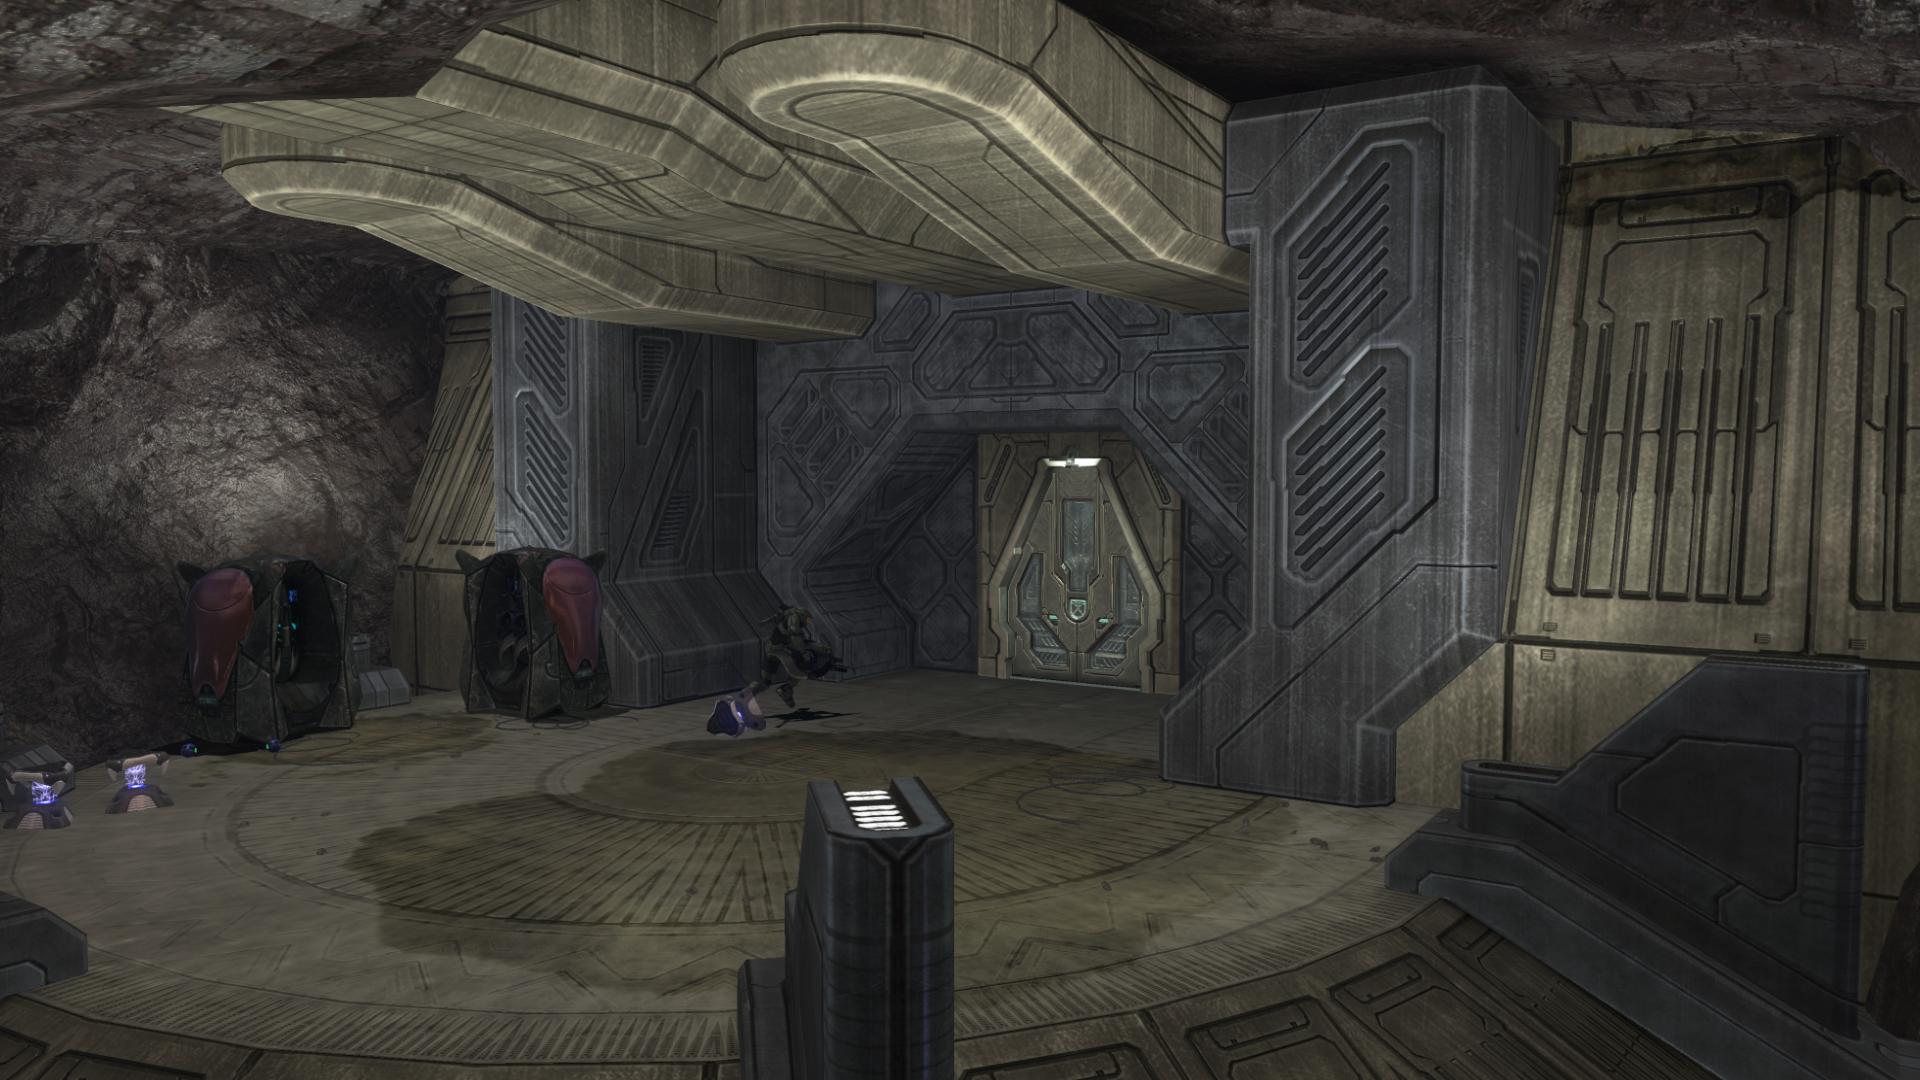
Once you go through the door and enter the interior of the area, you’ll get the chance to access of of the most interesting pieces of story that the Halo universe has offered us thus far: the Terminals. Immediately to your left there is a door, through which is a room housing the first of these Terminals. These text of all seven Terminals can be found in a pdf file, which you can download here. If you’re interested in these, vociferous has very thoroughly dissected them – and the unbelievable story contained within them – here on the site, in a series of articles which can be found here. I very highly recommend reading these articles; they tell a story that predates the Halo trilogy, and sets the foundation for the entire series.
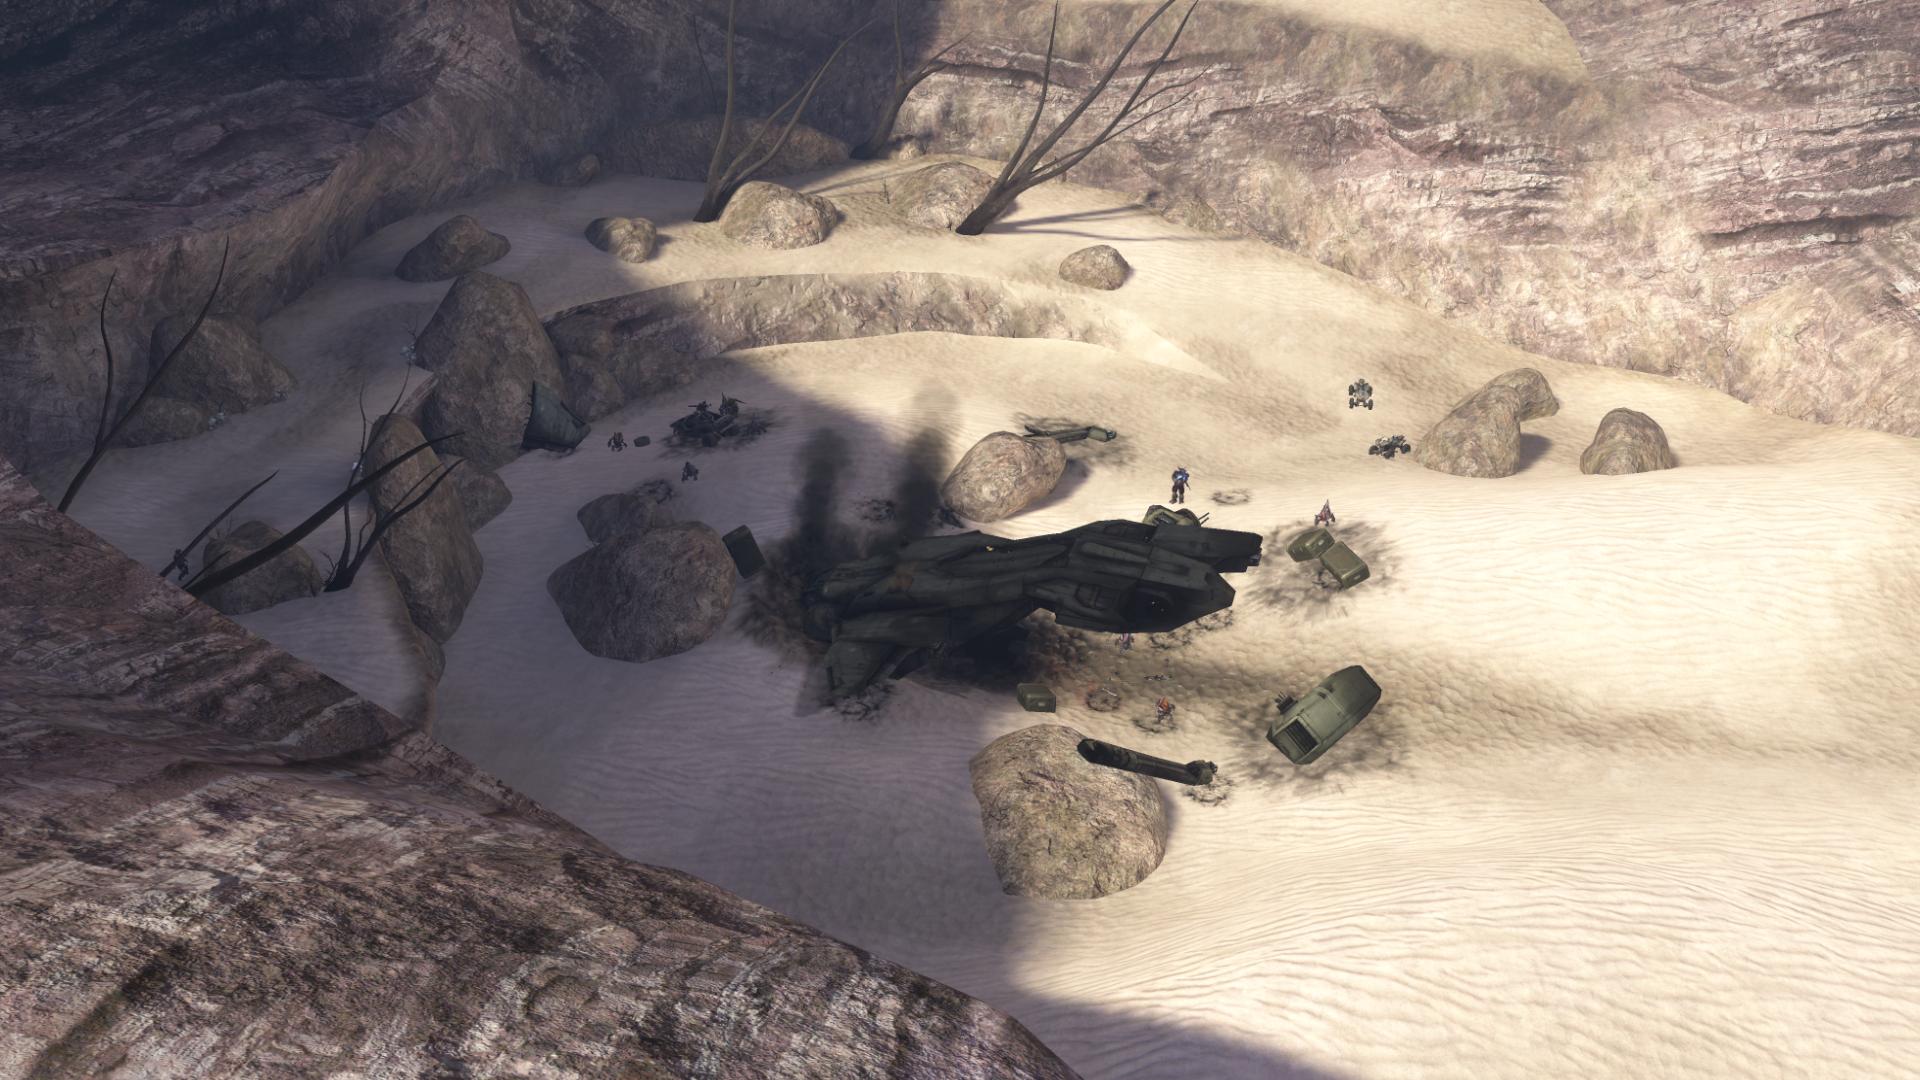
Upon exiting the interior, a small group of Marines wait amongst the rocks; a Longsword Interceptor zooms through the air ahead, with its pilot on the radio, announcing its impending crash. Last time we saw a Longsword (at the end of The Storm), it was in the same predicament. These poor guys are always crashing; those jets must be hard to control.
One of the Marines that was watching the fighter’s descent informs you that his unit crashed, but that they spotted a good LZ for the Dawn; he wants you to lead them to their vehicles so that they can take you there. A small group of Covenant are guarding the crashed Pelican.
A squad of Brutes and Grunts that were hidden from view will attempt to make their way toward you on the left, while you’re typically shooting at the enemies below you; the Marines will usually start firing at the closer group of enemies, though, alerting you to their presence.
After the two groups of enemies have been taken out, two Brute-laden Prowlers will fly in over the ridge ahead (if you’re positioned appropriately, they will can actually “fly” over your head). A rocket launcher resting near the Pelican can provide some great laughs as you can attempt to blast the Prowlers as they barrel toward you, and then sidestep out of the way so that the vehicles’ momentum doesn’t carry the debris into you. The Prowlers’ turrets pack a punch, so if you don’t rocket them immediately, or throw up a Bubble, otherwise you’ll typically be killed fairly quickly.
A Warthog will randomly be available in this area – it is always there, but it is sometimes destroyed and other times still intact. And if one of the Prowlers survived, you can load up some Marines onto it and make your way into the next area. Otherwise, I recommend handing off those rockets to a Marine and putting him on the back of a Mongoose.
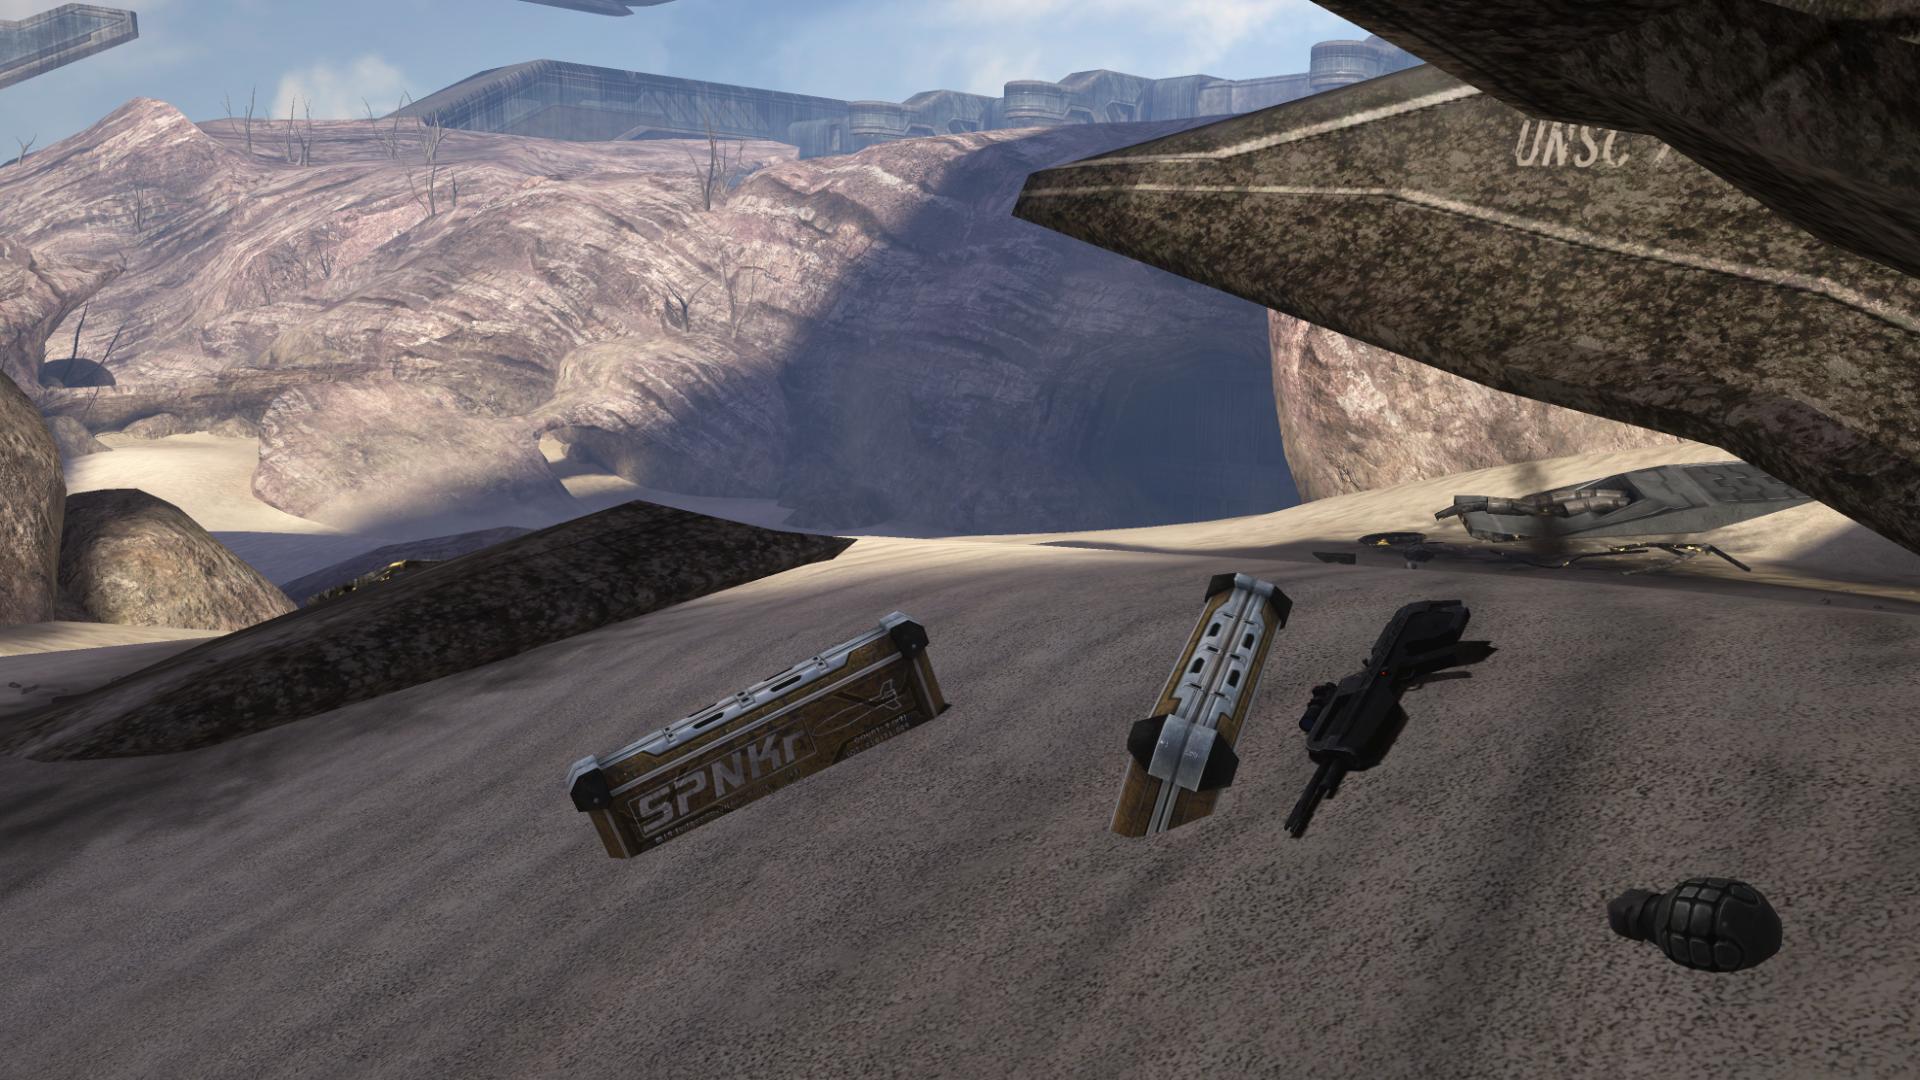
Speaking of the rockets, you may have noticed some rocket ammunition in the Pelican debris – ammunition not in the form of an actual rocket launcher.
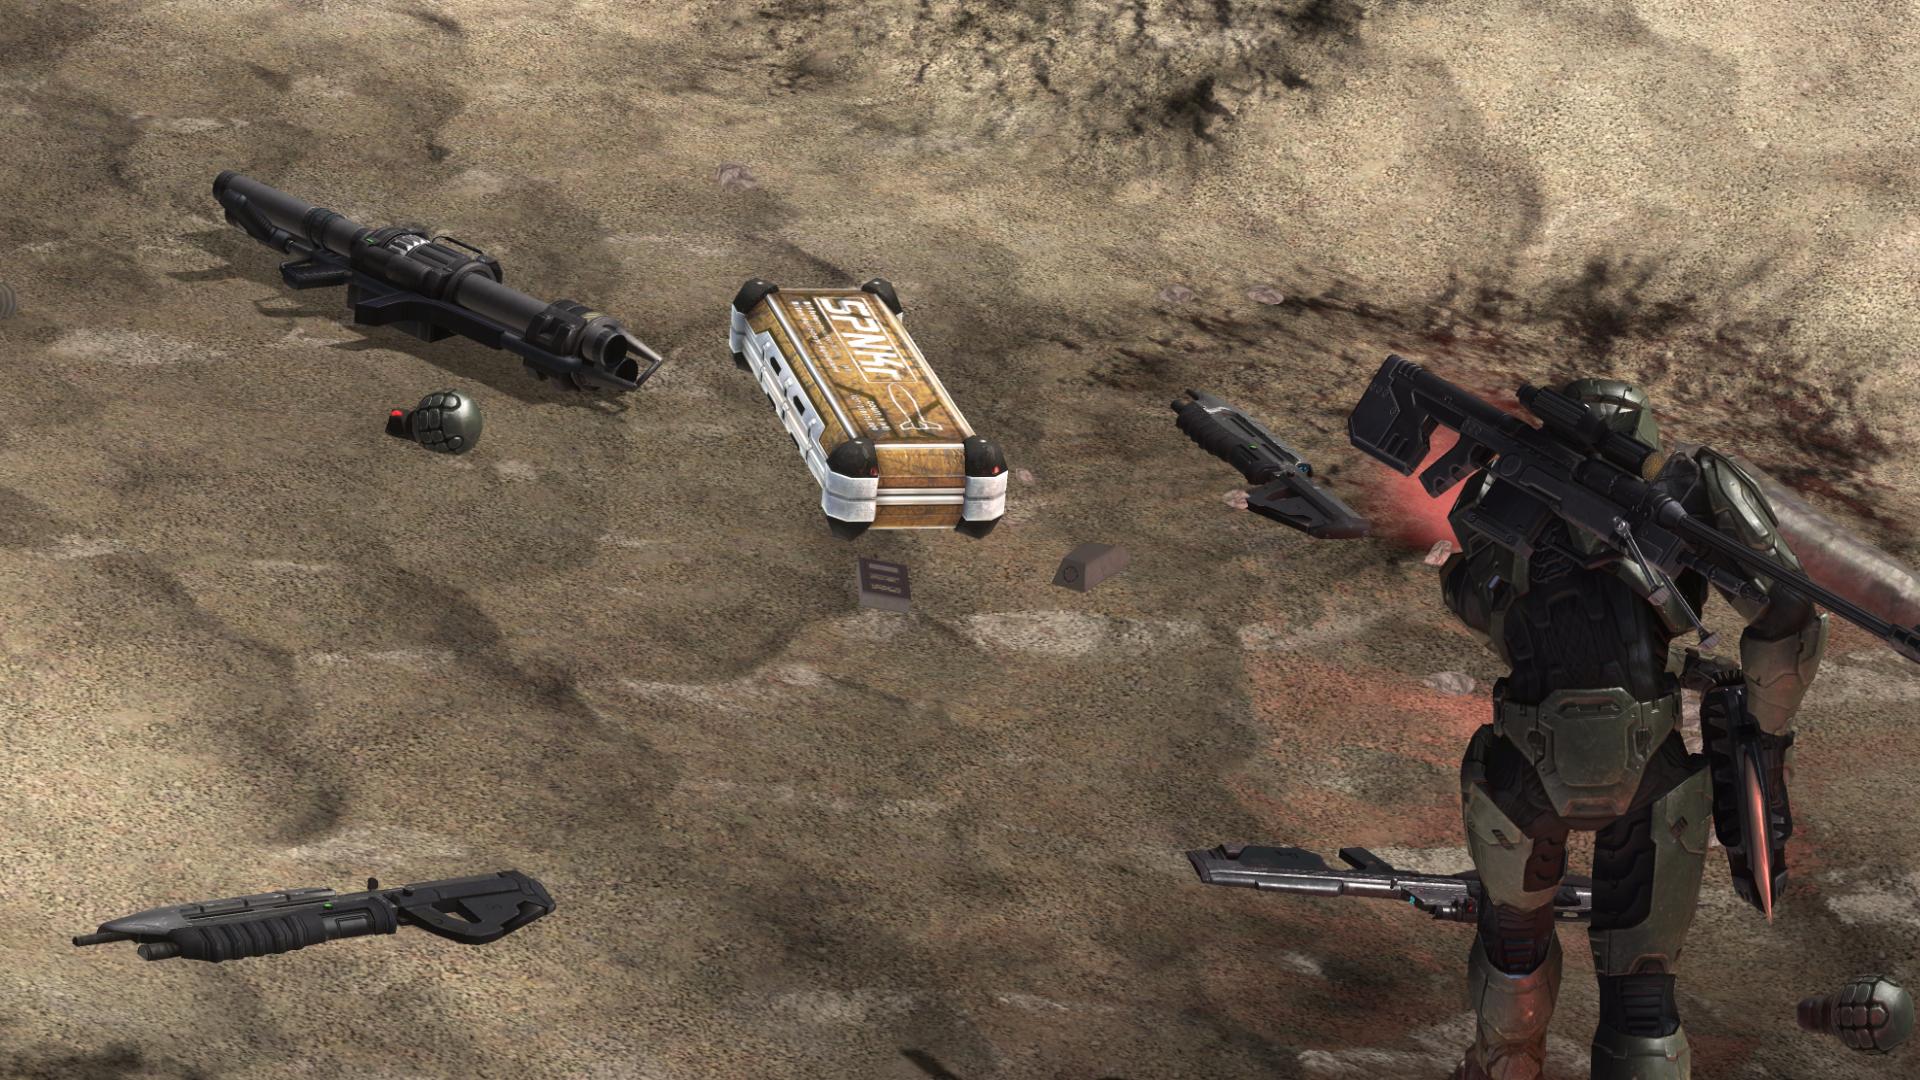
This is one of the few places during the game that you can find ammunition for a weapon that is in this form. Interesting that Bungie took the time to create these, rather than just leave two rocket launchers. Perhaps they didn’t want to allow you to load up your crack-shot Marines with rocket launchers?
The downed Pelican’s radio is transmitting some of Miranda and Half-Jaw’s dialogue from the battle taking place in the atmosphere. If you stick around, you can actually hear an abnormally large amount of dialogue, here:
“Seraphs, on my six.” (Marine)
“Fire pods one through twelve – archers away.” (Miranda)
“New contacts at point two three eight.” (Miranda)
“Affirmative, I see it.” (Marine)
“No, I will handle those myself.” (Half-Jaw)
“Let your cannons roar.” (Half-Jaw)
“Stay away from those cruisers!” (Marine)
“Understood; engage those Seraphs.” (Miranda)
“Broadside, what fools to face our guns!” (Half-Jaw)
“Hit them again. And again! And again!” (Half-Jaw)
“Now, close and finish!” (Half-Jaw)
“Negative, get out of there!” (Marine)
“Got a lock, fox fox!” (Marine)
“Negative, protect the Pelicans!” (Miranda)
“Let the Elites handle the cruisers.” (Miranda)
“Full shields, ramming speed!” (Half-Jaw)
“Splash one, coming about.” (Marine)
“Point laser fire, break off!” (Marine)
“I’m hit, I’m hit!” (Marine)
“Watch your fire, watch your fire!” (Miranda)
“…gonna try and hit their carrier! Goodbye, guys.” (Marine)
“Forward lancers, through their fire.” (Half-Jaw)
“Standby to jettison the ETVs… on my mark.” (Miranda)
“Suppress with mainpoint laser batteries.” (Half-Jaw)
“Charge the MAC; give me a firing solution.” (Miranda)
“A mark of honor for that kill.” (Half-Jaw)
“All squadrons, form up, form up.” (Miranda)
“Look at it blister and burn.” (Half-Jaw)
“Affirmative, that’s a hit.” (Miranda)
“They have been gutted, stem to stern.” (Half-Jaw) [The Ark, Halo 3]
While, from my experience, all of the lines are always delivered, their order appears to have some randomization. The entire sequence typically begins and ends with the same lines, but I have heard some of the dialogue in the middle take place at different times.
You can download a recording of this audio by right clicking and saving this link.
“Mount up! Let’s find that LZ. Follow us, sir! All the way down this canyon.” [The Ark, Halo 3]
As soon as you get onto a vehicle, a musical piece begins to play – it is “Perilous Journey” from the first Halo game. It appears here pretty much unchanged from its original orchestration, which is a delight to hear. In Halo 1, it was heard on the level “Assault on the Control Room” at multiple times during the level, most notably when you are fighting alongside the final group of Marines that need to be evacuated. It was also used, less memorably, in the first level, “The Pillar of Autumn.”
This encounter, and the next, are awesome in a couple of respects: they are the first time in Halo 3 that you encounter the Prowler.
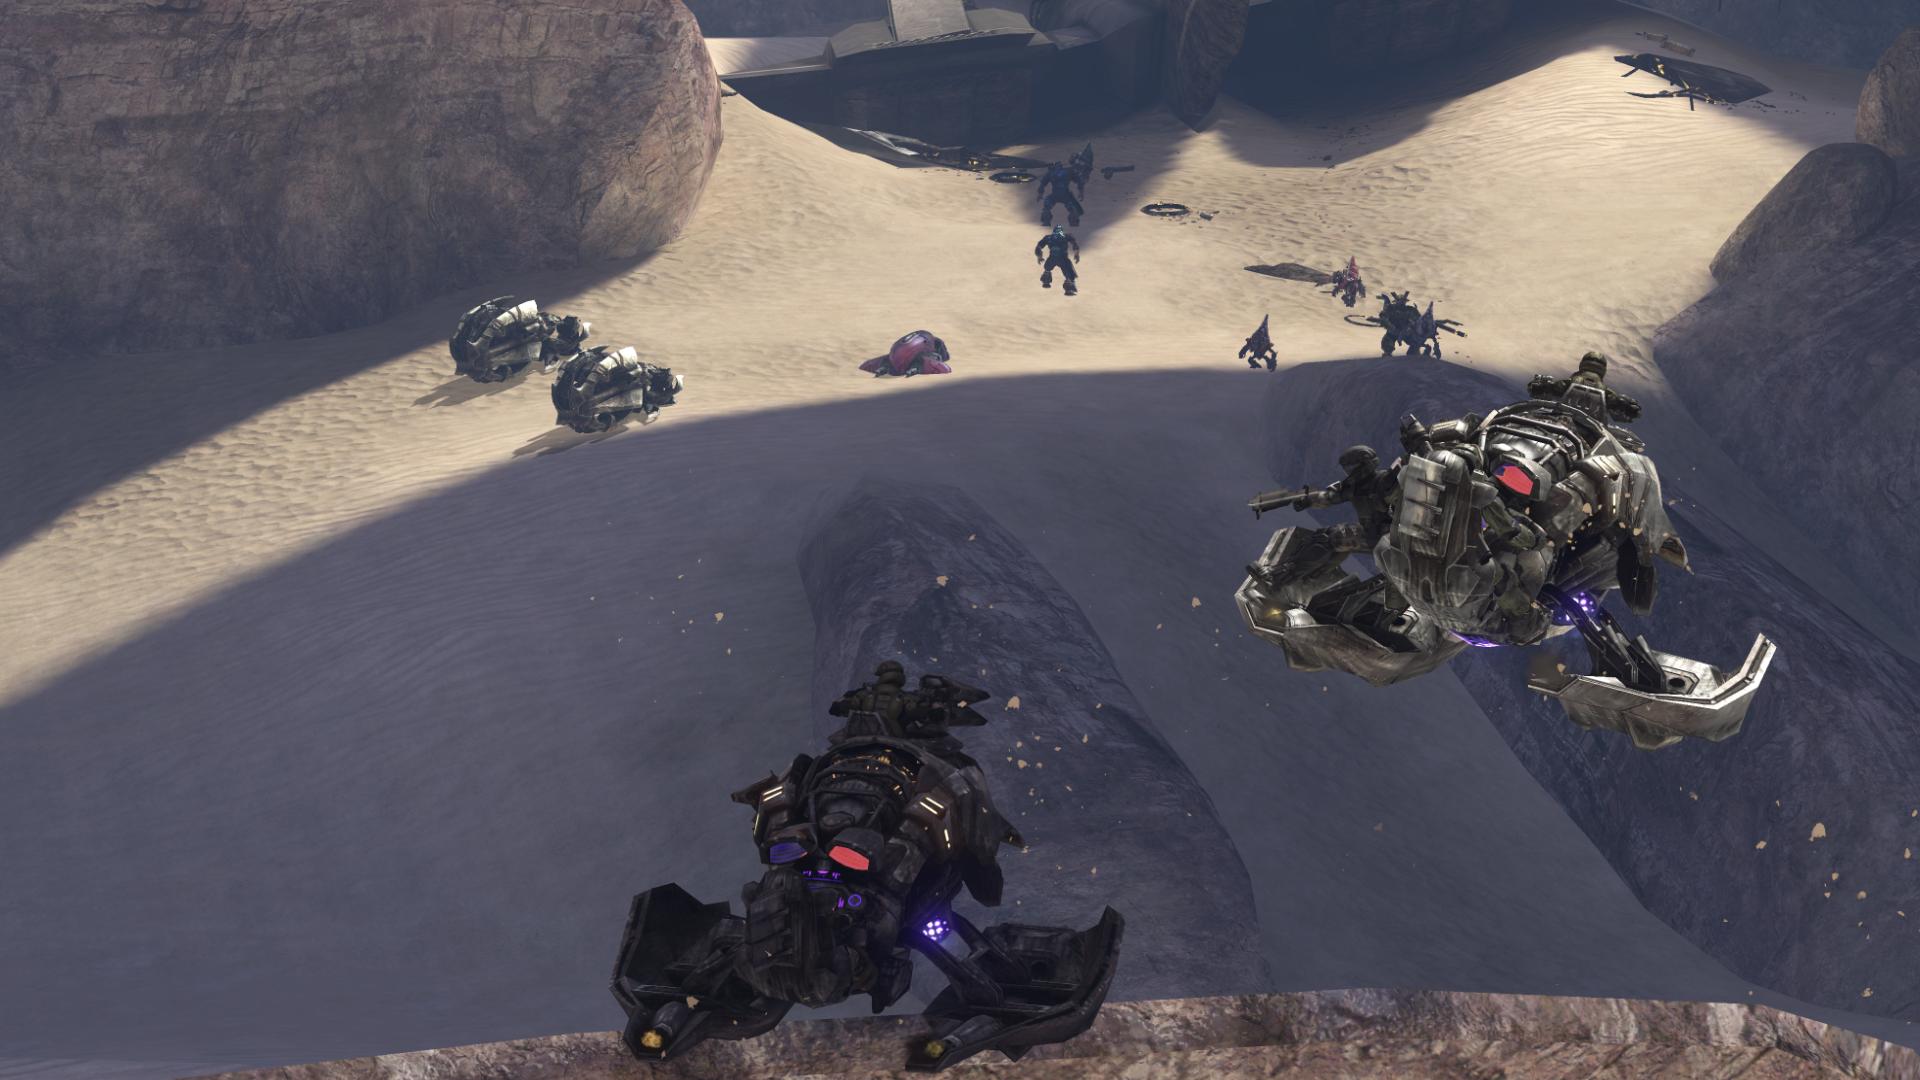
You may also be reminded of the destructive power of the Chopper’s front end:
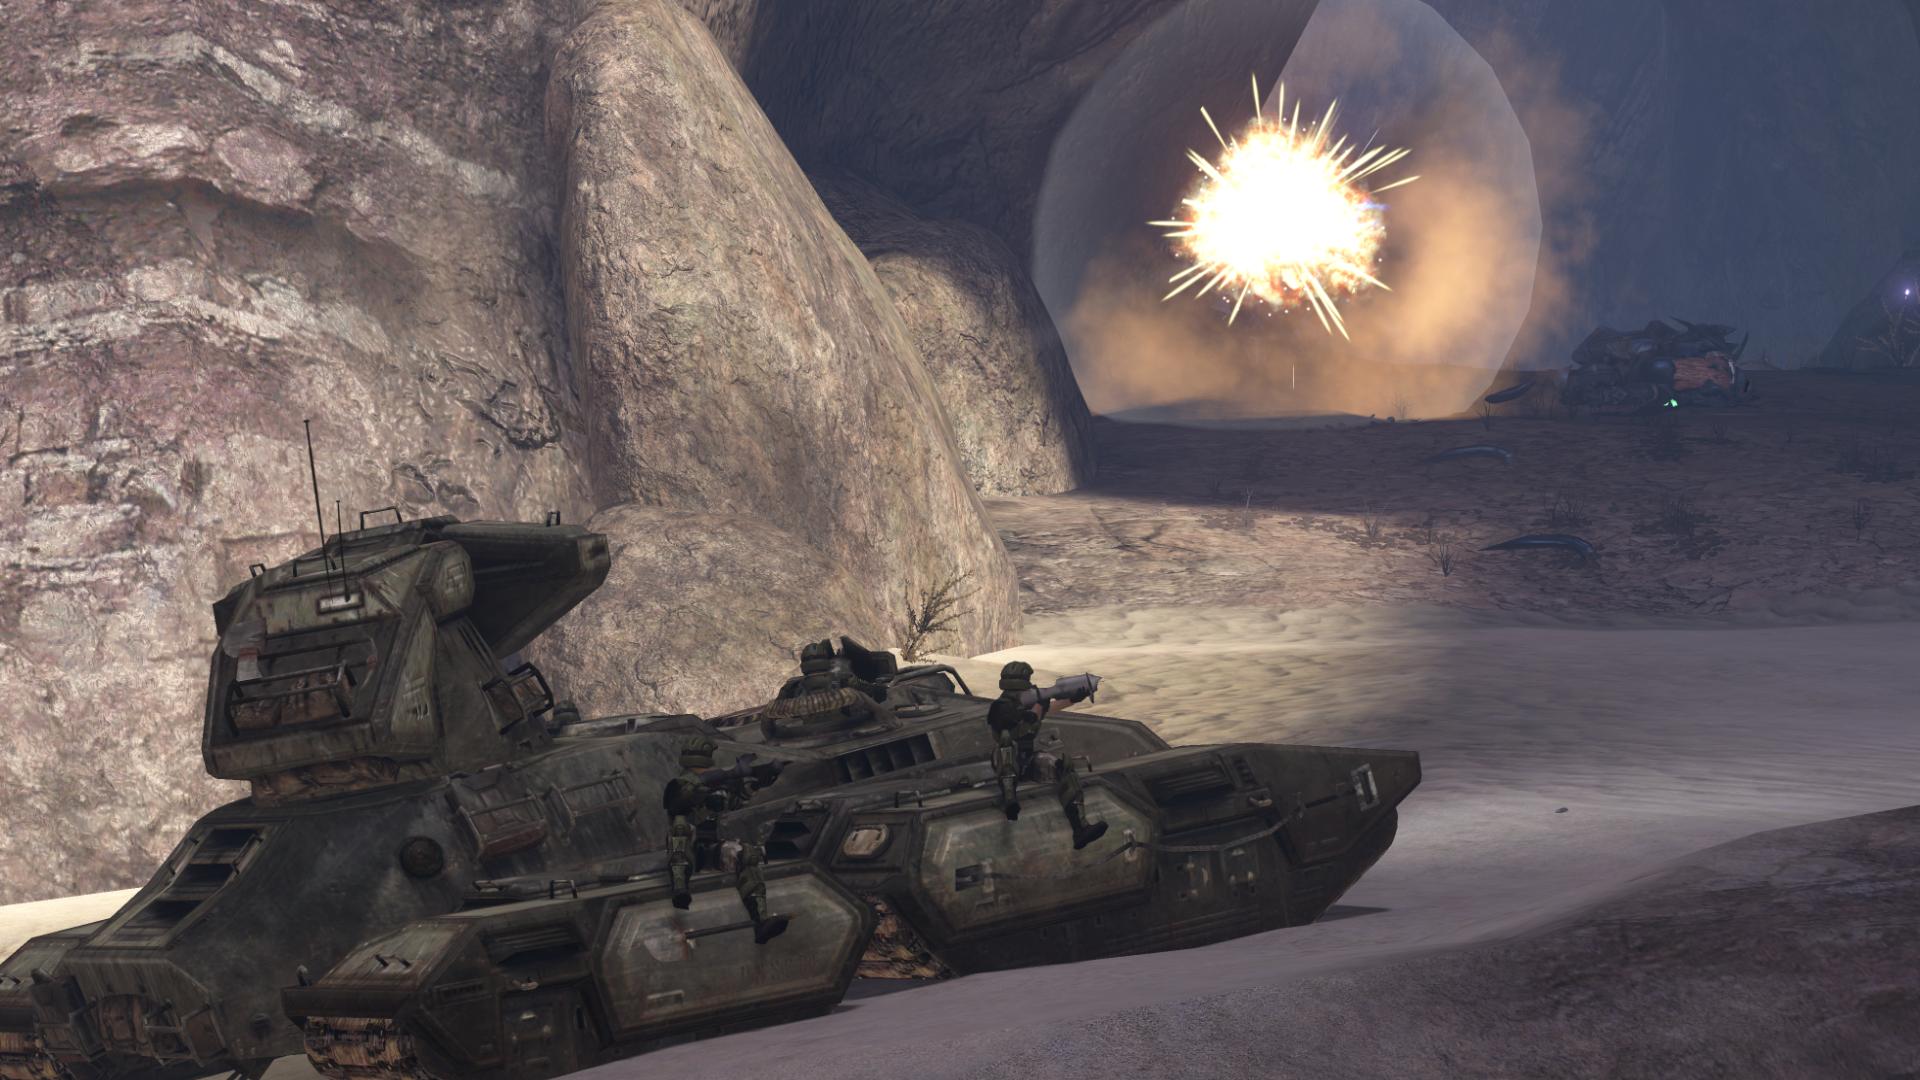
This encounter is the first of many vehicle-oriented battles that you’ll engage in throughout this level. This first one, while involving only a few Choppers and Ghosts, plus your Prowlers and/or Mongooses, is still quite varied in its substance and environment. Since every vehicle is jackable, and Marines without rides will make use of any un-manned vehicle, that means that even small(ish) encounters like this one are lots of fun with a very high replayability factor. Many times I’ve ditched my vehicle right before it exploded, and jacked a Ghost or Chopper from an enemy. And as far as the environment is concerned, it is ideal for facing the Choppers and Ghosts found here. Since Choppers are very powerful against other vehicles due to their ability to flip enemies with their fire, and Ghosts’ plasma fire is dangerous as well, the two caves located here provide valuable cover.
I’ve moved into these caves countless times to avoid being taken out by enemy vehicles. It’s areas like this that make for fantastic encounters. Besides the environment and the various vehicles, this encounter has a few other ingredients that make it fun: holding the high ground at the edge of the area are enemies with long-range weapons (Brute Shots and Plasma Pistols). In addition to that, more enemy vehicles arrive periodically as the battle progresses, which keep things rolling without causing you to be overwhelmed at once.
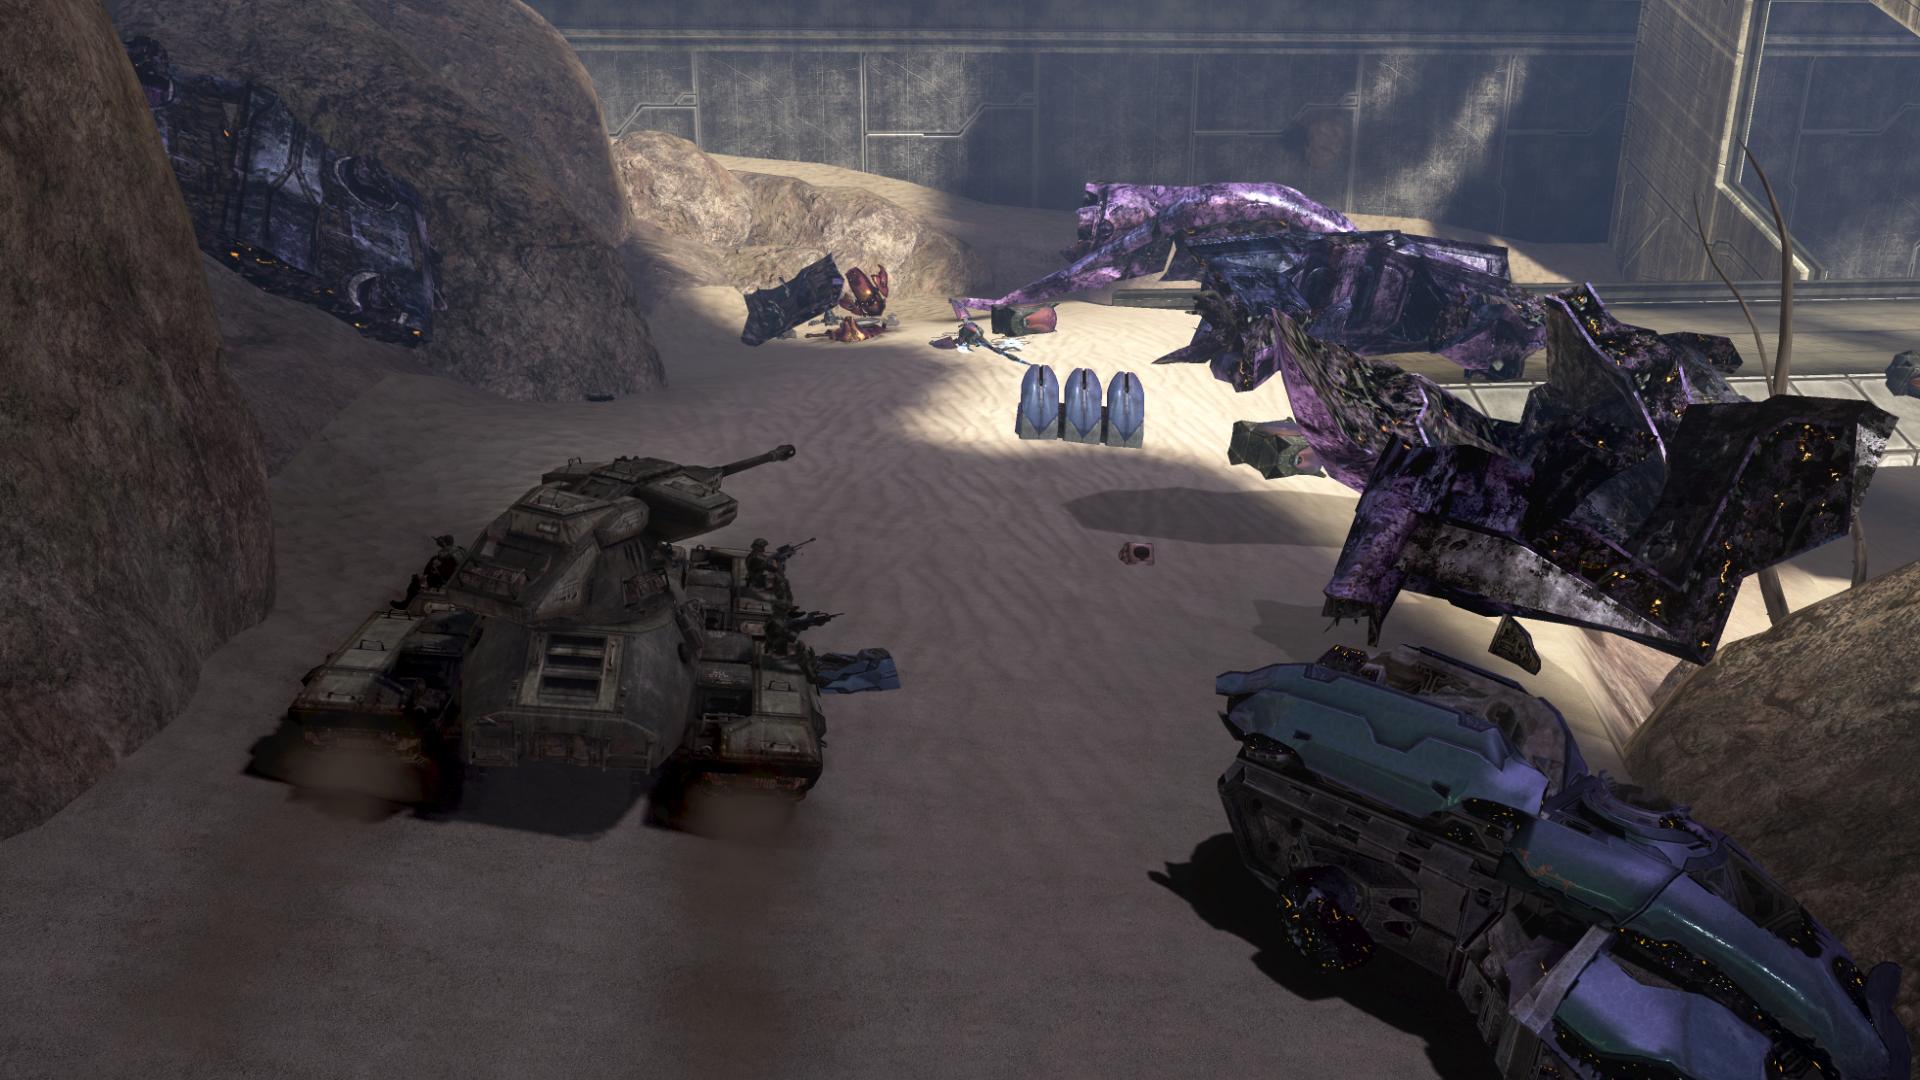
I also think that it’s worth noting that the UNSC vehicles strewn throughout these first areas really give a good sense of the battle that’s raging in the atmosphere above – first, the Pelican in the previous encounter, and in this area, the Pelican crashed into the ridge above with drop pods resting below. Lastly, the jet that we saw earlier can be found at the top of the hill.
Next to the jet, something else interesting can be found:
Two more cases containing rocket ammunition can be found next to the crashed Longsword jet.
Immediately past the jet, there is an overturned Warthog that can be used if the one earlier on in the level wasn’t available. I’ll often put a rocket Marine into the passenger seat, and have another Marine on the chain-gun, while I drive.
Up ahead is a downed Phantom – looks like the Covenant aren’t escaping the battle unscathed, either. After you defeat the turret Grunt and the rest of the enemies, you can stick around to hear some battle transmissions from the Brutes’ side:
“Keep them off this sacred ground. Drive the Heretic’s ships back through the portal.”
“Their cruiser’s fixed with ours; watch your fire!”
“No! Shoot the carrier! Kill that Half-Jaw and his crew!”
“Do not fear the Prophet’s wrath – if you fail, I will have your hide!” [The Ark, Halo 3]
Not nearly as lengthy as the UNSC’s transmissions – and only from one source – but interesting nonetheless.
You can also download a recording of this audio by right-clicking and saving this link, although this one is a bit annoying because of a constant explosion that keeps occurring due to the destroyed Phantom.
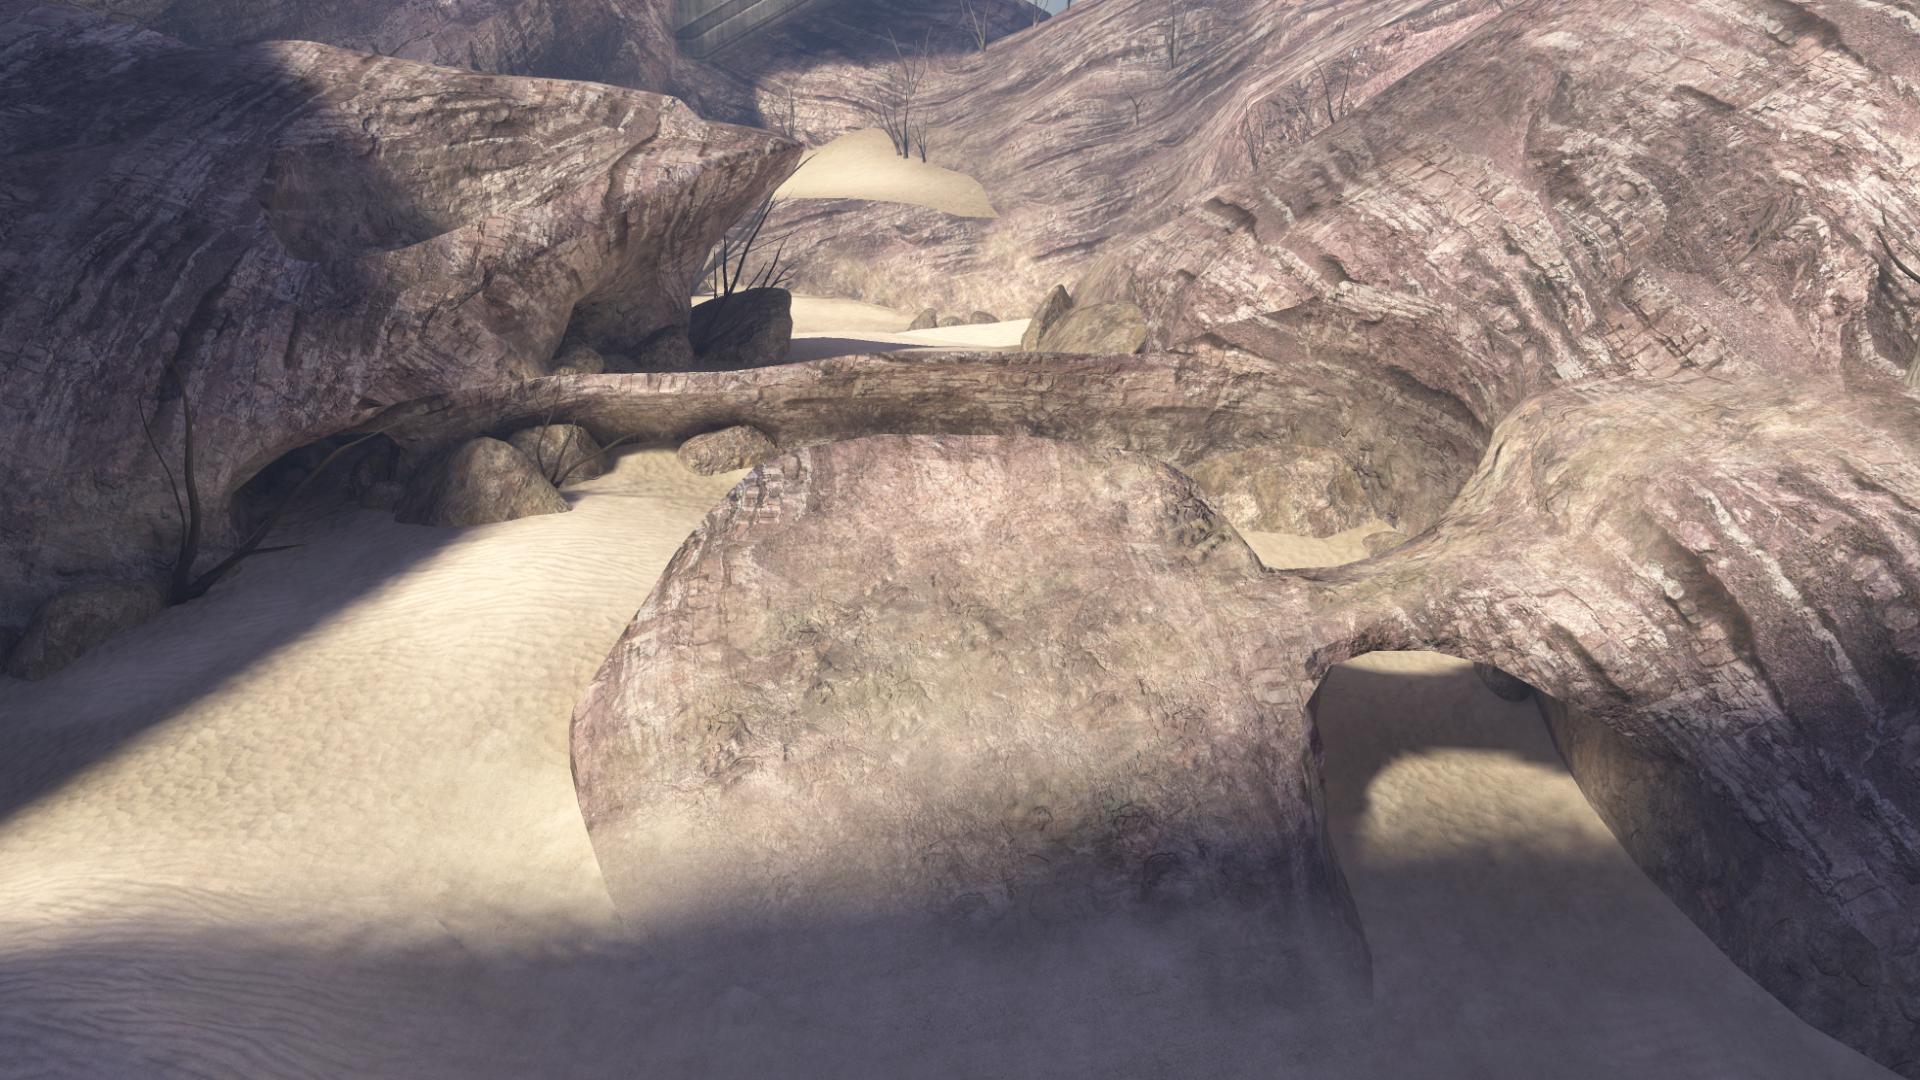
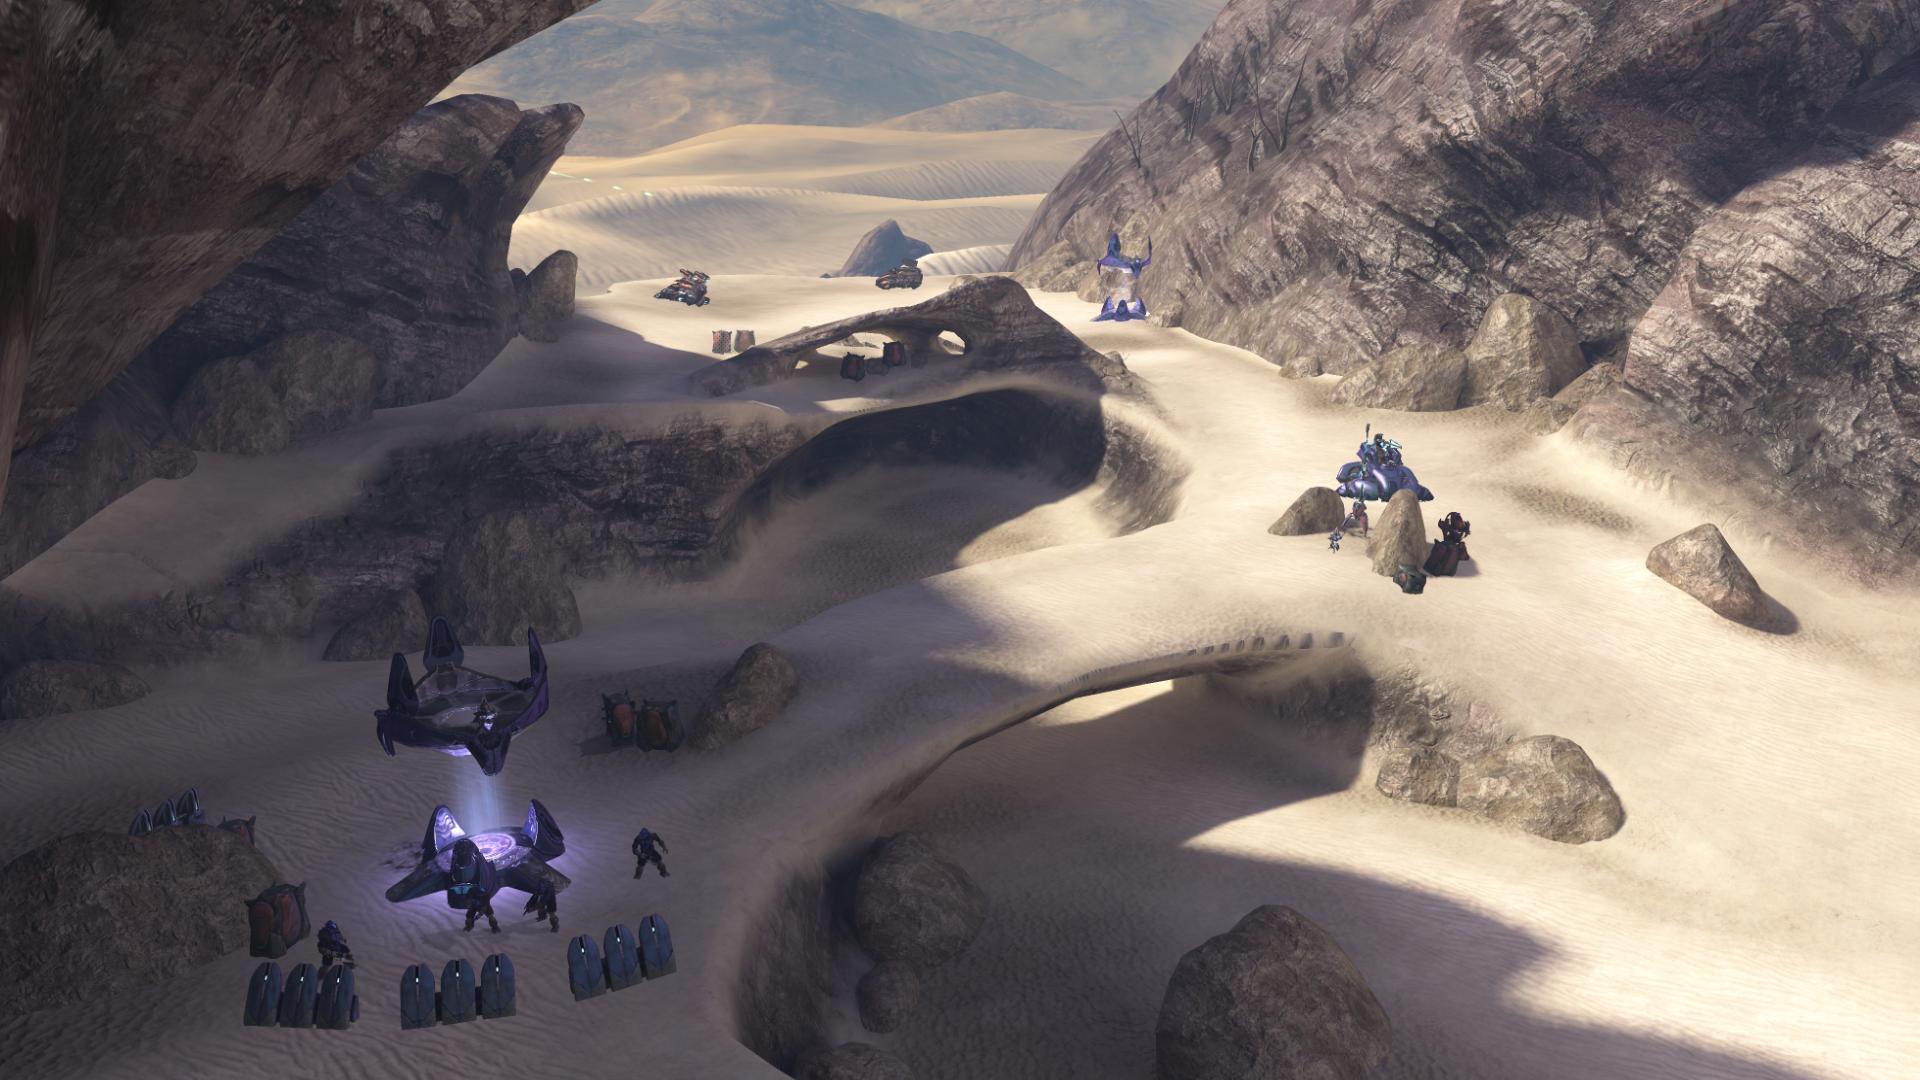
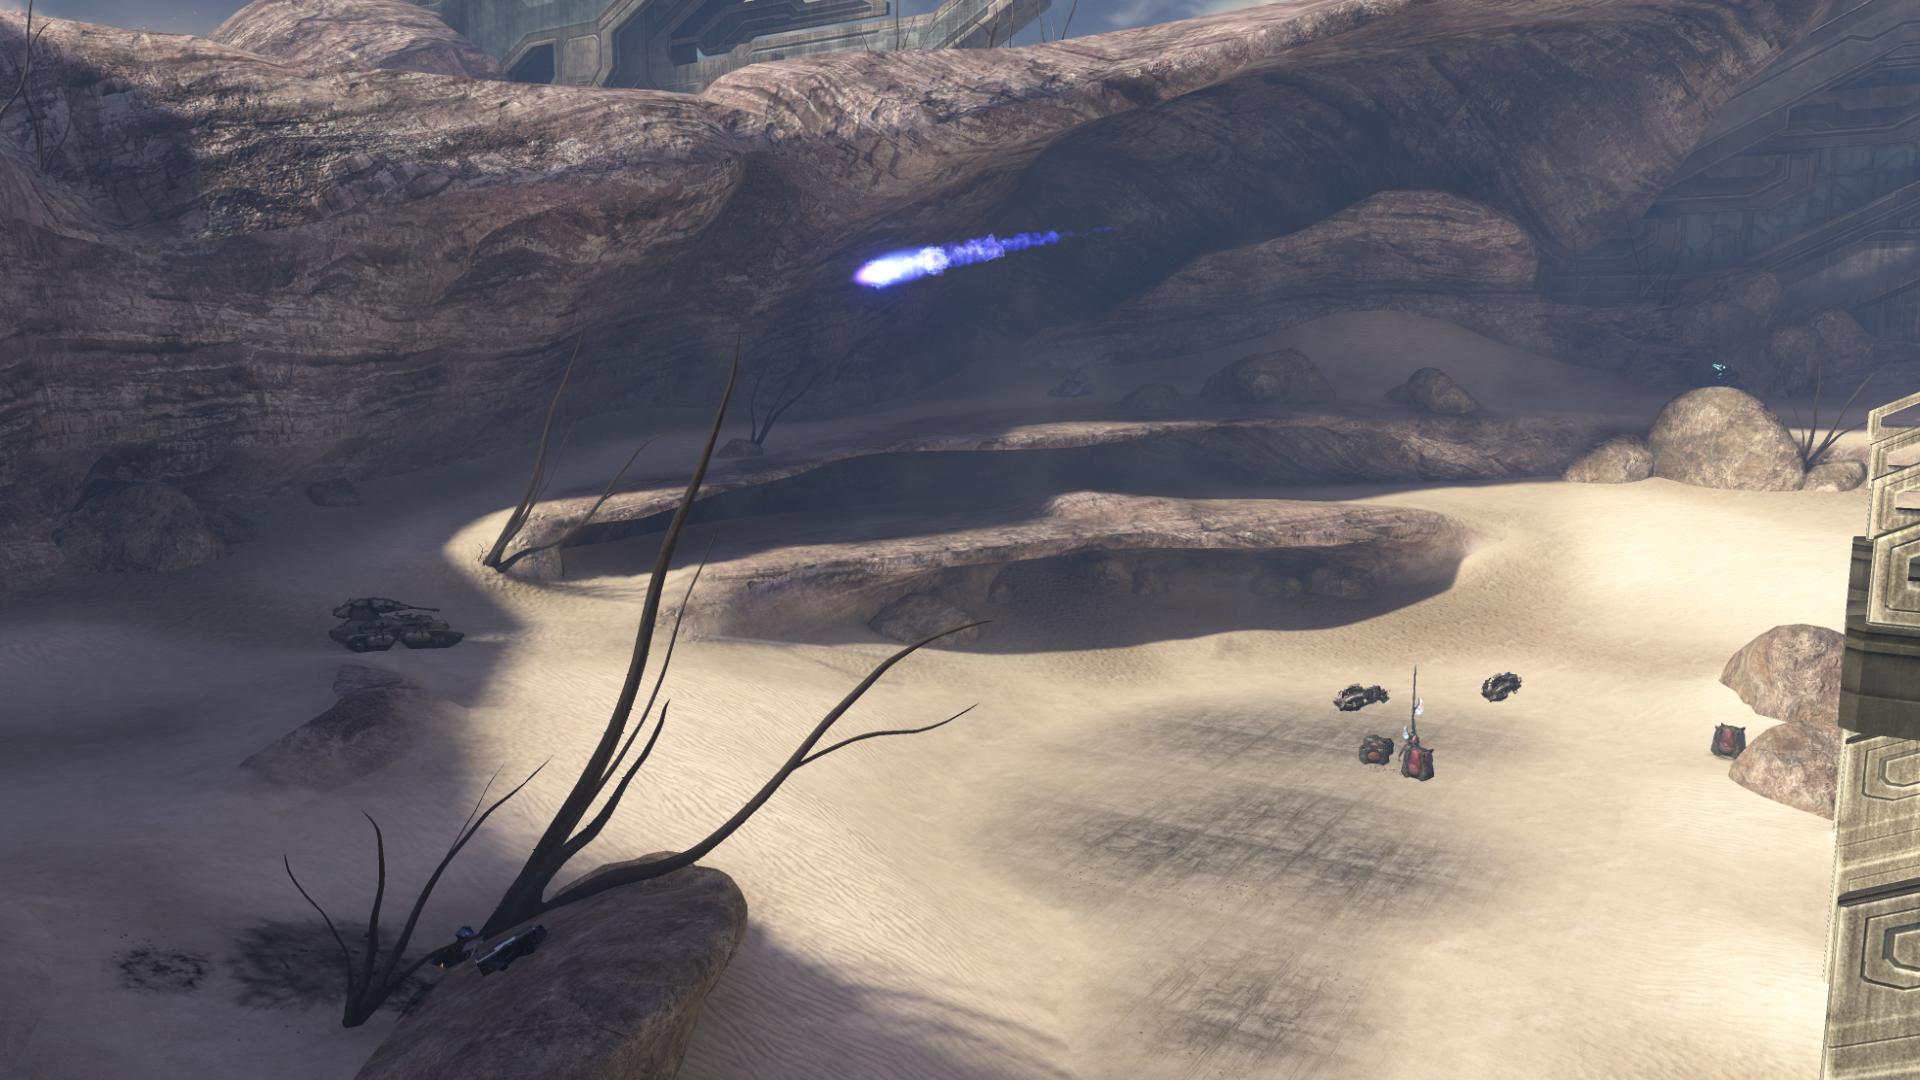
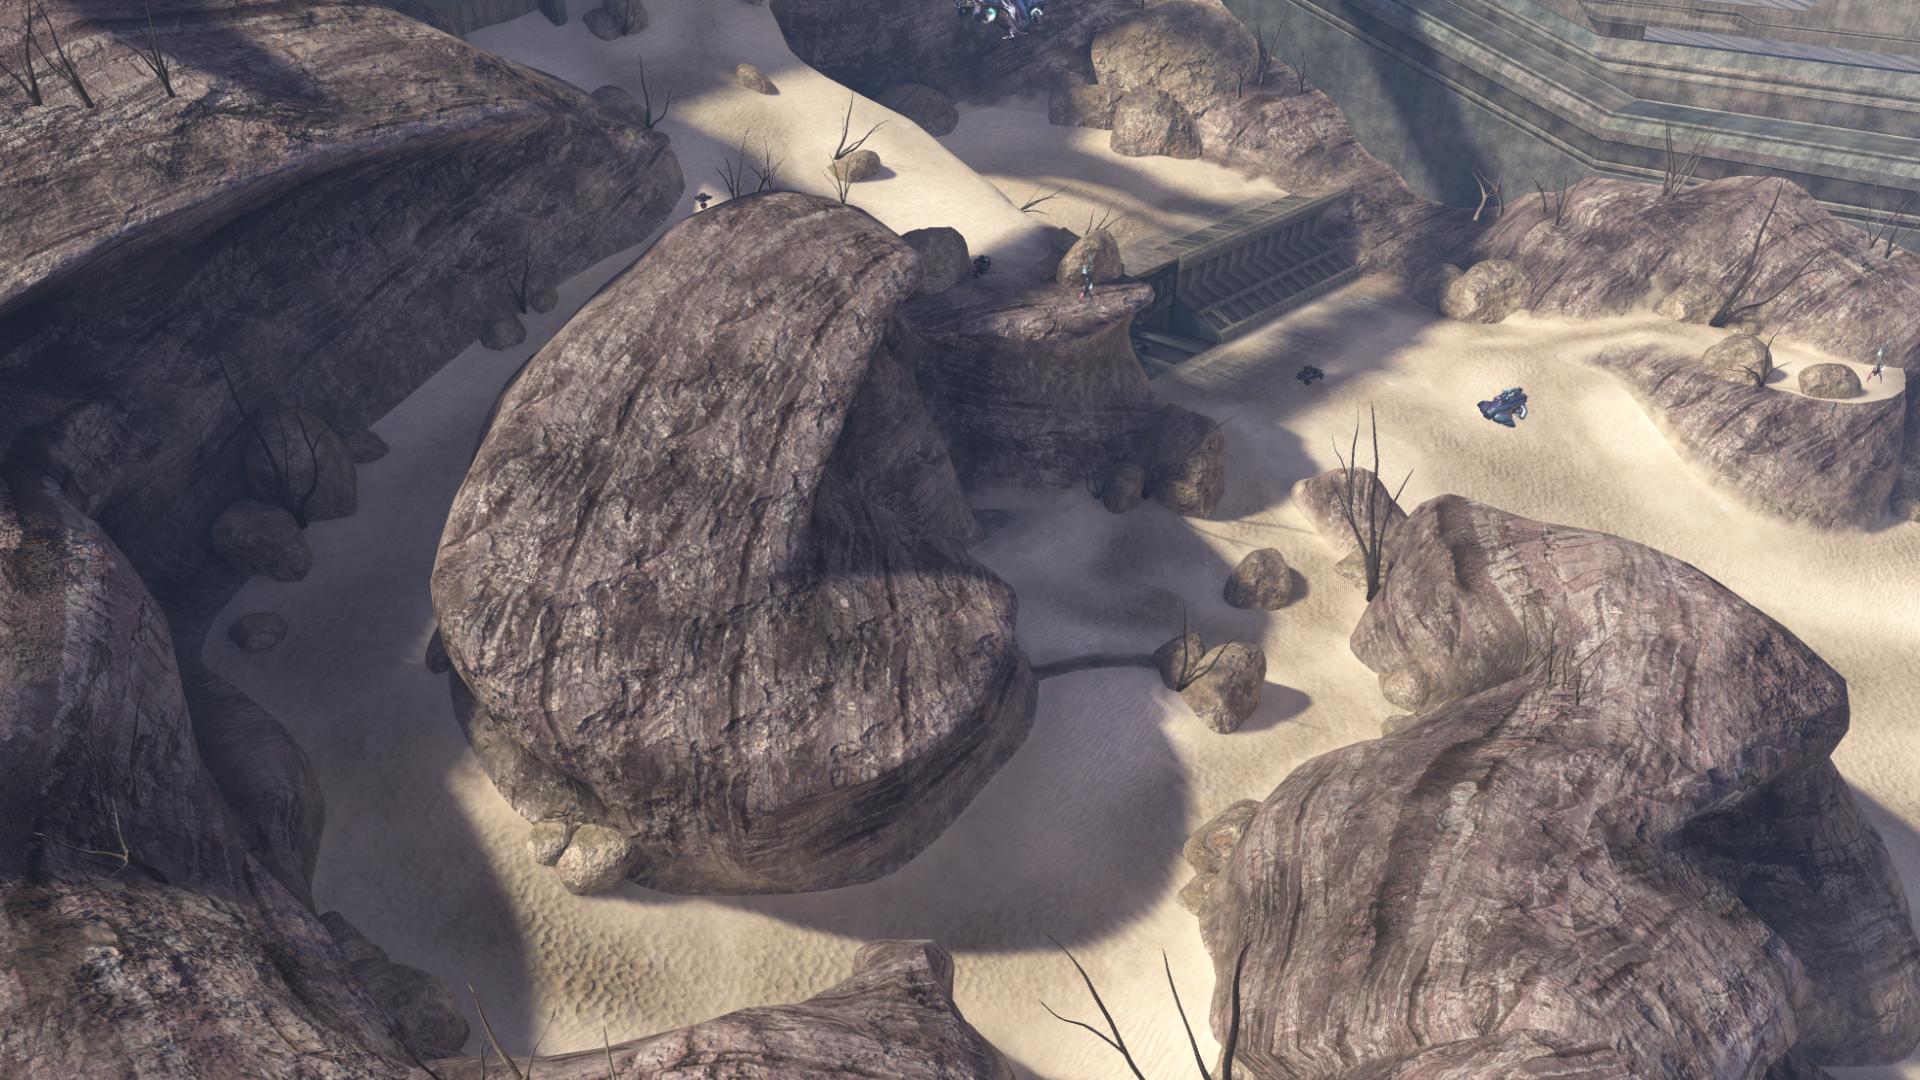
From this location, you’ve got a fantastic view into the next encounter:
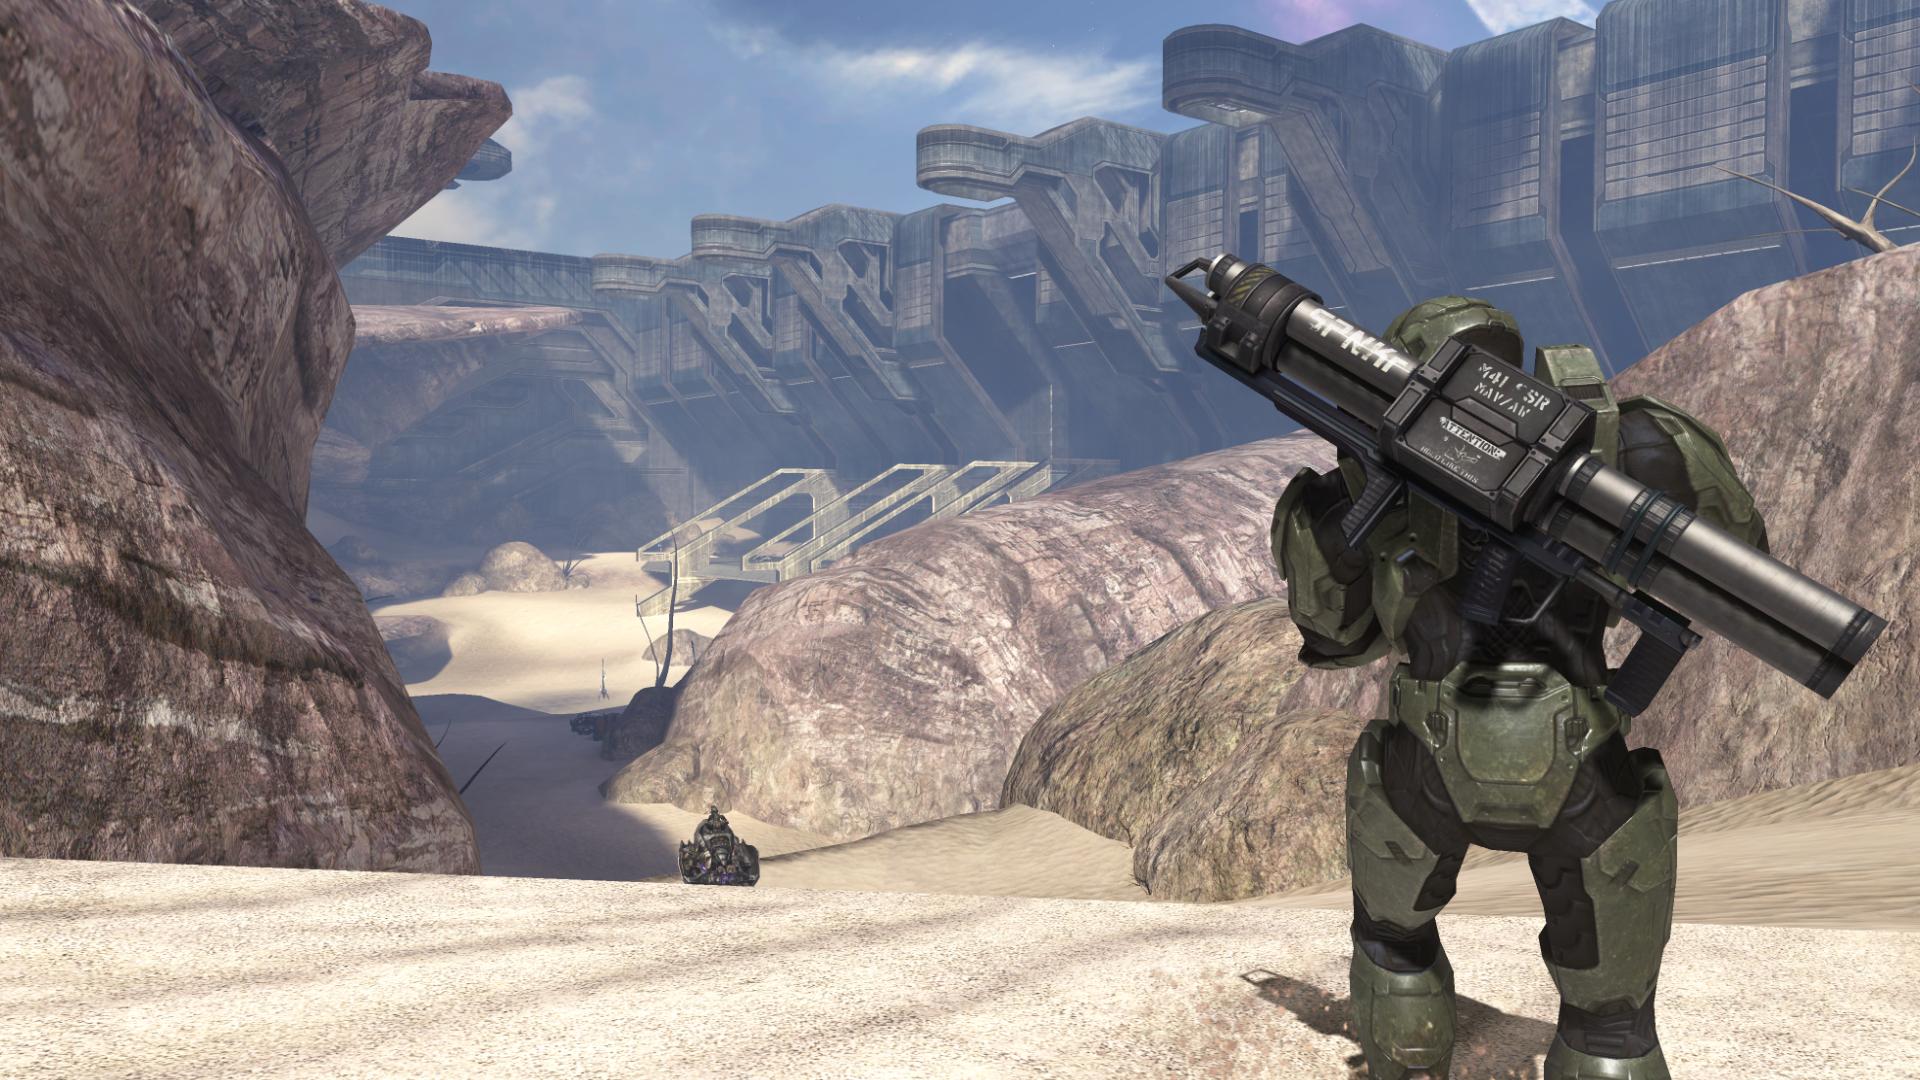
It’s always great when you’re given the chance to look ahead into the next area, since, especially in this case, you can look forward greatly to traversing that terrain.
I must admit, I played through this level for a few weeks without ever really comprehending the layout of it. But the campaign designers really need to be given some credit for this level – its overall layout is really phenomenal. As you drop down over the cliff edge at this section, your obvious choice of direction is to move forward – toward the environment that you’ve been looking at for the past half-minute. You probably won’t even notice that there’s a pathway that leads to your right.
A combination of line-of-sight and clever geometry will keep you moving forward, while keeping the level design a little less linear than normal. We’ll talk more about this after this upcoming encounter.
As soon as you enter the area, there’s a spare Chopper to your left. You can grab it now and use it during this next battle, or save it for later.
Dropping down into the wind-swept basin, you have to do battle with two Brute Choppers, while avoiding a bit of plasma fire from above. Constant Fuel Rod blasts from a barricaded area up above let you know which direction you need to be heading; multiple Grunts – and their Brute leader – await you.
Such an amazing environment doesn’t seem fully utilized by housing just a few Grunts and a Brute…
As you make your way down the bridge, you’ll see some fighting going on up ahead.
“Careful, sir! The Brutes must have tripped the defensive system.” [The Ark, Halo 3]
Sentinels!
Now that you’re back on a Forerunner construct, it’s only natural that these guys make an appearance. With your help, the enemies at the edge of the bridge are quickly disposed of.
Johnson shows up in the back of a Pelican, manning a chain gun (a couple of times, I’ve seen him fire for a few seconds on a dead Brute. Heh).
“Ma’am. We almost got our wings shot off. But we spotted a structure on the other side of this wall; it matches Cortana’s description of the Map Room on the first Halo ring.”
“A Cartographer! Good. It should help us fix Truth’s location. Secure the LZ and we’ll push through that wall.”
“Roger that. Follow my Pelican, Chief. The LZ’s this way.” [The Ark, Halo 3]
So, not only are we closing to securing an LZ for the Dawn, but Johnson has also located the installation’s Map Room, which, as in the first Halo game, will divulge information regarding the installation’s primary locations of interest. The Sentinels will follow you as you drop back down into the basin and follow in Johnson’s general direction.
It’s at this point that you’ll come back to the entrance to the basin area. However, the path naturally winds around to the left, with a steep cliff blocking access to the area you originally came from. The height of the cliff – and the obviousness of your path – is a great work of design. You’ve literally backtracked to your previous point of entry, but there is no chance that you’ll accidentally backtrack any further; no loading trickery must be used to force you down the correct path – nor must Johnson stop and wait, ensuring that you follow him – the natural geometry of the level allows it to be used again without fear of confusion.
Two Ghosts will run upon you as you round the corner and move underneath this next bridge. If you still have your Chopper you can make short work of them.
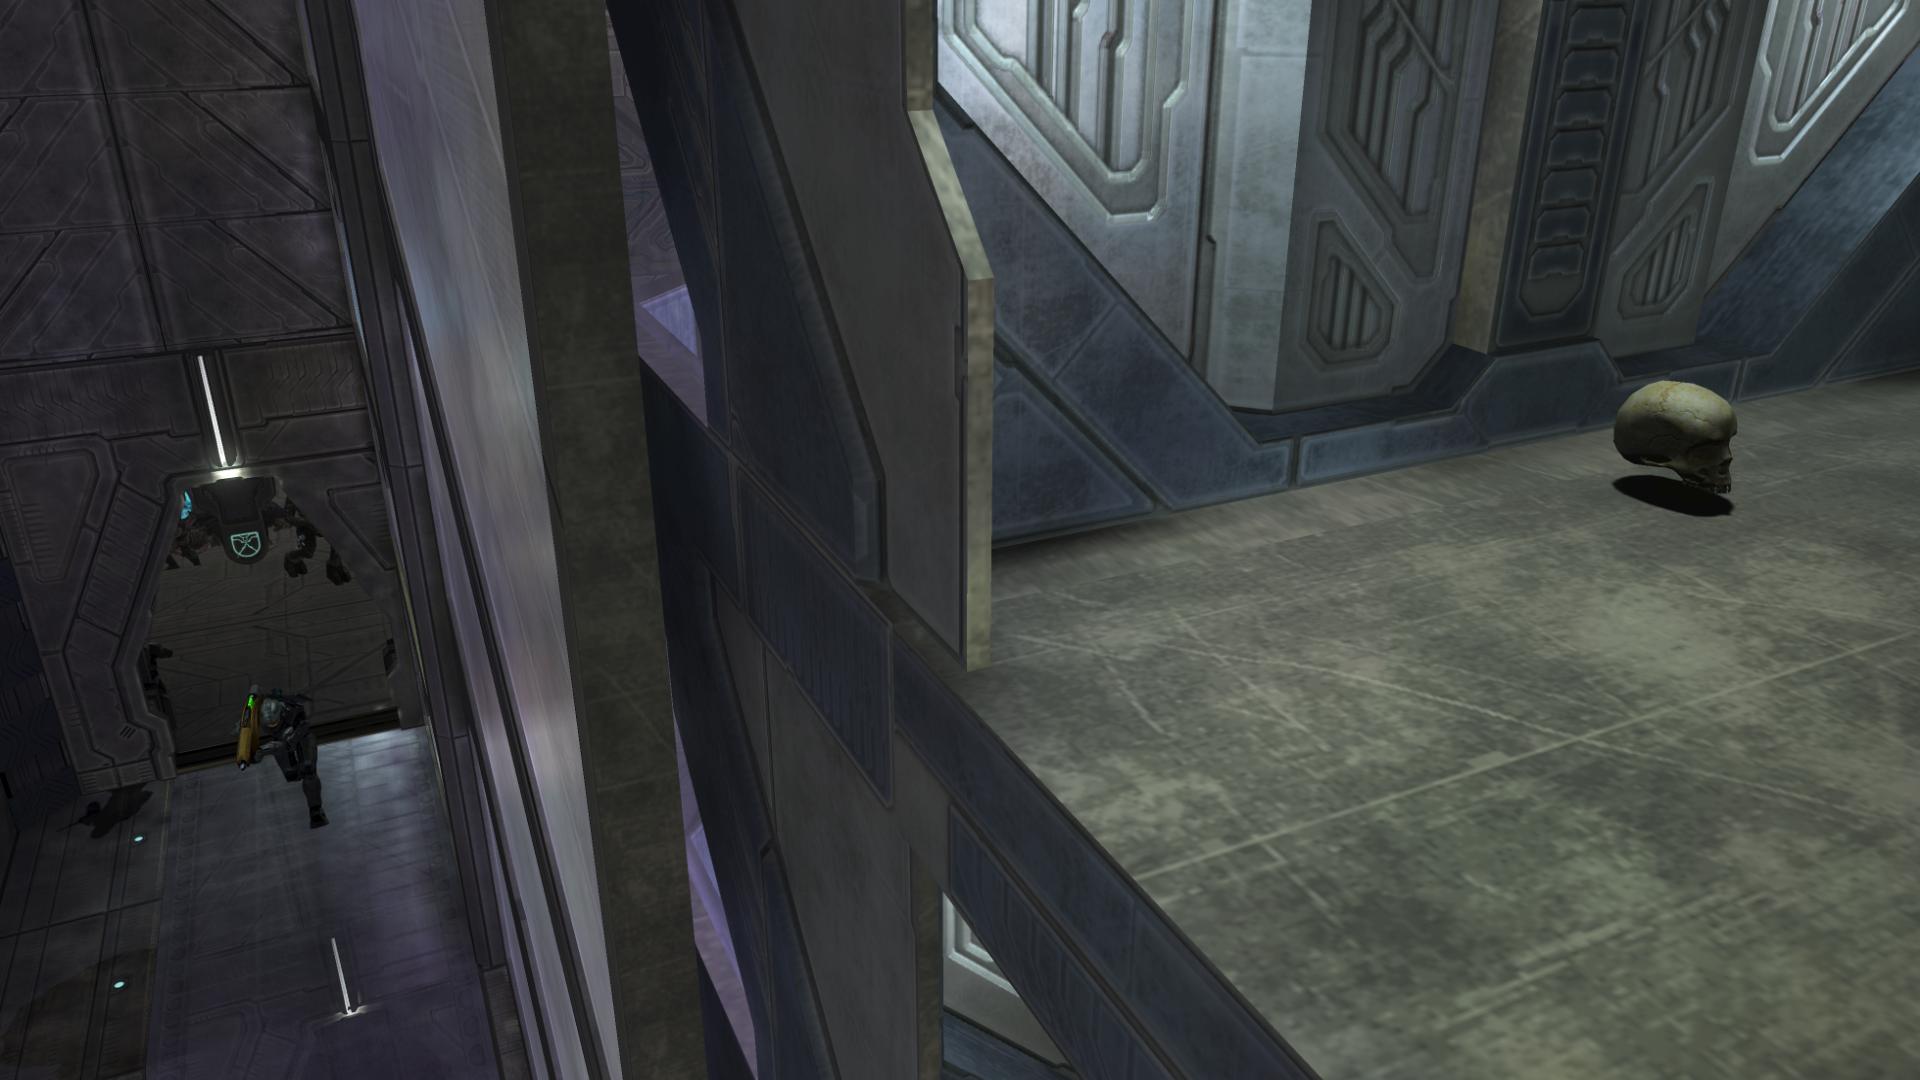
As soon as you move out from underneath the bridge, and begin to turn right, stop; the rocky area to your right can be used to gain access to the bridge, and back near the front of it, you can find the Famine skull.

This skull can be a little tricky to grab. It is placed at the end of a long arch that you can’t access without grenade-jumping or standing up on top of something. Since getting a vehicle up there is a huge pain, I suggest grenade-jumping: placing a grenade at the base of where you need to climb up to, counting its timer, and jumping, with the grenade going off as you reach the height of your jump. If done correctly, you’ll be pushed slightly higher than normal and you’ll gain access to the arch that the skull is sitting on. Most Halo fans have been familiar with this technique for many, many years, so grabbing this skull shouldn’t be a problem.
Moving up the hill, you’ll see a battle taking place in front of the entryway to a small cave. Some Jackals, Ghosts, Grunts and a Brute with a Fuel Rod Gun are pounding some Marines whose Warthog has obviously taken a fatal hit. This section can be a bit frustrating, since the Ghosts can take you out pretty quickly if they turn their attention to you when you aren’t ready. And when the AI controls a Fuel Rod Gun, the mortars have a slight tracking ability, which will take you out if you don’t make wide enough moves to get out of their way. I typically find myself ditching whatever vehicle I’m in and making use of any equipment and weapons that I have – usually a Bubble Shield and some rockets that I’ve been holding onto since the Pelican crash site we went through earlier (if I didn’t give them to a Marine).
Your choices early on in this level will play a major role in how you confront its encounters. In this next encounter, for example, I seem to have the most fun if I’ve got a Warthog and a Marine with a Fuel Rod Gun in the passenger seat. Sometimes, however, I’m not able to keep my ‘hog alive long enough, and consquently, this next encounter will play out entirely different from how it most often does.
Speaking of the Fuel Rod Gun, one thing that’s really cool to see is how its blasts will ricochet off the ground sometimes. If they hit at a certain angle, instead of exploding, they’ll just arc back upward. This adds a lot visually to fights, since it results in some rounds blasting the enemy, and the ground nearby, and others arcing through the air.
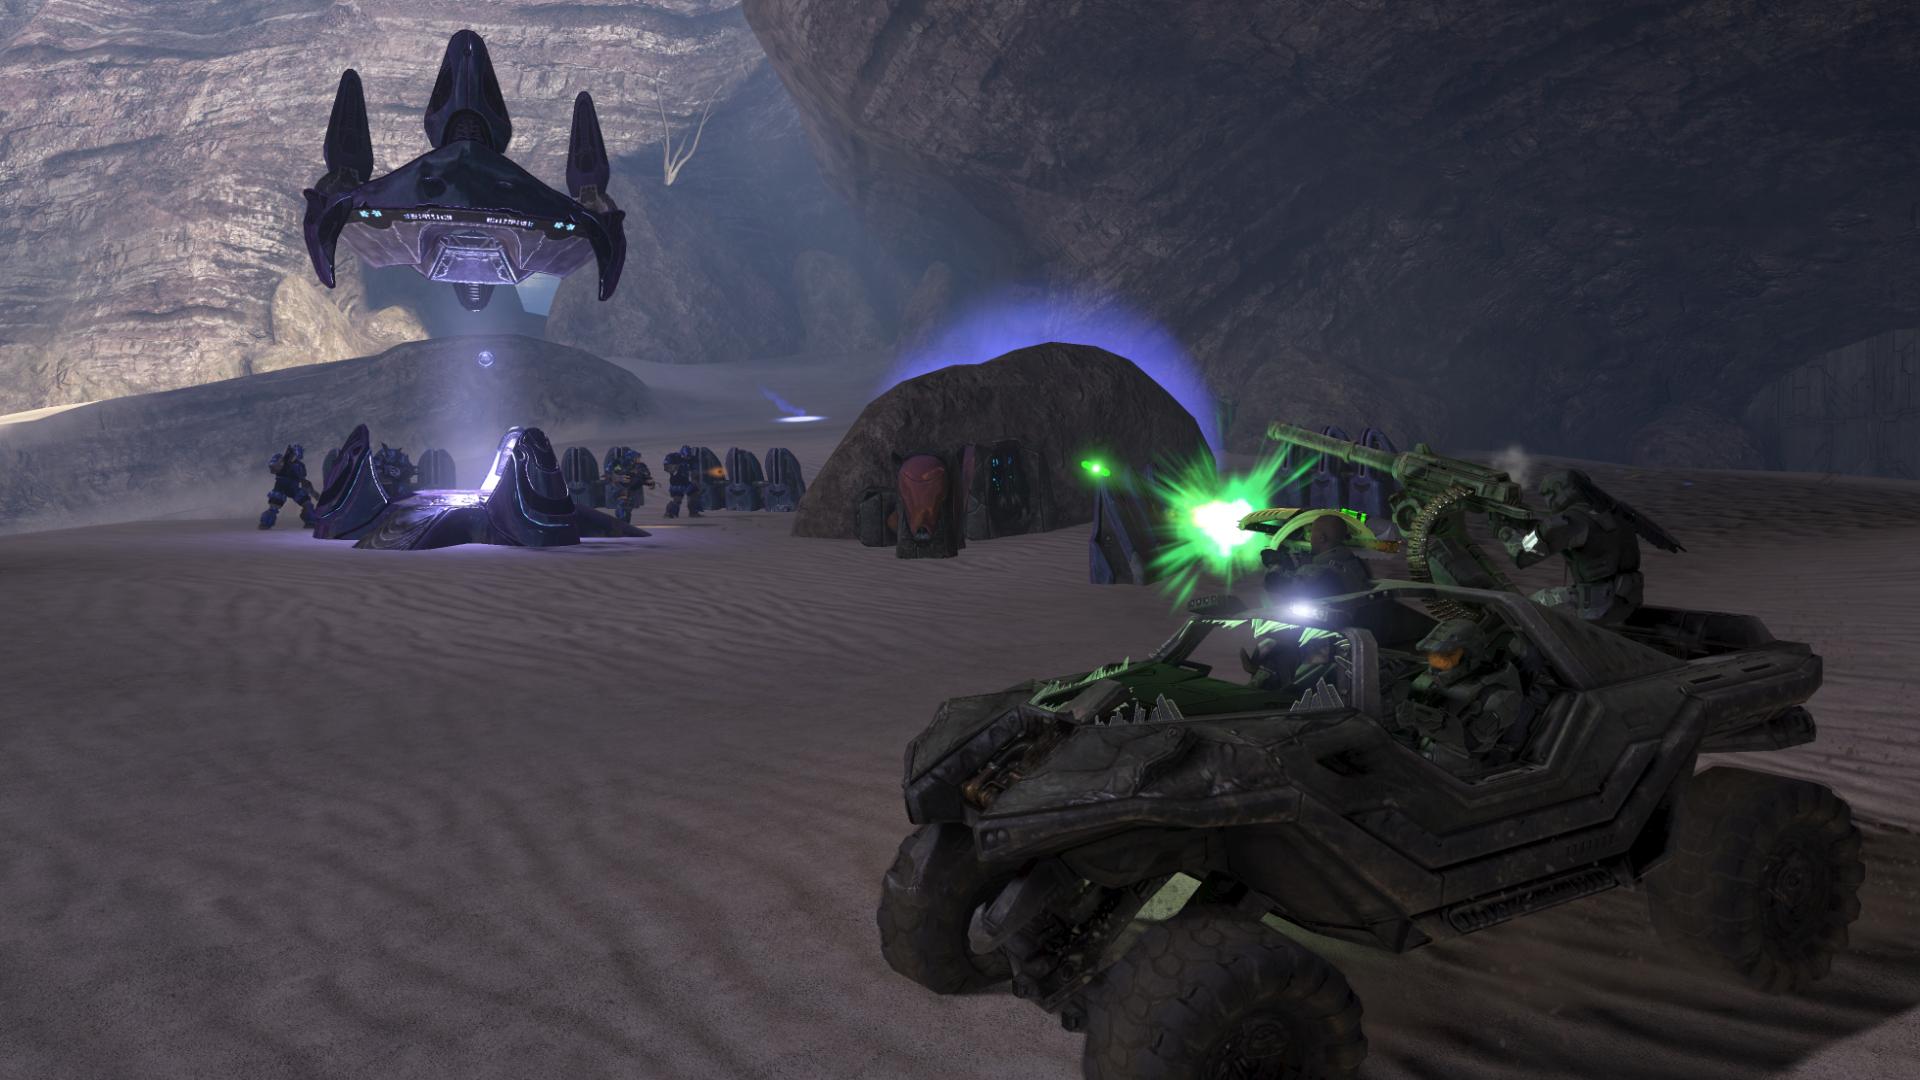
Exiting the cave, I’m often reminded of that moment from Assault on the Control Room (if you typically took the cave, rather than the canyon on the left): you emerge from a safe, enclosed area to find a Covenant army – multiple Wraiths, and enough enemies on foot to keep you busy. Although, admittedly, the encounter on Halo 1 seemed a bit more epic. That feeling won’t hold true for much longer, though…
The Anti-Air Wraiths from the The Storm are back – they’re assisting their Banshee allies by attacking some Hornets in the sky.
Like I was saying before, this encounter can play out a variety of ways based on the choices you’ve made earlier on in the level. Personally, I think that I have the most fun when I have a Warthog loaded up with a Fuel Rod Gun Marine and a gunner that seems to know what he’s doing. For whatever reason, I always find myself tackling the troops on the left first. Multiple Brutes armed with Brute Shots can be hazardous to your health if you slow down near them. I enjoy making a wide sweep around them and letting my Marines take care of things – you can drop down into the rift in the middle for cover while you make your way back around for another pass. A natural land-bridge assists in keeping you safe.
The music being played here is a very memorable theme first used in Halo 1. It was known back then as “On a Pale Horse,” and it was used during Two Betrayals as you were making your way across one of the sky bridges. Every time I hear that theme, I expect to also hear the accompanying “whoosh” of the Banshee… it does not happen here, but, somehow, I am perfectly okay with that.
It is such a blast to blow through these enemies with a Fuel Rod Gun Marine in your ‘hog. I’ll oftentimes kill myself if he dies, just so I can experience the entire encounter with him.
You also have the option of taking out the Wraith on the right first. It starts out with its back turned toward you, exposing its weak point. But unless your Marines are really good shots, it will quickly turn around and begin hurling mortars your way. It also has a gunner, who is nearly as deadly as the mortars.
After taking out the troops on the left and Wraith on the right, I usually ditch whatever vehicle I’m in and steal back my Rockets or Fuel Rod Gun from a Marine. There’s an interesting piece of rock that’s provided cover for more Covenant troops while you’ve assaulted their allies. Before you can tackle the Anti-Air Wraiths, you have to take out a Fuel Rod Gun-toting Grunt and his pals. Not to mention the Grunt at the top of a gravity platform who’s manning a plasma turret. It’s especially satisfying to knock down those platforms and their inhabitants with a blast or two from a Fuel Rod Gun.
This next moment left me breathless, as I’m sure it did many of you, the first time that I experienced it.
“Commander? Bring her down.”
“Roger that. Beginning my descent.”
“Look! Up high! Here she comes!”
“Is the Dawn rated for atmosphere?”
“Guess we’re gonna find out… hey! Take cover!” [The Ark, Halo 3]
The Forward Unto Dawn starts out as a literal speck on the horizon and quickly becomes an unbelievably huge behemoth of a ship, slowing as it nears, nose pointed upward as it settles into position overhead.
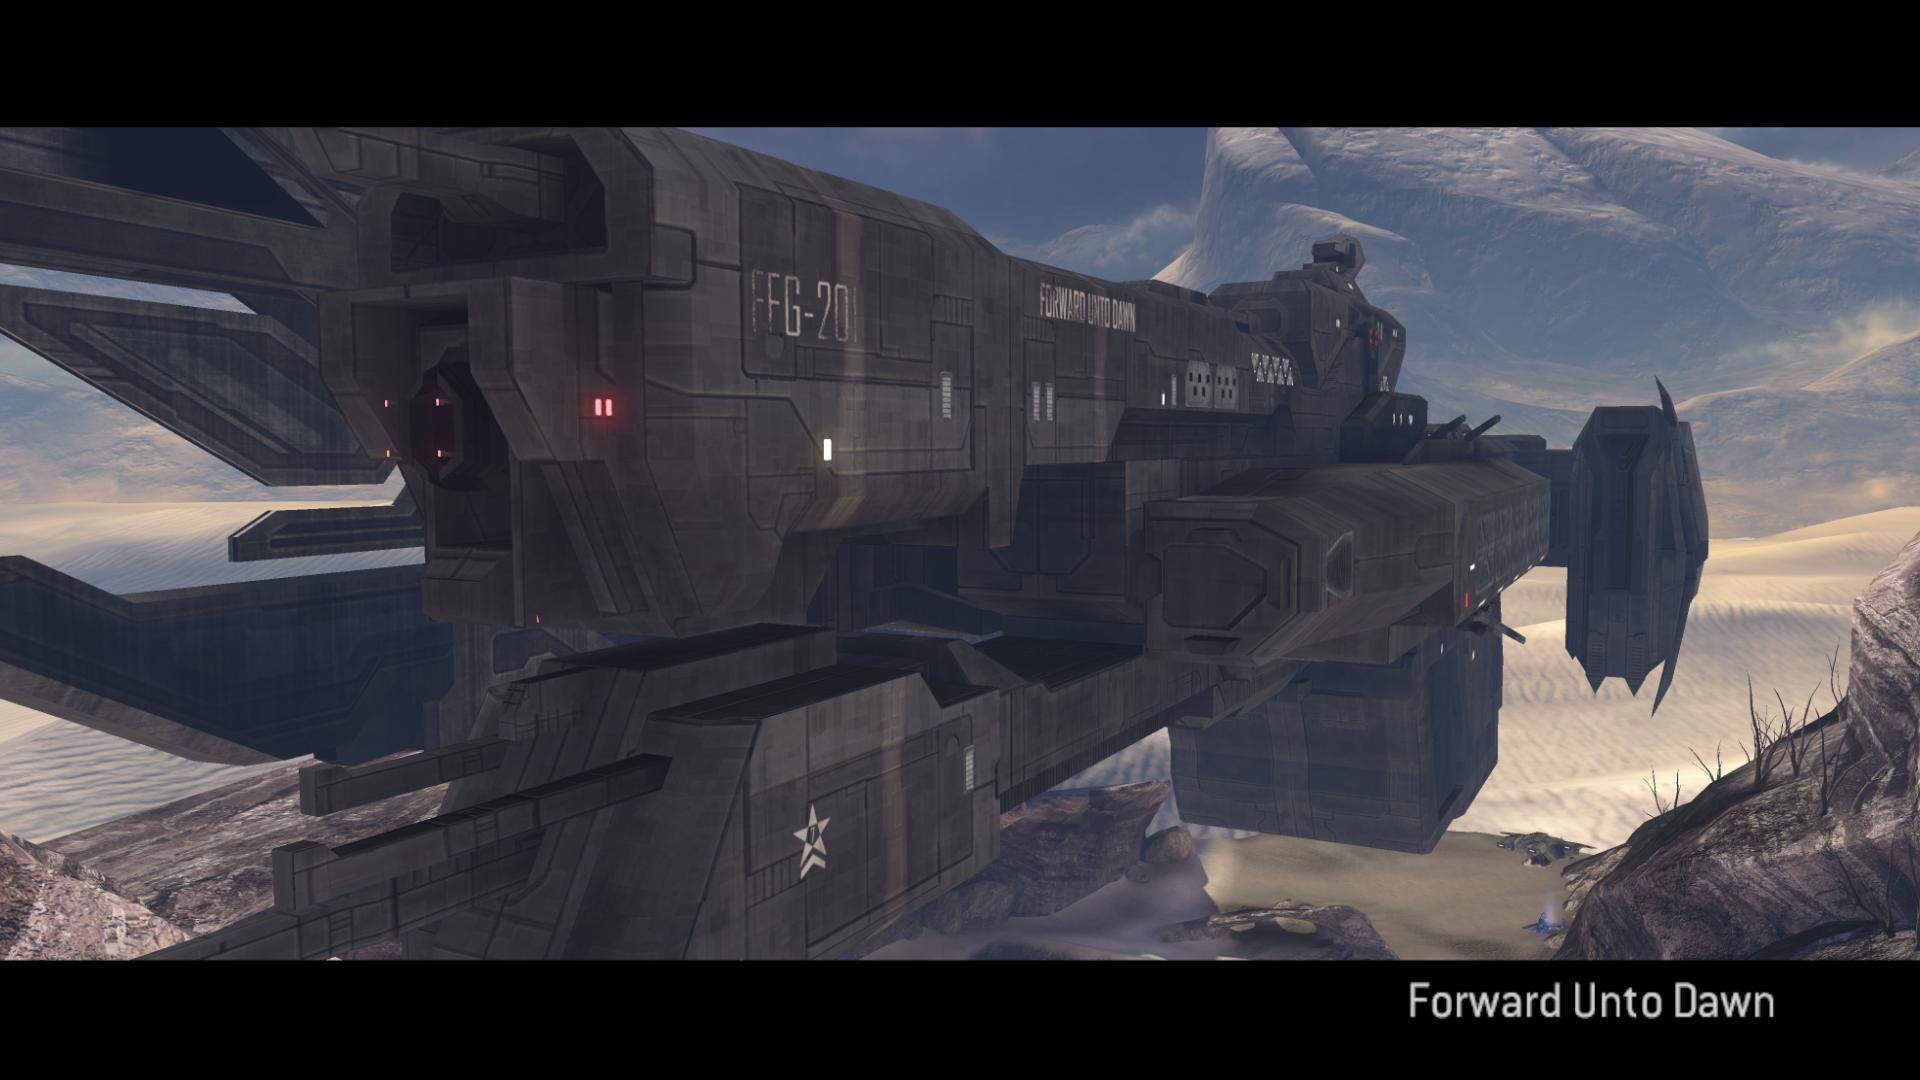
Accentuating the moment, Marty uses what is, in my opinion, one of the most beautifully elegant musical pieces from the entire trilogy. I do not know the name of it, or if it even has a name that has been publicly released, but every Halo fan can remember when it was first used – during the second level, Halo, of the first game, as you emerged from the first underground cavern (“Someone built it, so it must lead somewhere!”). The words “Reunion Tour” came up at the bottom of the screen as you, and your Marine pals, exited the cavern on your Warthog – with the full beauty of Halo’s rolling hills on display in front of you. I, personally, will never forget that moment, and Marty draws perfectly from that nostalgic well by using that theme at this time.
Another ingredient to this epic moment is how every piece of debris underneath the Dawn will be blown away as the frigate settles into place: Warthog, Wraith, gravity platform – they are all equally insignificant.
And yet another ingredient is the Marines that come out of the Pelican: for whatever reason, the first few do this “slow-walk” that makes them look awesome. I wonder if Bungie did that on purpose.
Before we move forward, let me apologize for the out-of-map shot. I typically don’t try to use any screenshots that aren’t easily replicable, but that one was too good to resist. And, besides, it is easy to do. If you’re facing the mountains, looking out at the sky (where the Dawn approached from), drop down the cliff to your left while in saved films mode. There’s a hole at the bottom that you can slip the camera through to gain access to a wider area, including the place that I took the latter screenshot of the Dawn from.
“Thanks, Chief. Wouldn’t have lasted much longer up there. Come to the back of the frigate. Did the Elites get a fix on the Cartographer?”
“Yes ma’am. Just through the other side of that wall. But it’s surrounded by Brute heavy armour.”
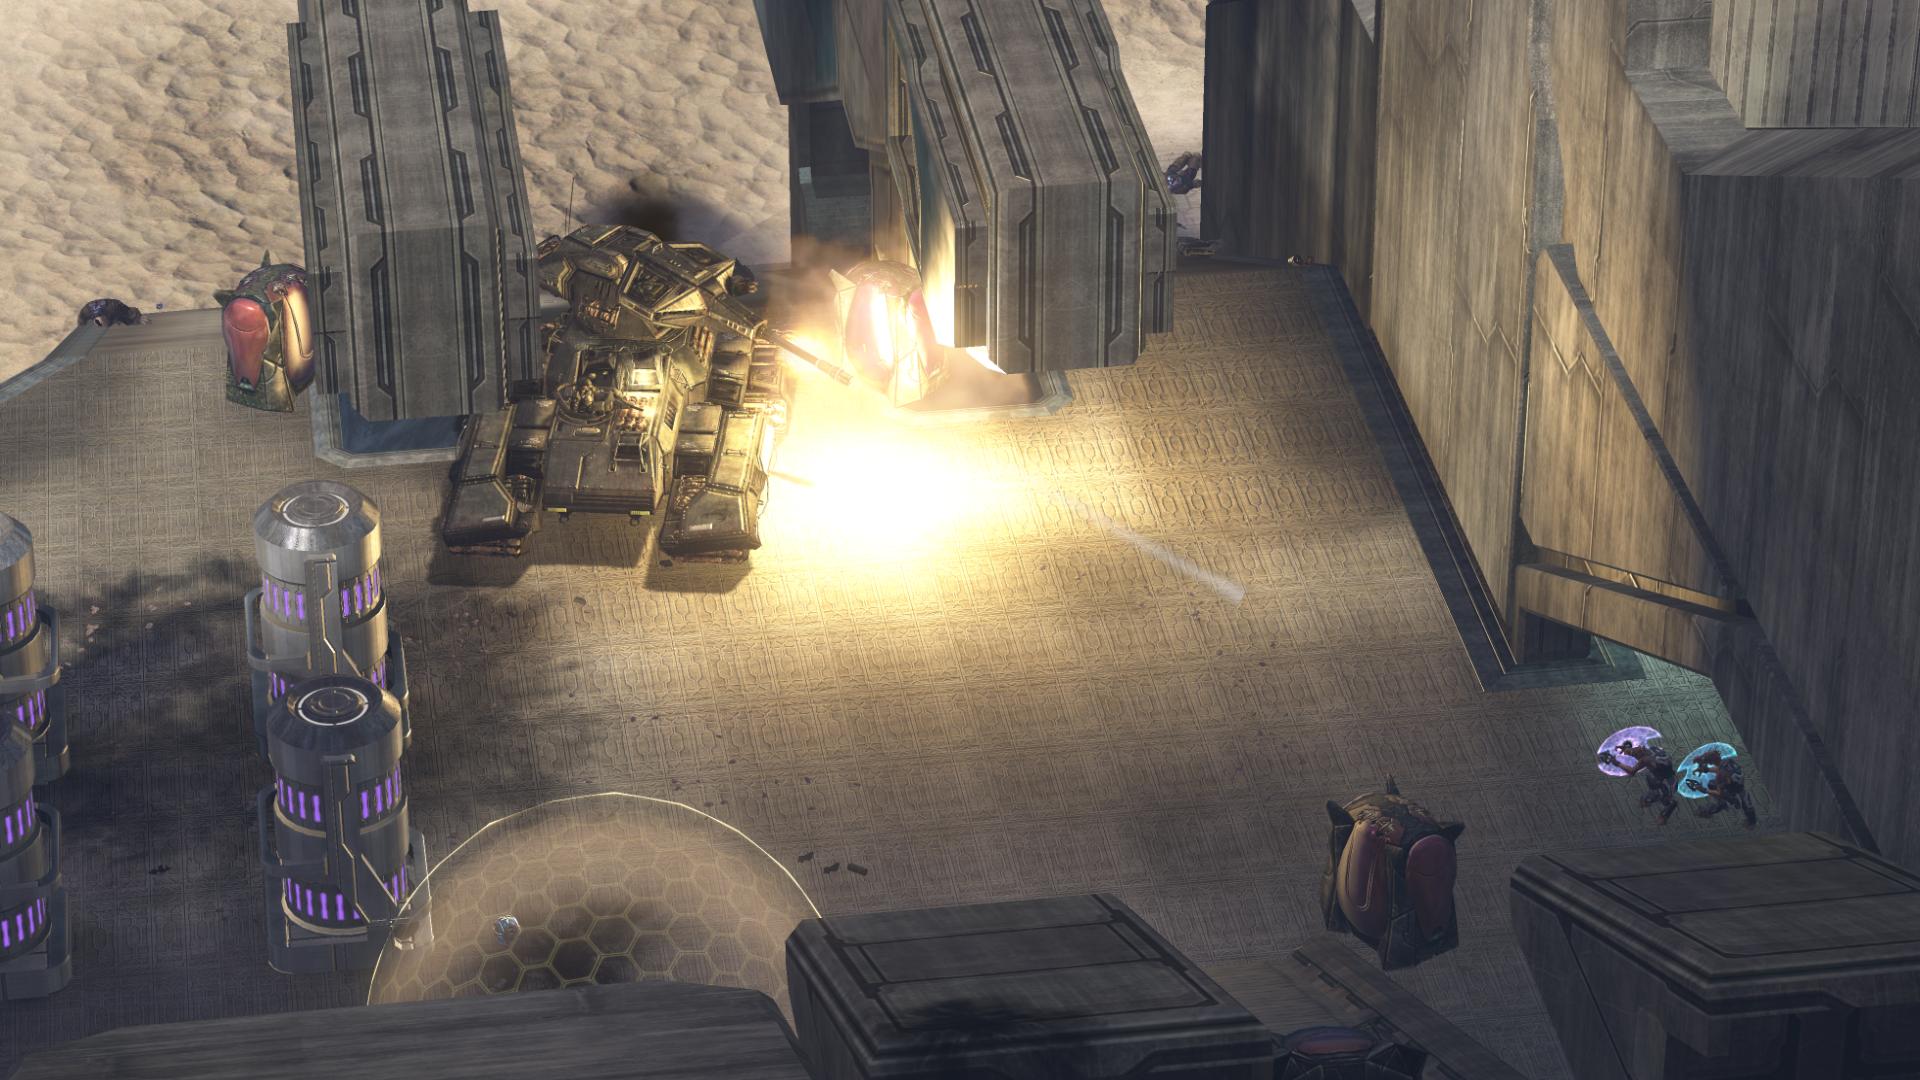
“Don’t worry; I’ve got a plan: if we can’t fly over the wall, we’ll go right through it. Chief, take one of the tanks; lead the way. If you find any locked doors, Spark will be happy to pry them open.”
“I will certainly try my best, though I am unfamiliar with this facility.” [The Ark, Halo 3]
You’ll sometimes hear a Marine humming “The Ride of the Valkyries,” which was made famous by the movie “Apocalypse Now,” in which a small army of helicopters assaults a coastal town while this Richard Wagner piece plays.
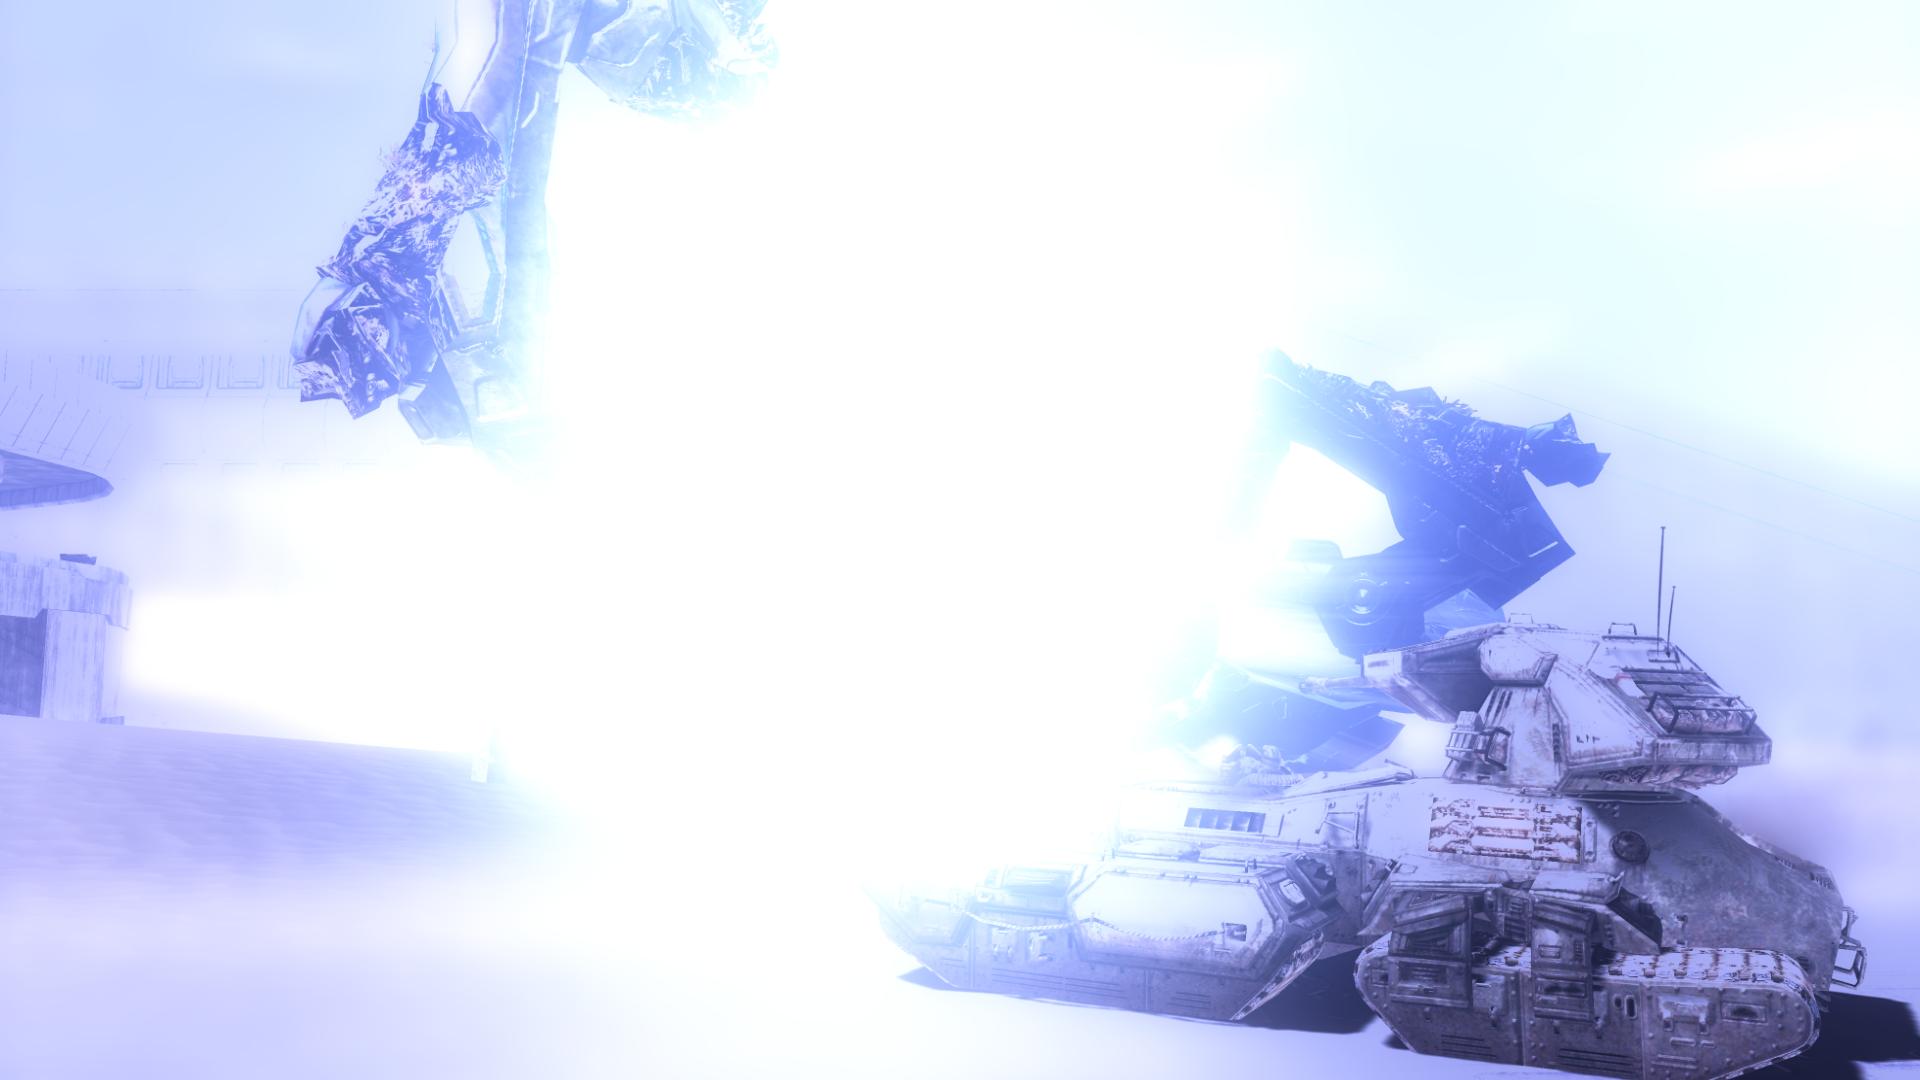
Considering that this is the most powerful fleet we’ve ever been given control over in a Halo game, I think that the Marine has chosen an appropriate tune. I also like Marine that says, “Hey, how does ninety millimeters of Tungsten strike ya?” as soon as you start decimating the incoming enemy vehicles.
Enemies that previously posed a threat are now, literally, harmless.
By now, the whole “Tank beats Ghost… tank beats Hunter… tank beats everything!” line should be familiar to all Halo fans. The last part of that line is delivered as you use the tank to bring down the Phantom.
“Oh, man! I could do this all day.” [The Ark, Halo 3]
Me too, buddy.
Backtracking, which many people tend to lodge a complaint against, is perfectly okay in this scenario, for me, at least. Now that I’ve got three tanks, I’m ready, willing, and eager to see what the Covenant have to throw at me. It almost makes it more fun that I’m retrodding ground that I’ve already taken from them; like I’m kicking them when they’re down.
The Marines have some funny lines here, like “Killtacular!” and one that I especially like, delivered by Alan Tudyk in his perfect “Wash” voice: “That was a lot of guys dying at once!”
The gravity platform encampment that you come to before you re-enter the basin area wields you two Fuel Rod Gun, which I typically stop and pick up.
The basin encounter is a classic tank level – Wraiths in the distance and Ghosts that make their way toward you.
Although we’ve already been here before, now’s a good time to look at the unique landscapes that make up this area. Two shelves make up a three-tiered area on the left side of the basin. A tunnel leads from the floor to the middle shelf, which, if you’re driving a Warthog here as opposed to the tank, can prove very useful in getting away from Phantom and Wraith fire. In fact, this area can be just as much fun in a Warthog as it can be in a tank. Lastly, a shelf overhangs the entire left side, which sort of reminds me of the Sydney Opera House. Overall, it is an environment that looks amazing and plays amazing; it makes for a classic Halo encounter.
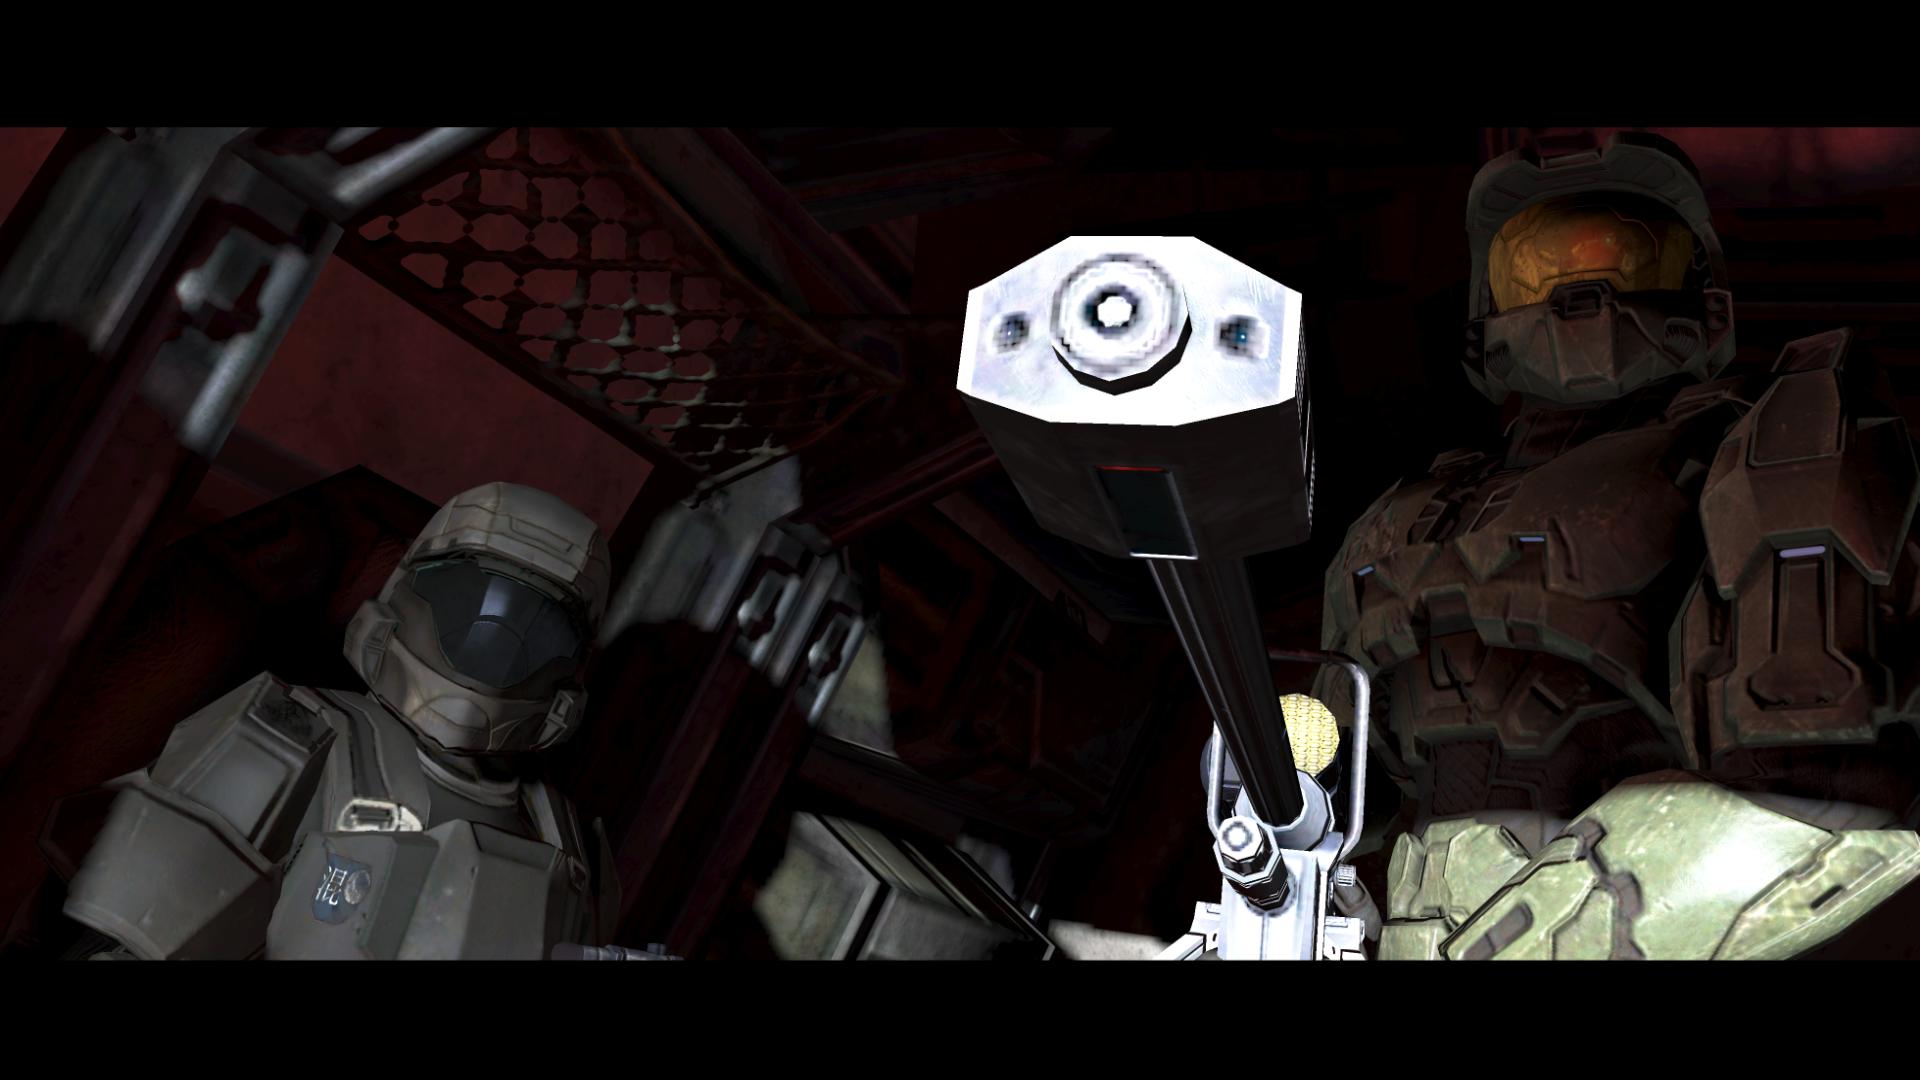
“Chief, get upstairs; have your robot pick that lock!”
“I beg your pardon? I am 343 Guilty Spark, Monitor of Installation Zero-Four!”
“Yeah, well, you’re also our ticket through this wall. So if you don’t mind?”
“I will gladly aid the Reclaimer’s progress.” [The Ark, Halo 3]
I love this exchange; it’s interesting to see how a Marine in an authority position refers to the Monitor, with whom he has likely spent almost no time.
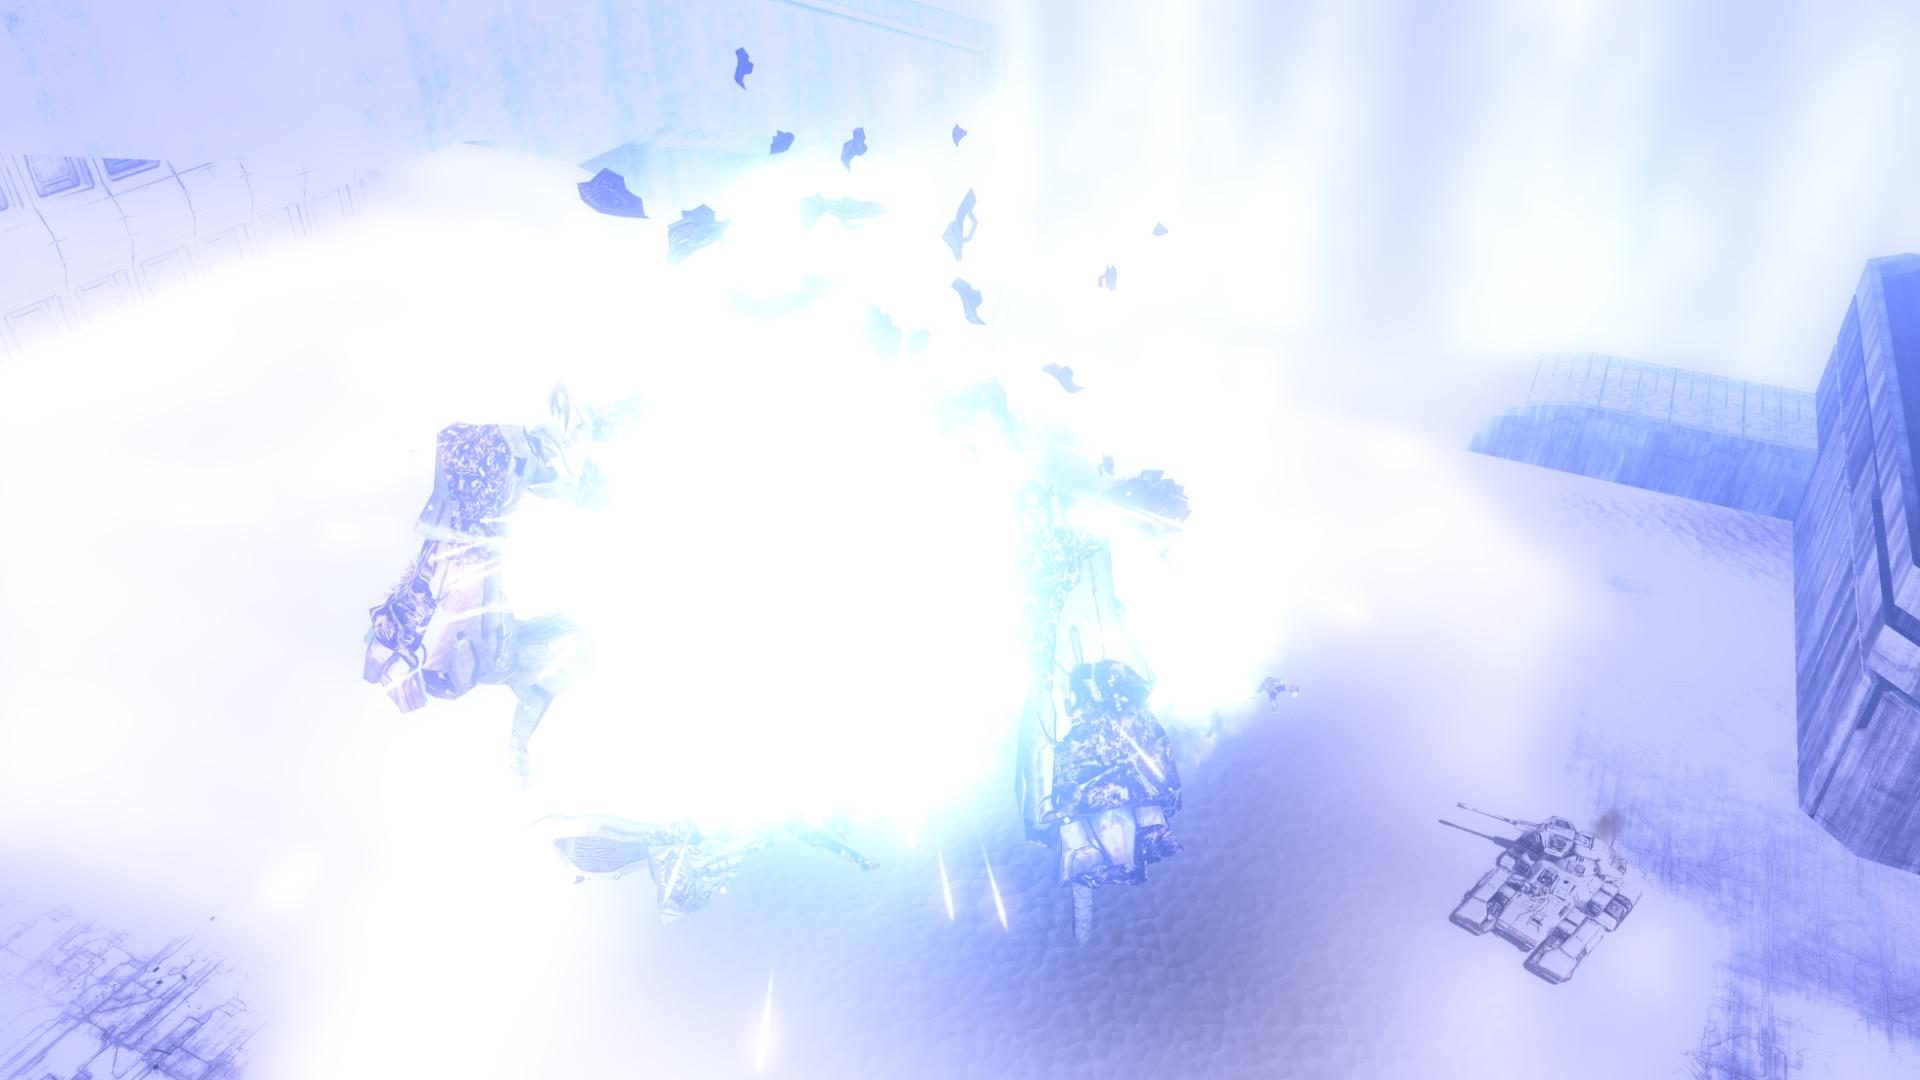
Taking down Phantoms while in the tank is extremely satisfying. Unfortunately, you’re left with a pile of wreckage to navigate through. And by “unfortunately,” I mean “awesomely.”
After you’re finished obliterating the enemy forces, the Monitor will open the previously locked door for you, noting:
“Please, use caution; avoid collateral damage. While this facility appears quite durable on the surface, no doubt there are delicate facilities below the facade. Odd, for a door to require such brute force security protocols. One moment, Reclaimer.” [The Ark, Halo 3]
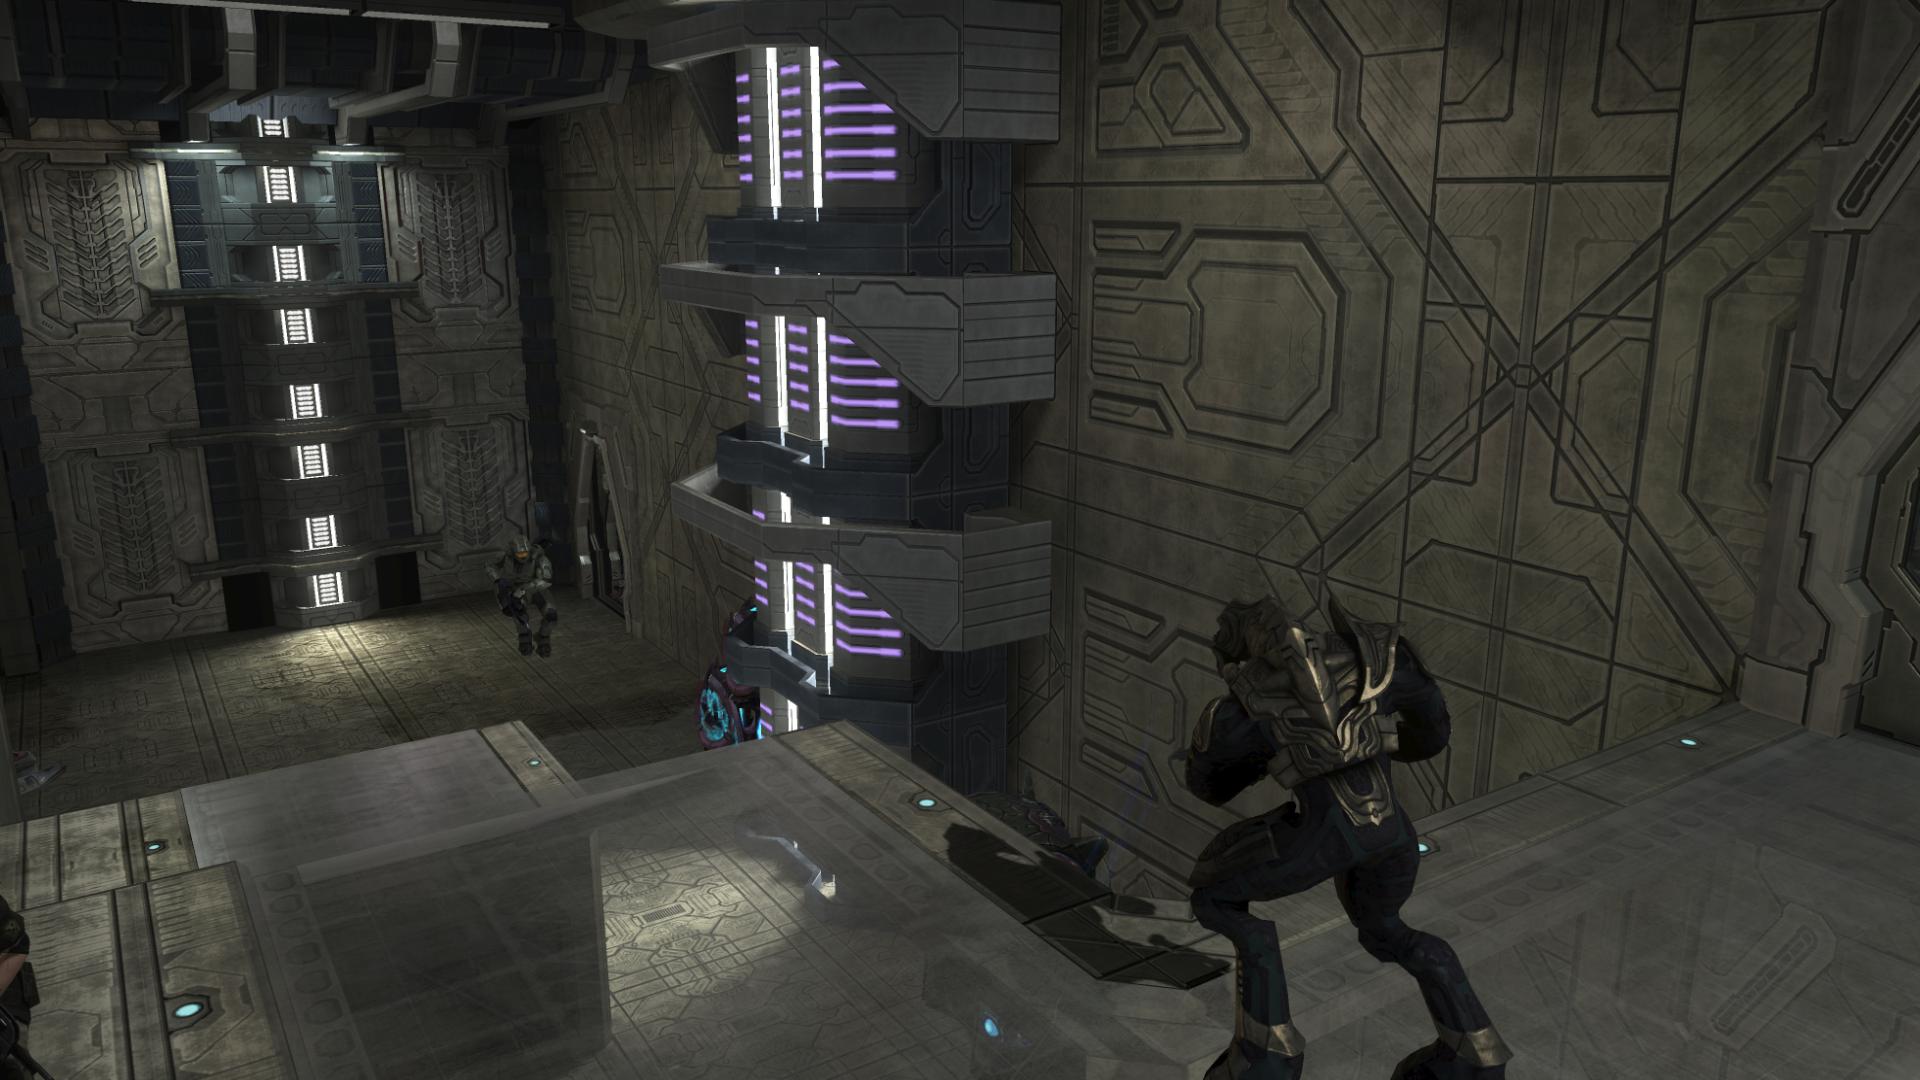
Once inside, you’re greeted with the familiar hum of the Sentinels as they accompany yourself and the Monitor down an incline. As you progress, you can see through a series of transparent windows on your left a room which awaits you. There are Sentinels in here, and I find it funny that they watch you as you move around. The Monitor opens a second door and follows you into a tall, very Forerunner-esque room.
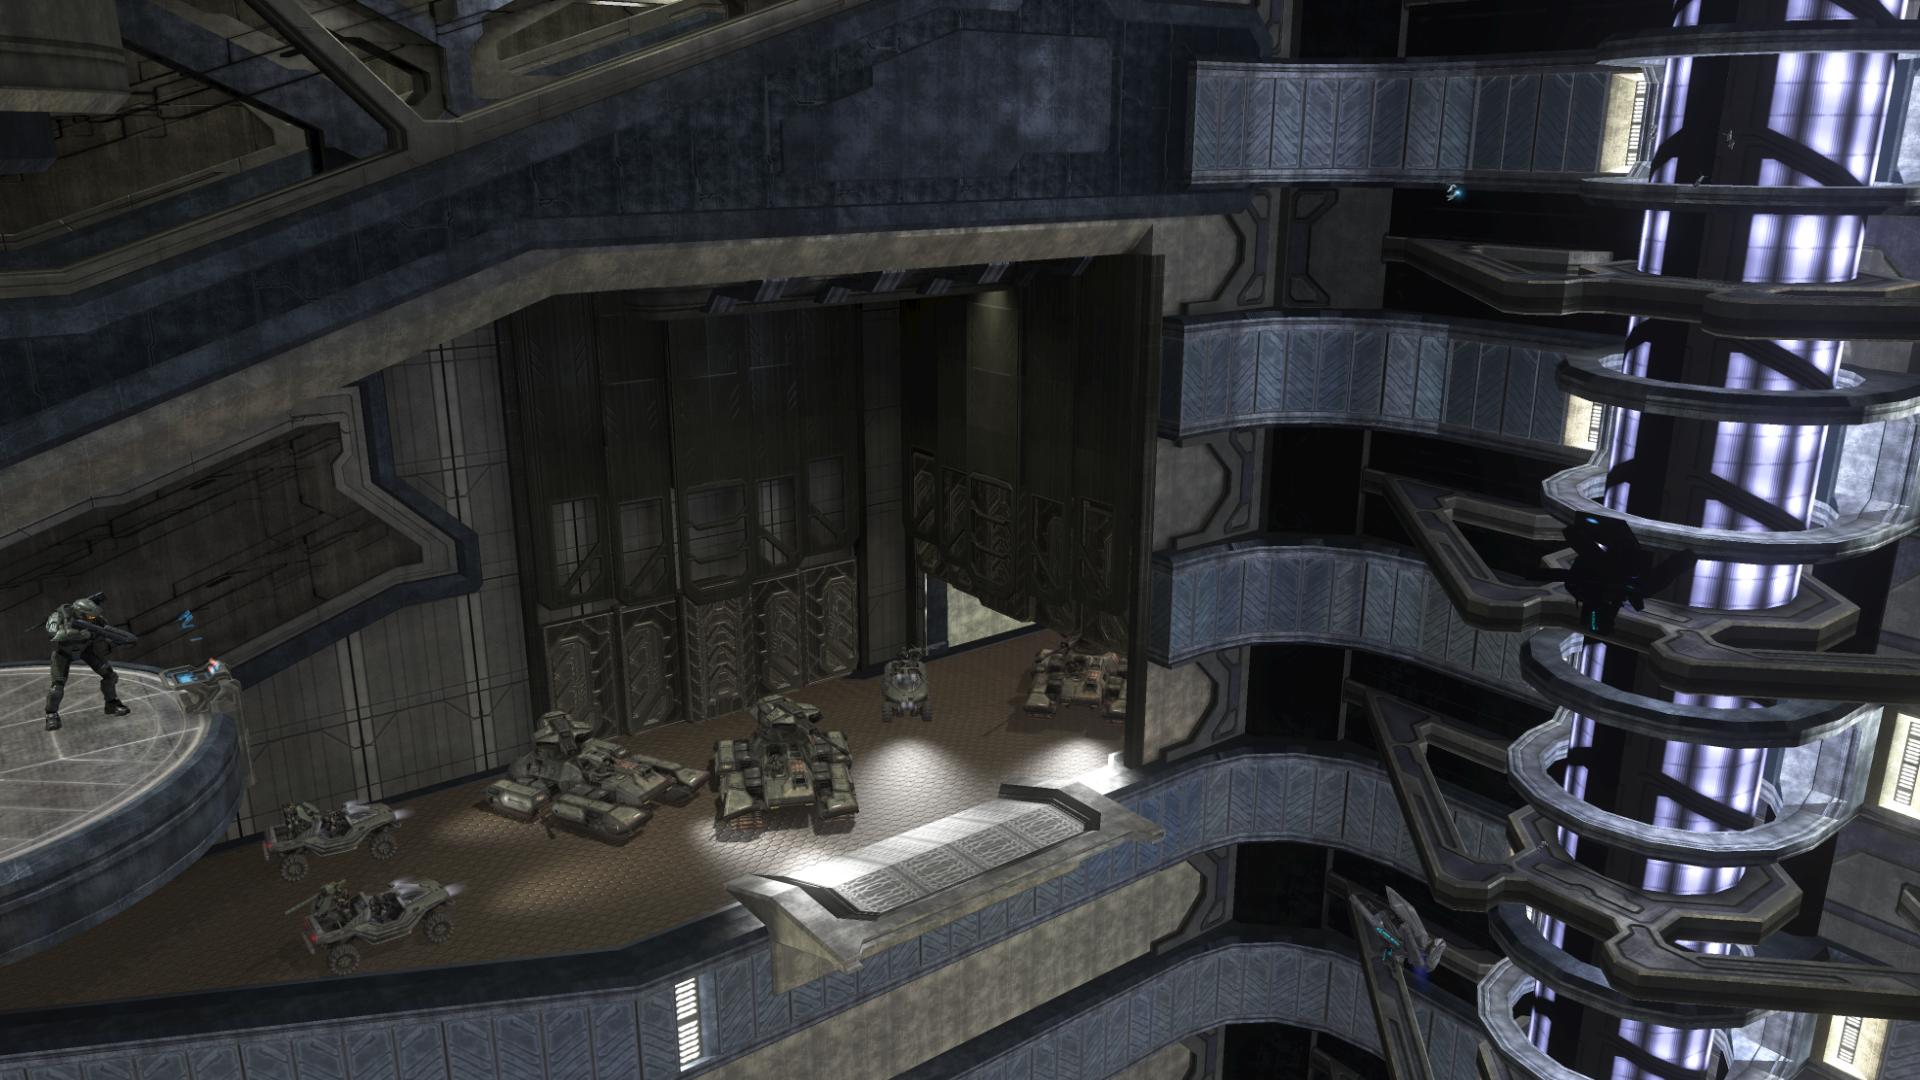
“Here; this panel will activate a bridge and allow your companions to cross below.” [The Ark, Halo 3]
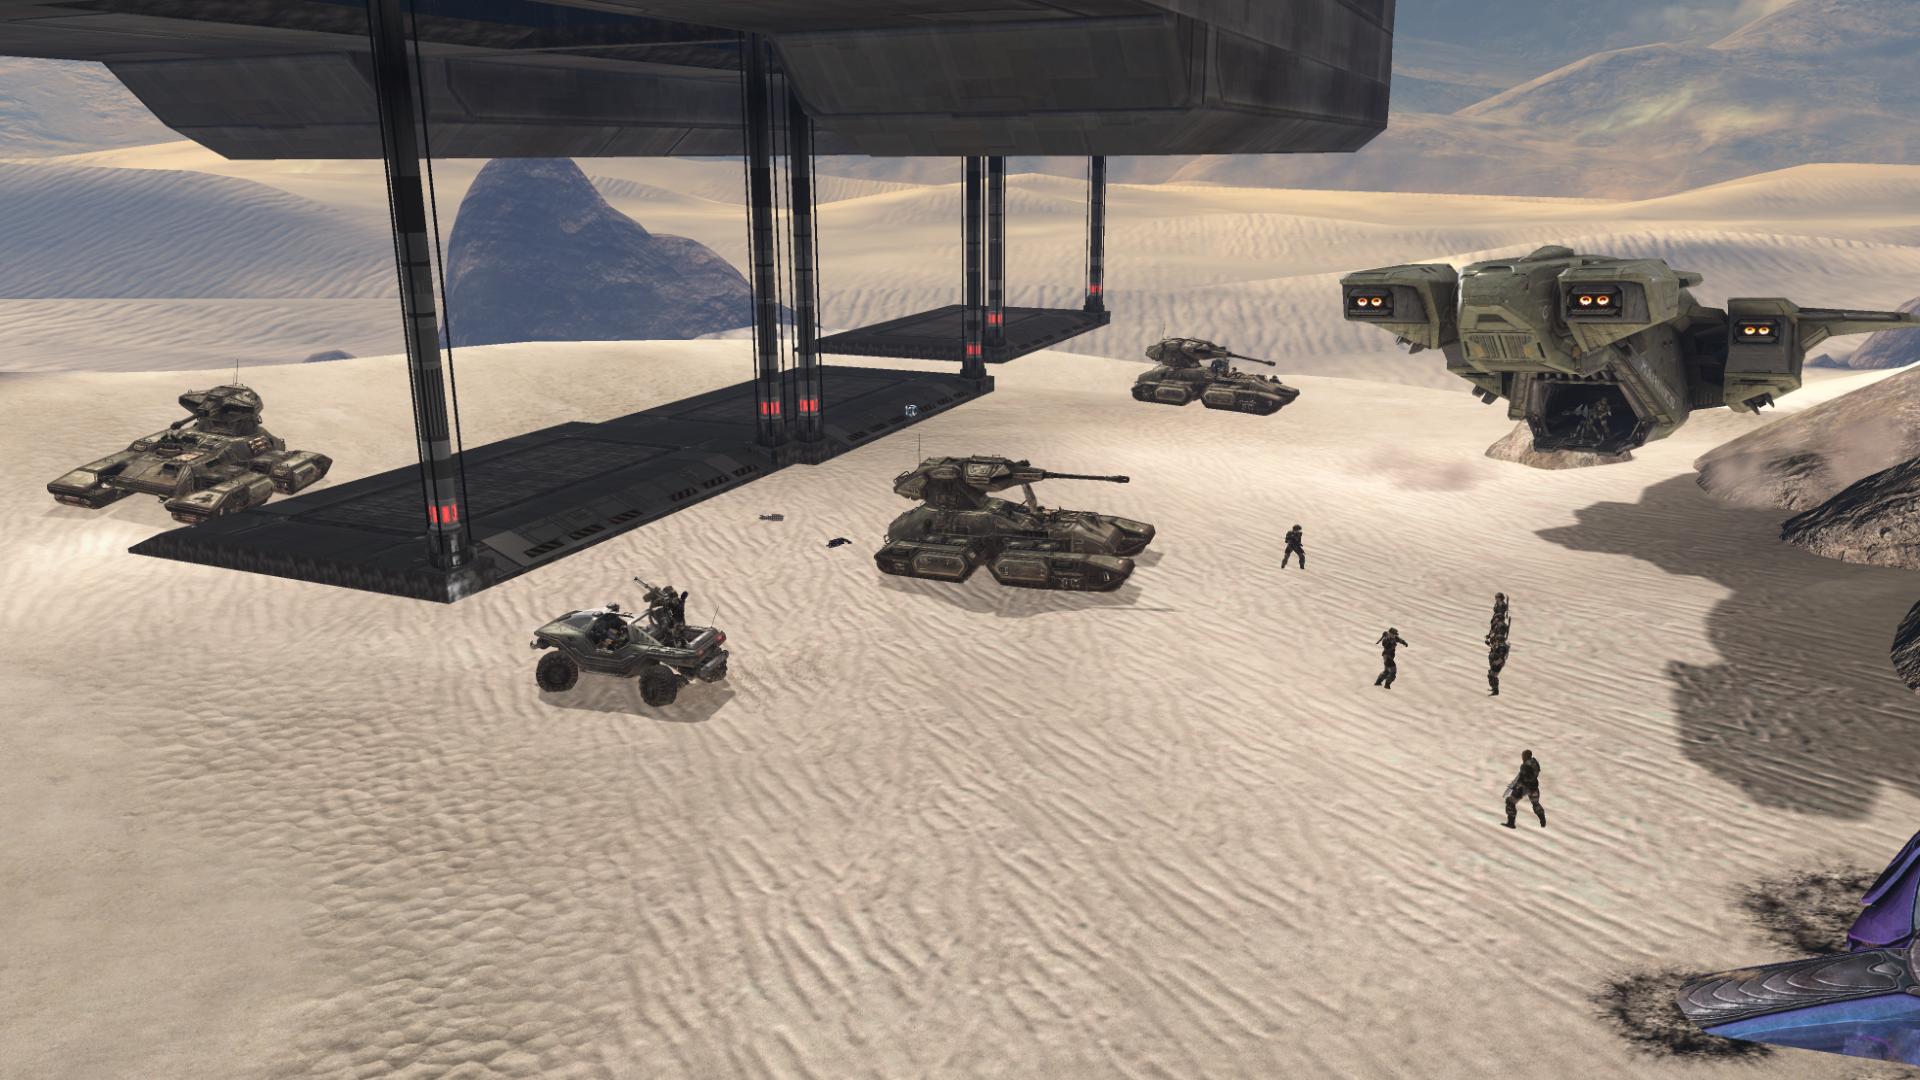
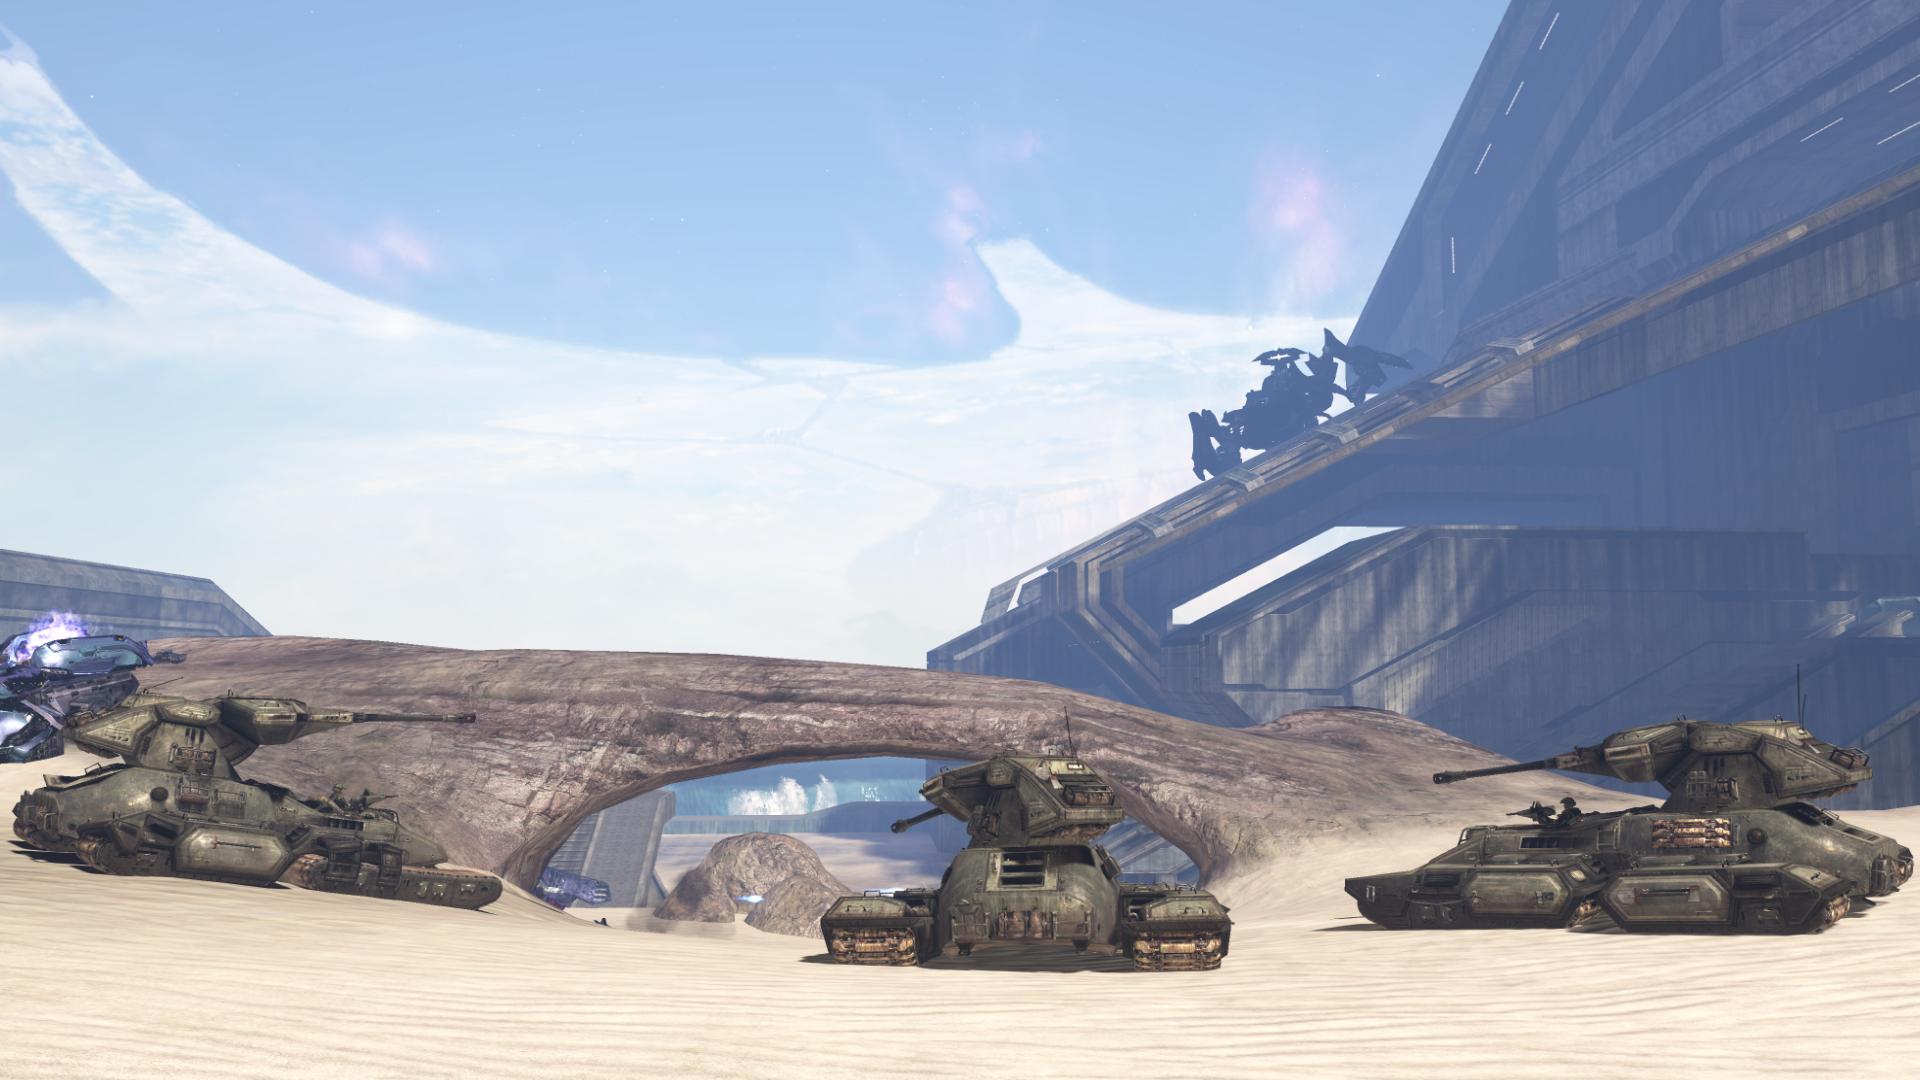
Your Marines and their vehicles are waiting below, having entered in through the lower door. It’s obvious that something epic is about to happen; the group of vehicles assembled below is literally a small army. It’s hard to imagine anything that all of these vehicles together couldn’t tackle…
The second Terminal is located directly behind you, as you face the light bridge panel.
After you activate the light bridge, Miranda says:
“Good work, Chief. Link up with our armour on the far side of the wall. Make your way down to the Cartographer.” [The Ark, Halo 3]
You’re reminded that your original goal, to cross through the wall and reach the Cartographer, is making good progress; you are moving through the wall right now.
If you pause for just a moment, you can hear the Monitor make the following statement:
“Sudden clarity! These Sentinels were trying to deny access to the lower levels of this facility. A wise decision given the Meddler’s preference for destructive acquisition.” [The Ark, Halo 3]
You can see these Sentinels coming out of their pods every so often, as they did in the Sentinel factory Halo 2.
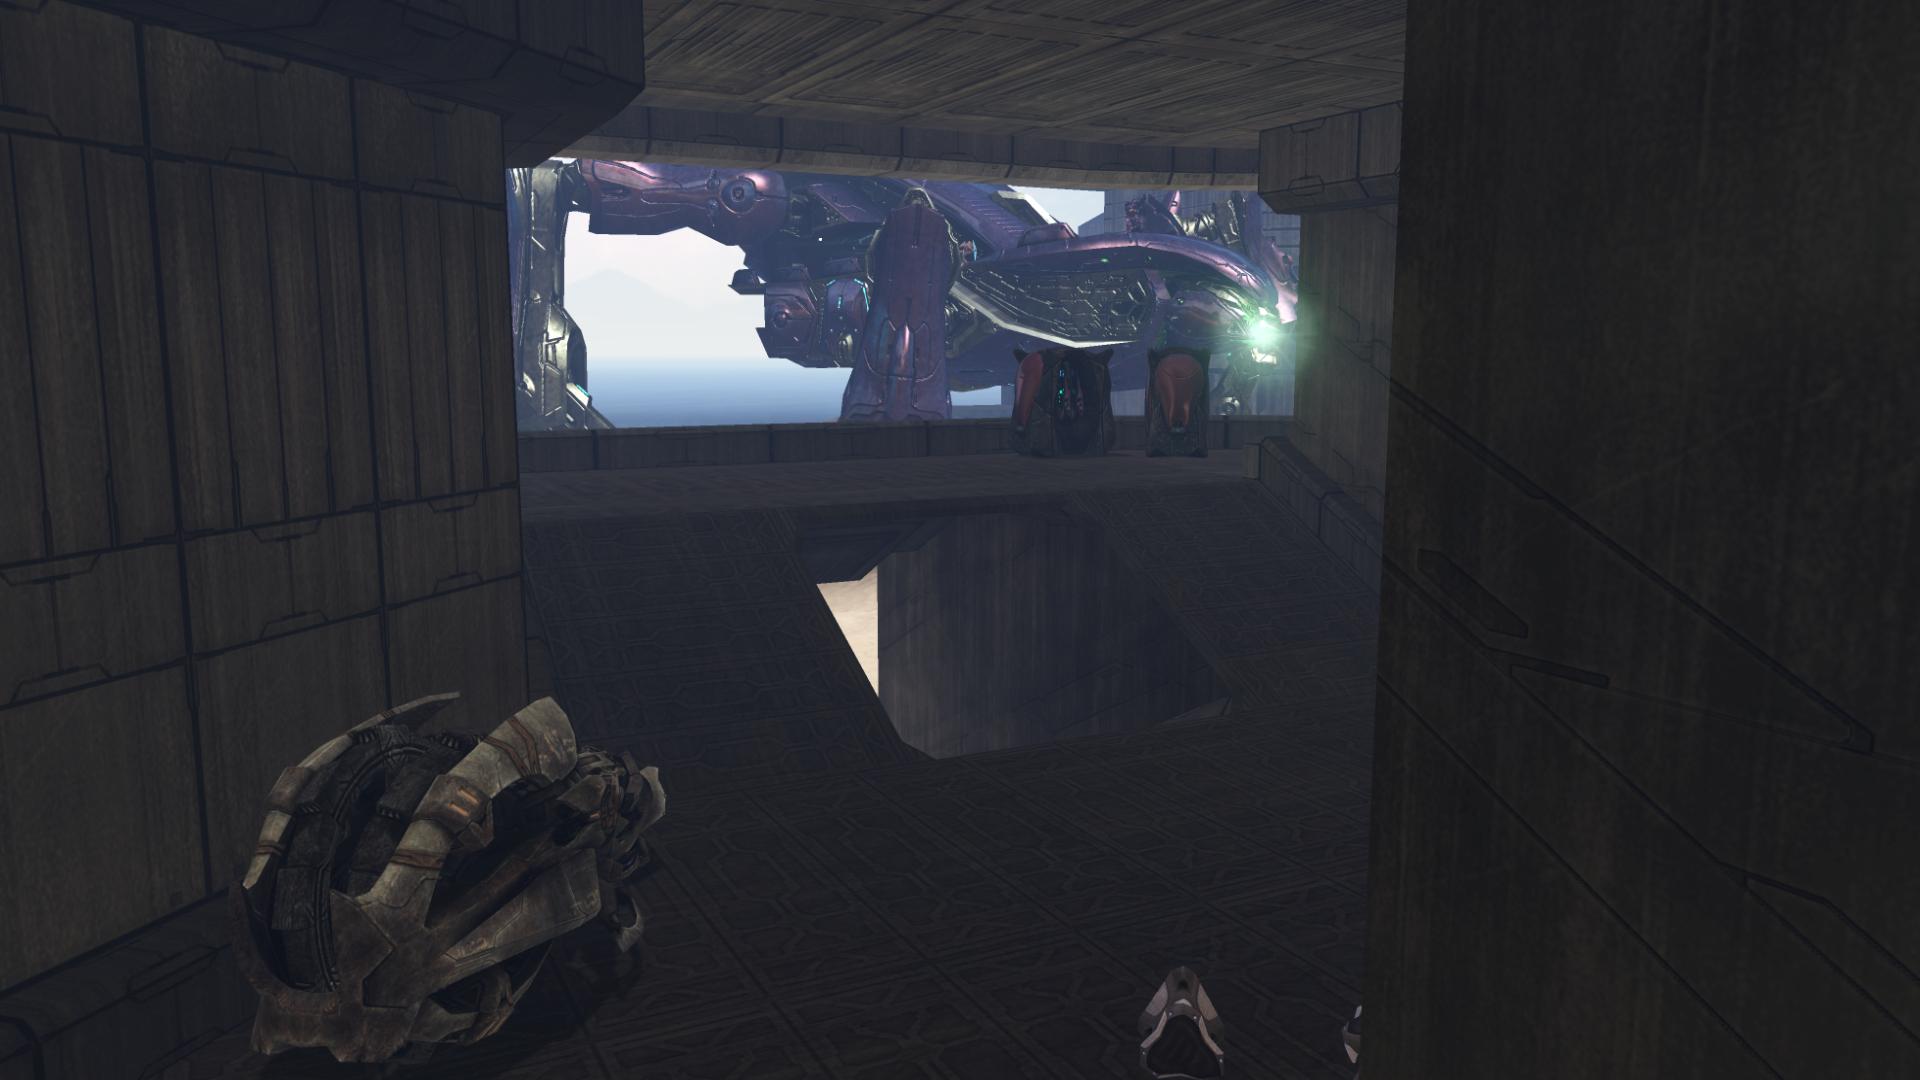
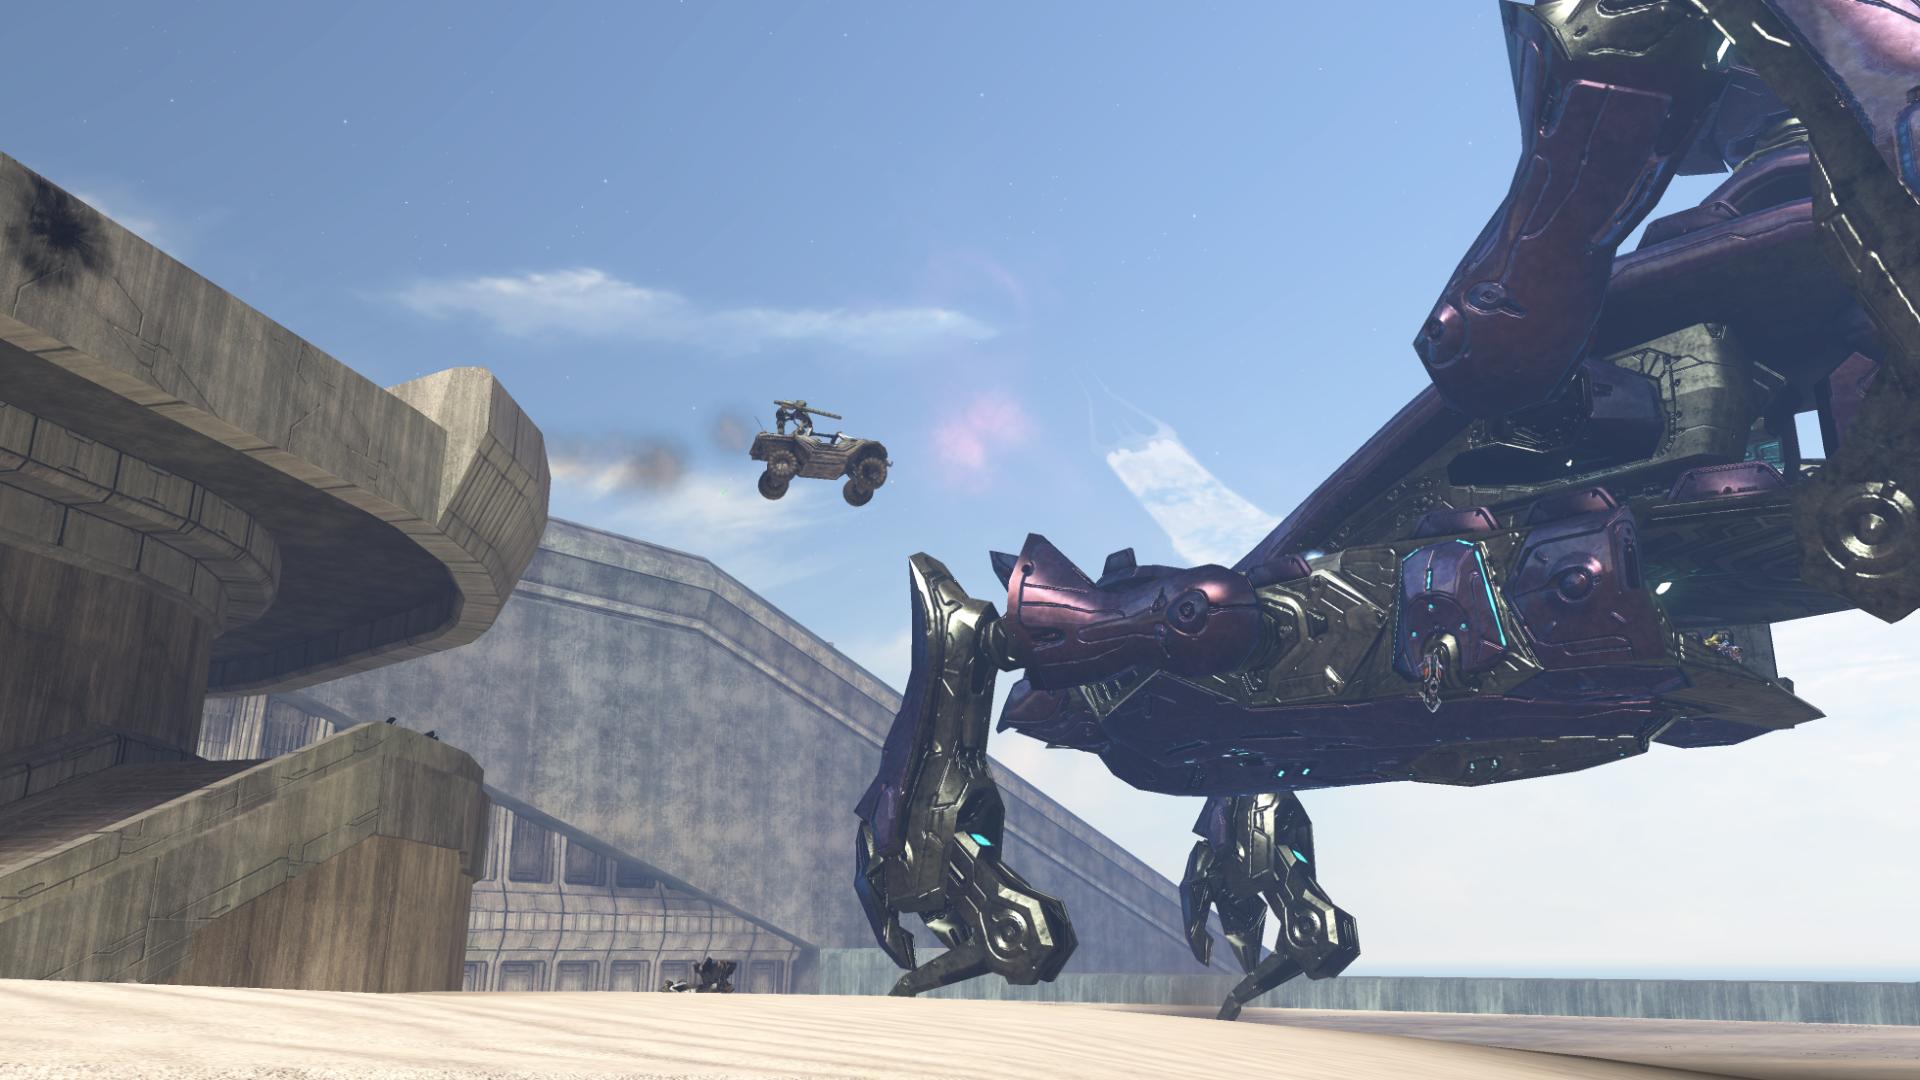
What can be said about this next experience? Probably nothing that can do it any sort of justice.
As you emerge from the wall, a massive machine drops down in front of you… it is a Scarab, and it is scaling down the wall above you. Beyond the Scarab, a massive, ornate spire reaches into the air; obviously Forerunner, and most likely the Map Room you have been searching for. Even further in the distance, beyond the beautiful Forerunner construct, you can finally see much more clearly a great portion of the installation that you have landed on: unimaginably massive prongs extend into space, and at the center of them, a planetoid. Looking very much like it is made out of some sort of ore, it rests like a marble in the center of the installation.
Unfortunately, you don’t have time to stargaze for very long.
“Heads up, Marines. We got trouble!” [The Ark, Halo 3]

Currently in view are three Warthogs, two Ghosts, a Phantom and two Wraiths. Oh, and the Scarab. And you can’t see them yet, but your three tanks are underneath you, emerging from the interior of the wall.
This is pretty much the battle that you’ve been looking forward to for the entire trilogy.
“All armour, form up on the lower ridge! Hit ’em where it hurts!” [The Ark, Halo 3]
Only a few seconds into the fight, four Choppers come onto the scene and a third Wraith begins lobbing mortars at you from an unseen location. You can, at this point, hijack a Ghost, take the Gauss ‘hog that a Marine has brought you, grab one of the tanks, or take one of the standard Warthogs.
This environment is, literally, like a sandbox you would have played in as a child. Perfectly placed rocks provide cover to keep the enemies from attacking you all at once, as well as allowing more enemies to enter the arena without being immediately spotted by you and your forces.
If you decided to take the Gauss ‘hog, there’s a route that you can take to get down into the action; a route that, otherwise, would never be touched. In fact, I think it was only after multiple playthroughs that I even discovered this pathway.
Pressing forward, you’ll take out the first set of Choppers, Ghosts and Wraiths. Commander Stacker comes in:
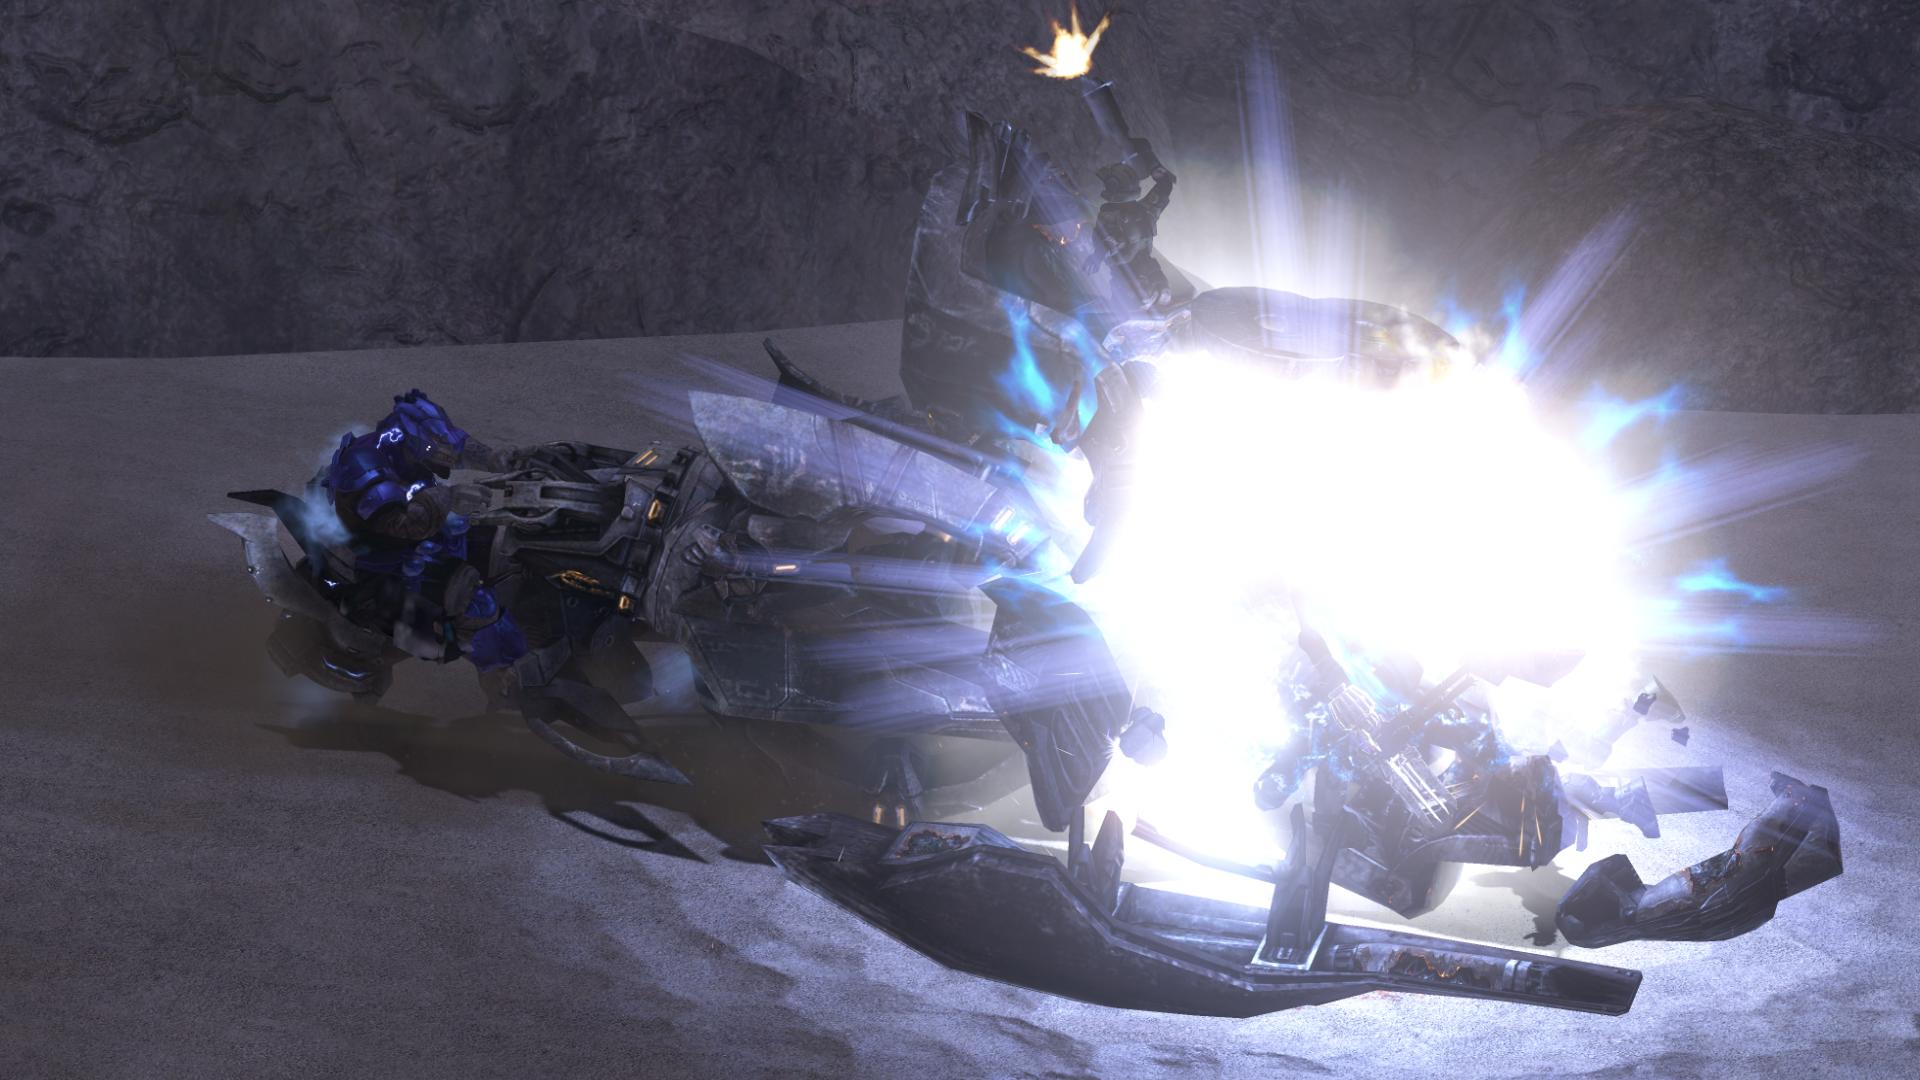
“First line clear, move up!” [The Ark, Halo 3]
Driving around a Marine in a Warthog is a blast, but nothing beats the fun of manning a tank. With so many vehicles zooming around, I always feel like a kid in a candy shop. The second that I take out a Chopper, two Ghosts and a Wraith come into view. And as soon as those are taken out, another Wraith appears. And just when you think you’re starting to get control of the situation…
“Scarab’s back! This time it means business!”
“Bravo, flank and cover! I want everybody supportin’ the Chief; he’ll take it down!” [The Ark, Halo 3]
As you take out the remaining Wraiths and Commander Stacker orders everyone to push forward, the Scarab reaches the ground and will begin firing at you with its plasma cannon. Your tank, which has been unstoppable up until now, is no match for sustained fire from either the Scarab’s main cannon or its secondary plasma cannon. You must outrun its fire, or find cover.
The building in the center serves multiple purposes. First, it houses two Grunts with Fuel Rod Guns that will fire at you as you attack the Scarab.
Secondly, it holds a Chopper, safely tucked away from any stray plasma or tank blasts. As well as a few grav lifts (you might want to grab one before you leave this area).
Lastly, it provides a ramp for… well, we know what it’s for.
Taking down the Scarab can often be quite hard. With a constant stream of Choppers dropping in, it can be difficult to split your attention between them, the Scarab’s legs, it’s plasma fire and the actual attempt to bring down the Scarab.
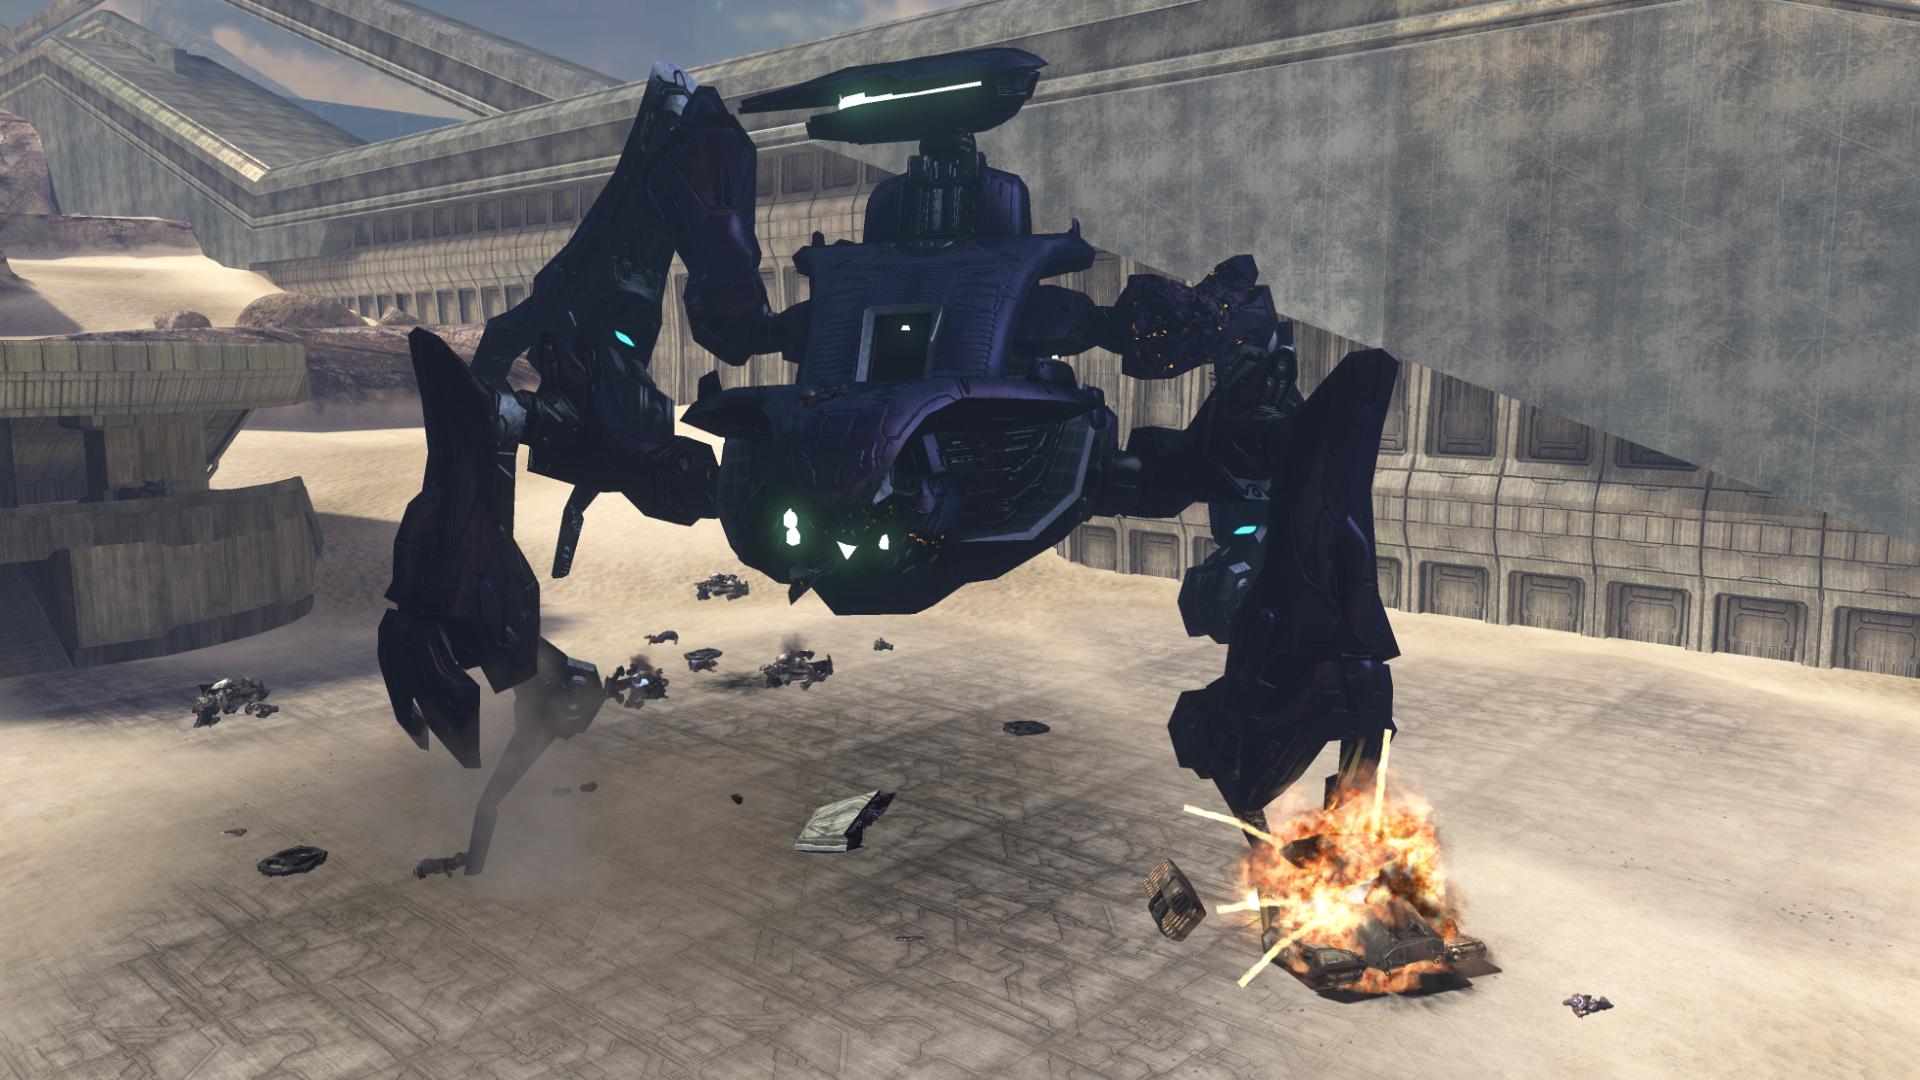
I usually die a lot. Ideally, I would drop the Scarab to its knees, board it and take out the enemies guarding the core, and then toss a grenade inside and jump off…. but doing it from the ground with the tank is almost as (maybe more?) rewarding.
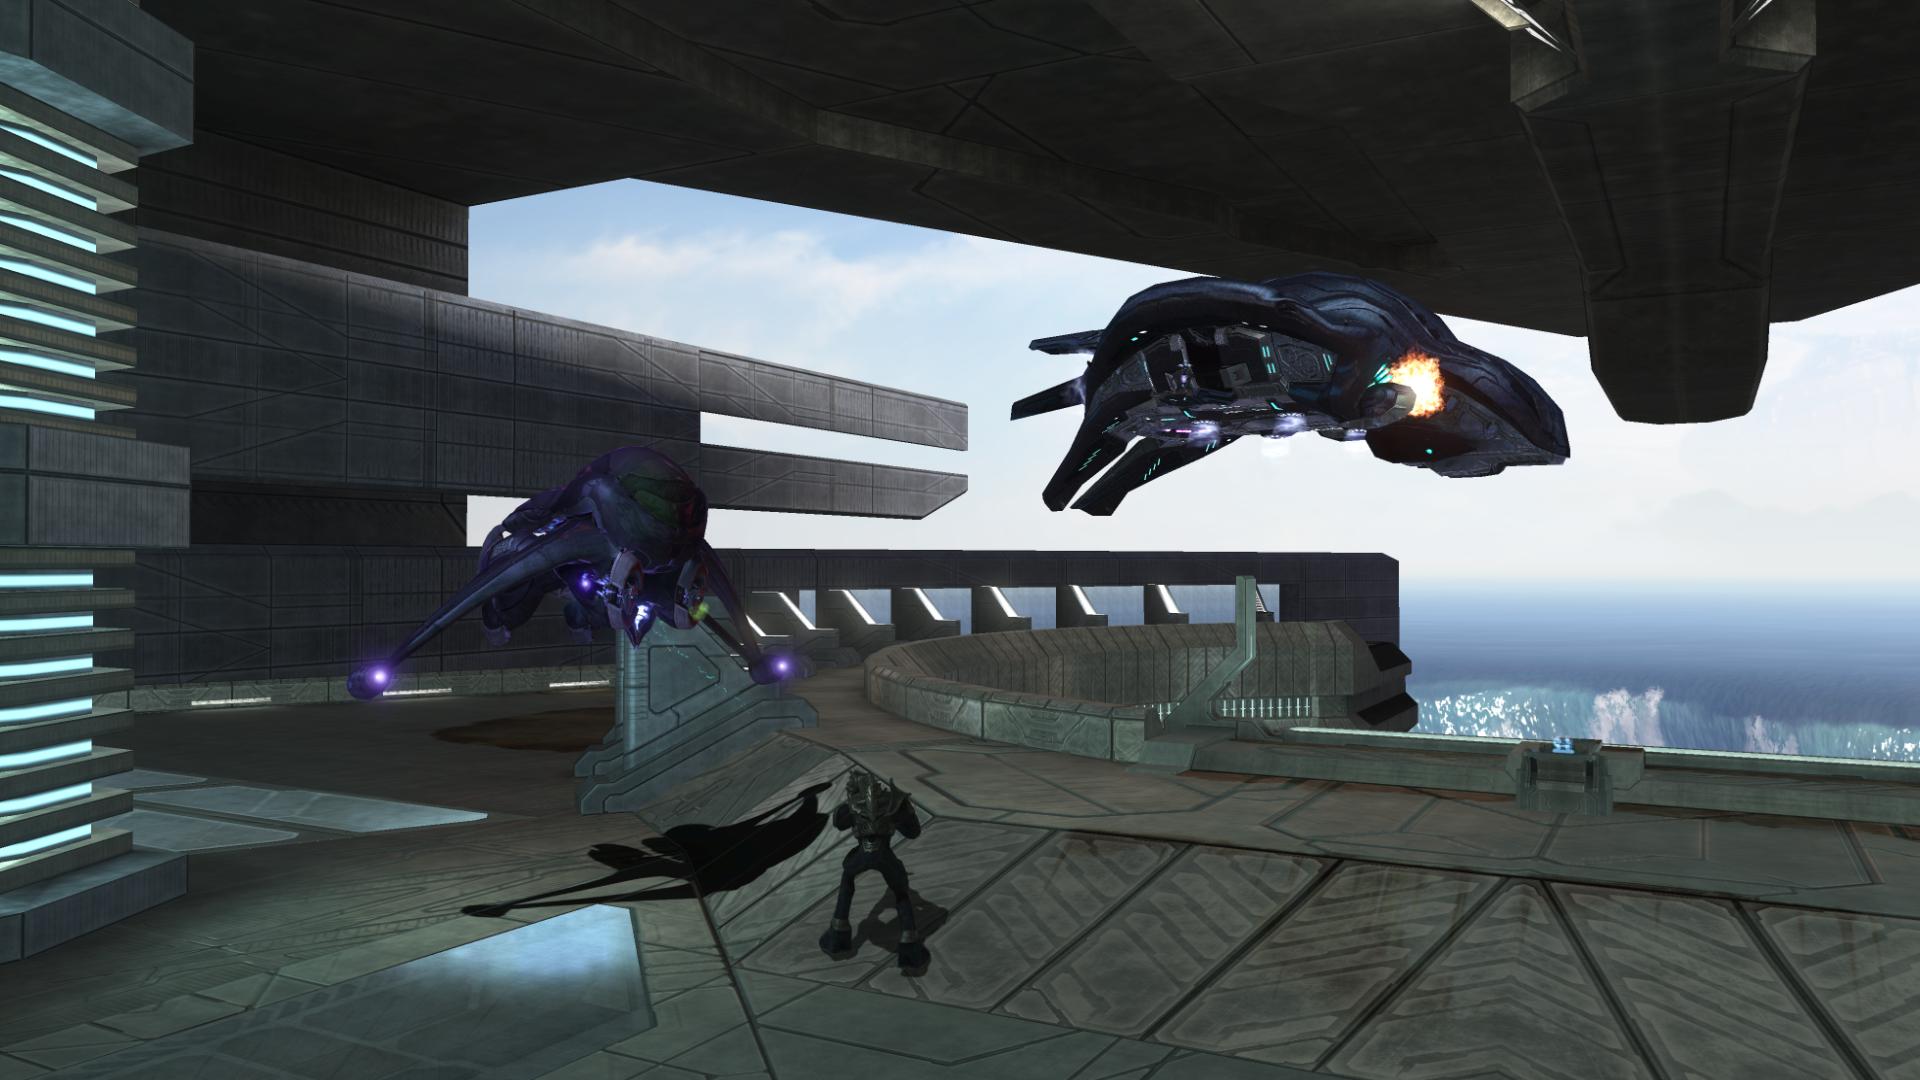
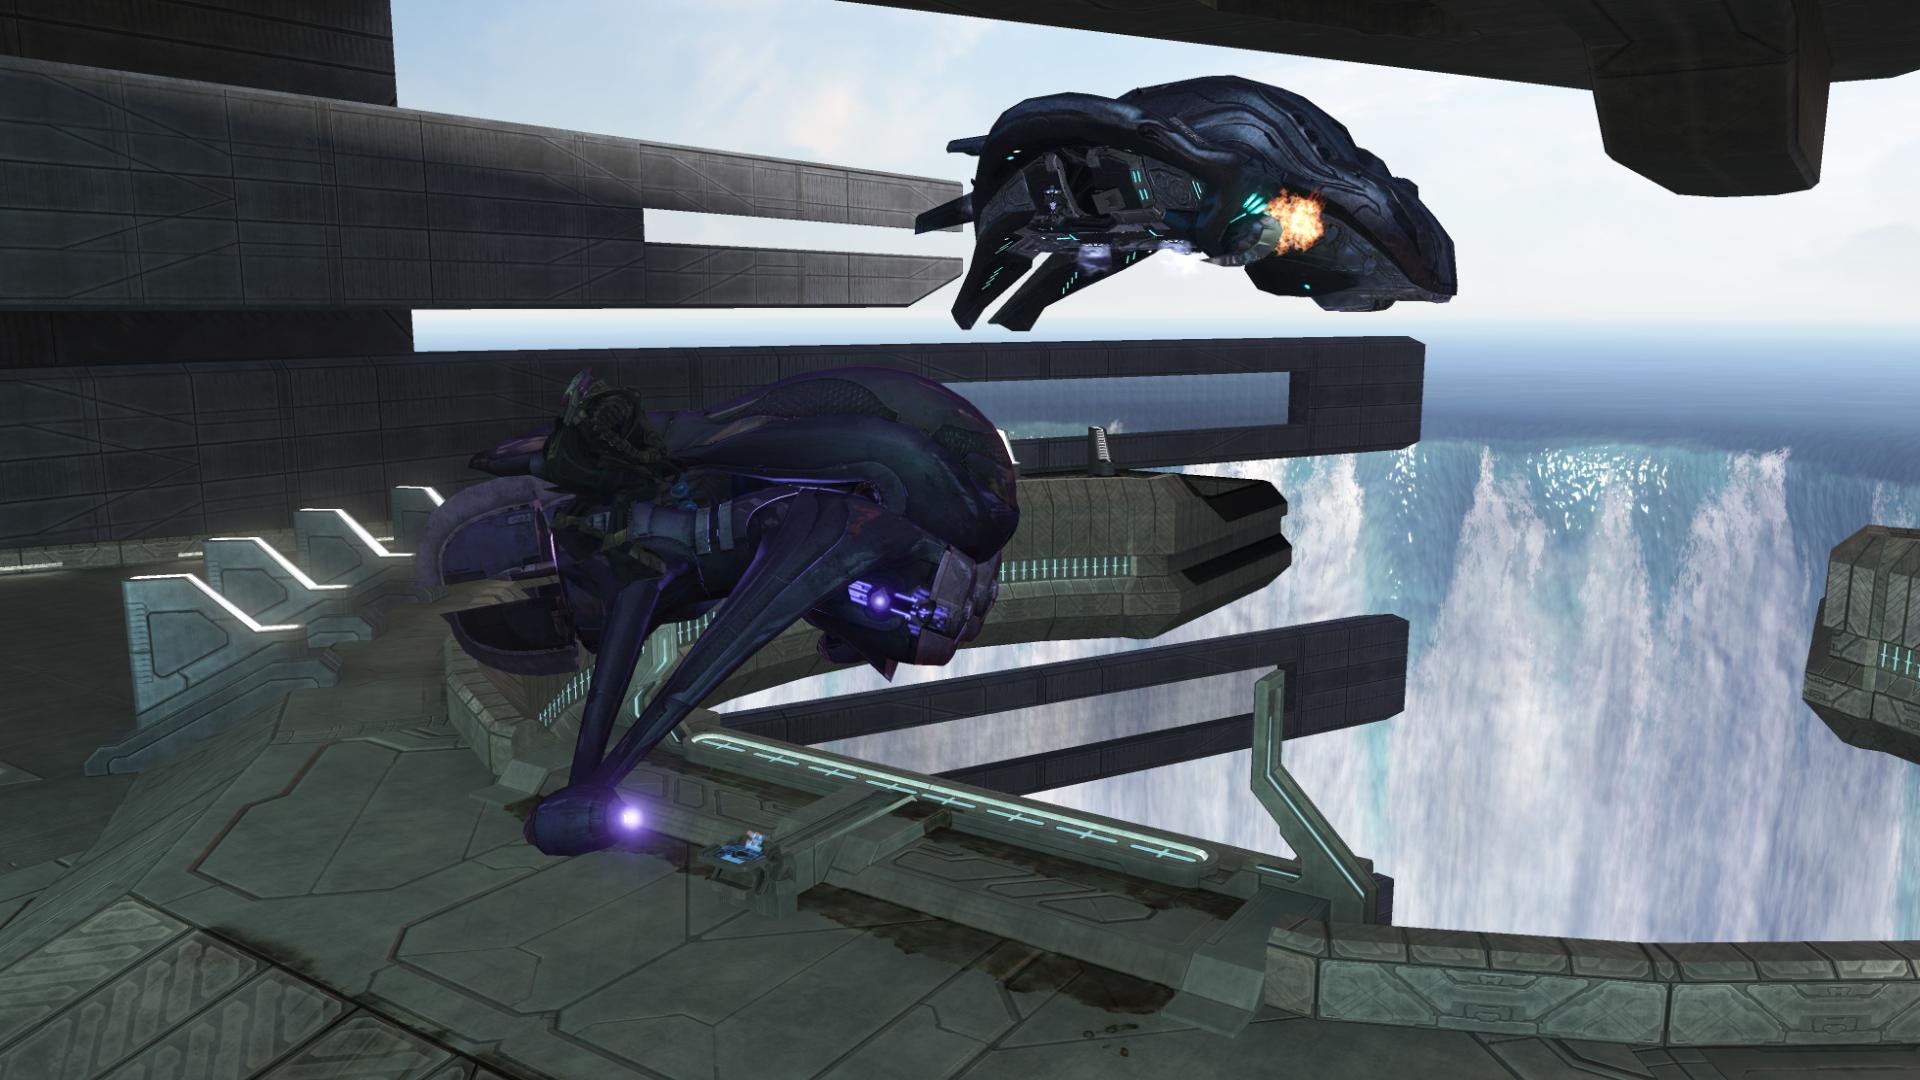
“Not bad, Spartan. I saw that explosion from orbit. Truth’s fleet lies in ruins. Find where the liar hides… so I may place my boot between his gums!” [The Ark, Halo 3]
Half-Jaw’s ship enters much like the Dawn did – as a speck on the horizon, which quickly grows into a massive cruiser. It settles above the waterfall.
One of Half-Jaw’s lines is very interesting to me – “Truth’s fleet lies in ruins.” Truth’s entire fleet has been destroyed? Admittedly, the Covenant has been split in half, with the Elites likely taking control of half or more of the Covenant’s space-faring vehicles. And it is also obvious that not even a large majority of the Covenant’s fleet was present at Earth when the portal was opened – in fact, at least a portion of it was destroyed when the Chief and his team crashed the Ascendant Justice into the Unyielding Hierophant, and set off an explosion that wiped out nearly five hundred Covenant cruisers [Halo: First Strike, pg. 332]. But still, the decimation of the ships that Truth did have with him is something I would certainly have liked to have seen.
Johnson informs you of enemies on the spire; battling your way to the top can be a welcome change from the vehicle combat that you’ve been engaged in for the past 30+ minutes. Even though I usually take the tank up as far as I can…
While you’re clearing out the enemies, Johnson’s Pelican hovers above the center structure back on the ground; the one that the Grunts with the Fuel Rod Guns were in. For some reason, seeing the Arbiter riding in the back of a Pelican with Marines is interesting to me.
Johnson hangs on to the back of the Pelican, which is almost reminiscent of the Chieftain from Sierra 117.
Taking note again of the Marine AI: as I was moving up the ramps on foot, a Jackal fired on me from a distance. A Marine shouted out, “Hey, where’d that come from? Anybody see where that came from?” It’s interesting that the AI is programmed to react to things like long-distance shots from enemies in hiding. It’s such a specific reaction, that you might almost think that it was scripted.
Also on your way to the top, you’ll encounter Brute Stalkers. These are Brutes that employ the use of active camouflage. They look interesting, but don’t pose much of a threat. Sometimes they’ll drop a cloak when they die.
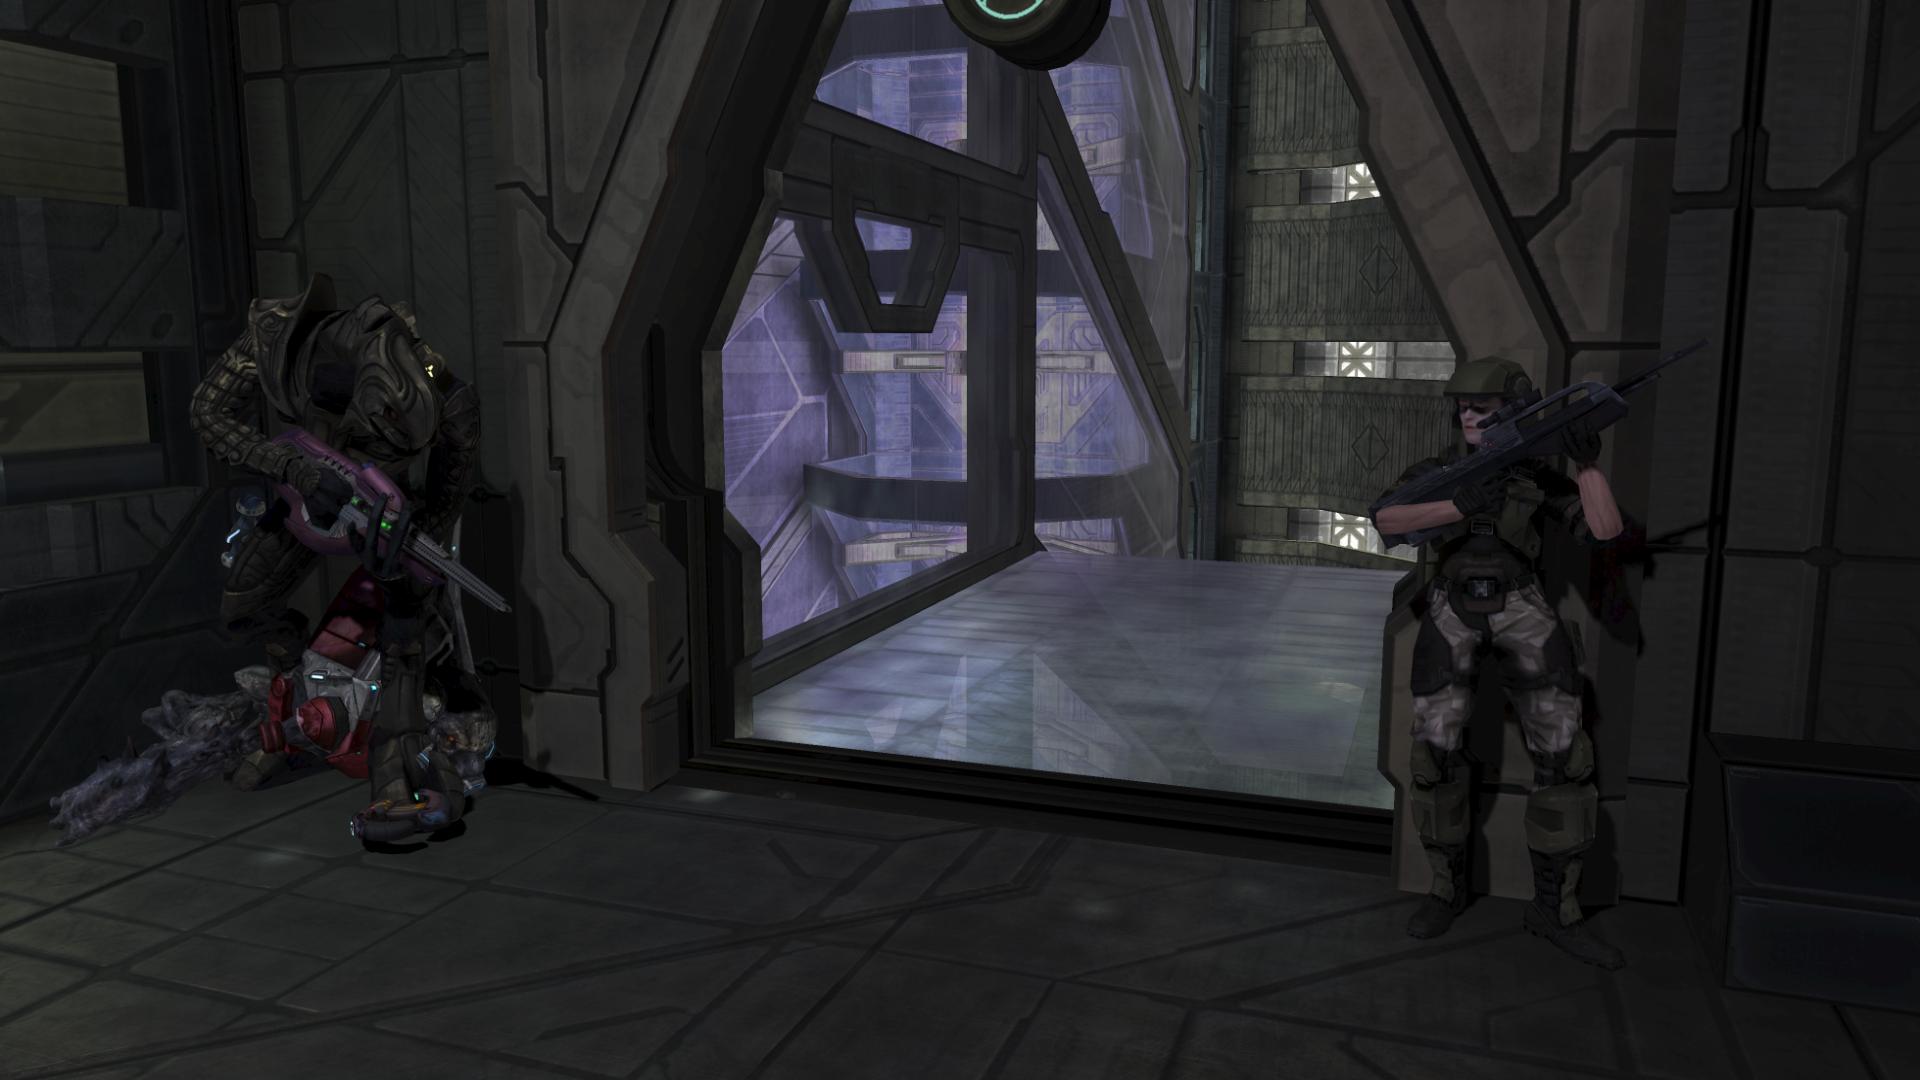
When you reach the top of the ramp, you’ll find a Pelican waiting; it drops off some Marines, as well as the Arbiter, who seems pleased with your progress.
“Well done, Spartan.” [The Ark, Halo 3]
Before we leave this area, I want to back up just a bit and look at the structure that we’re on: the map room. Seriously, someone at Bungie did a number with this thing.
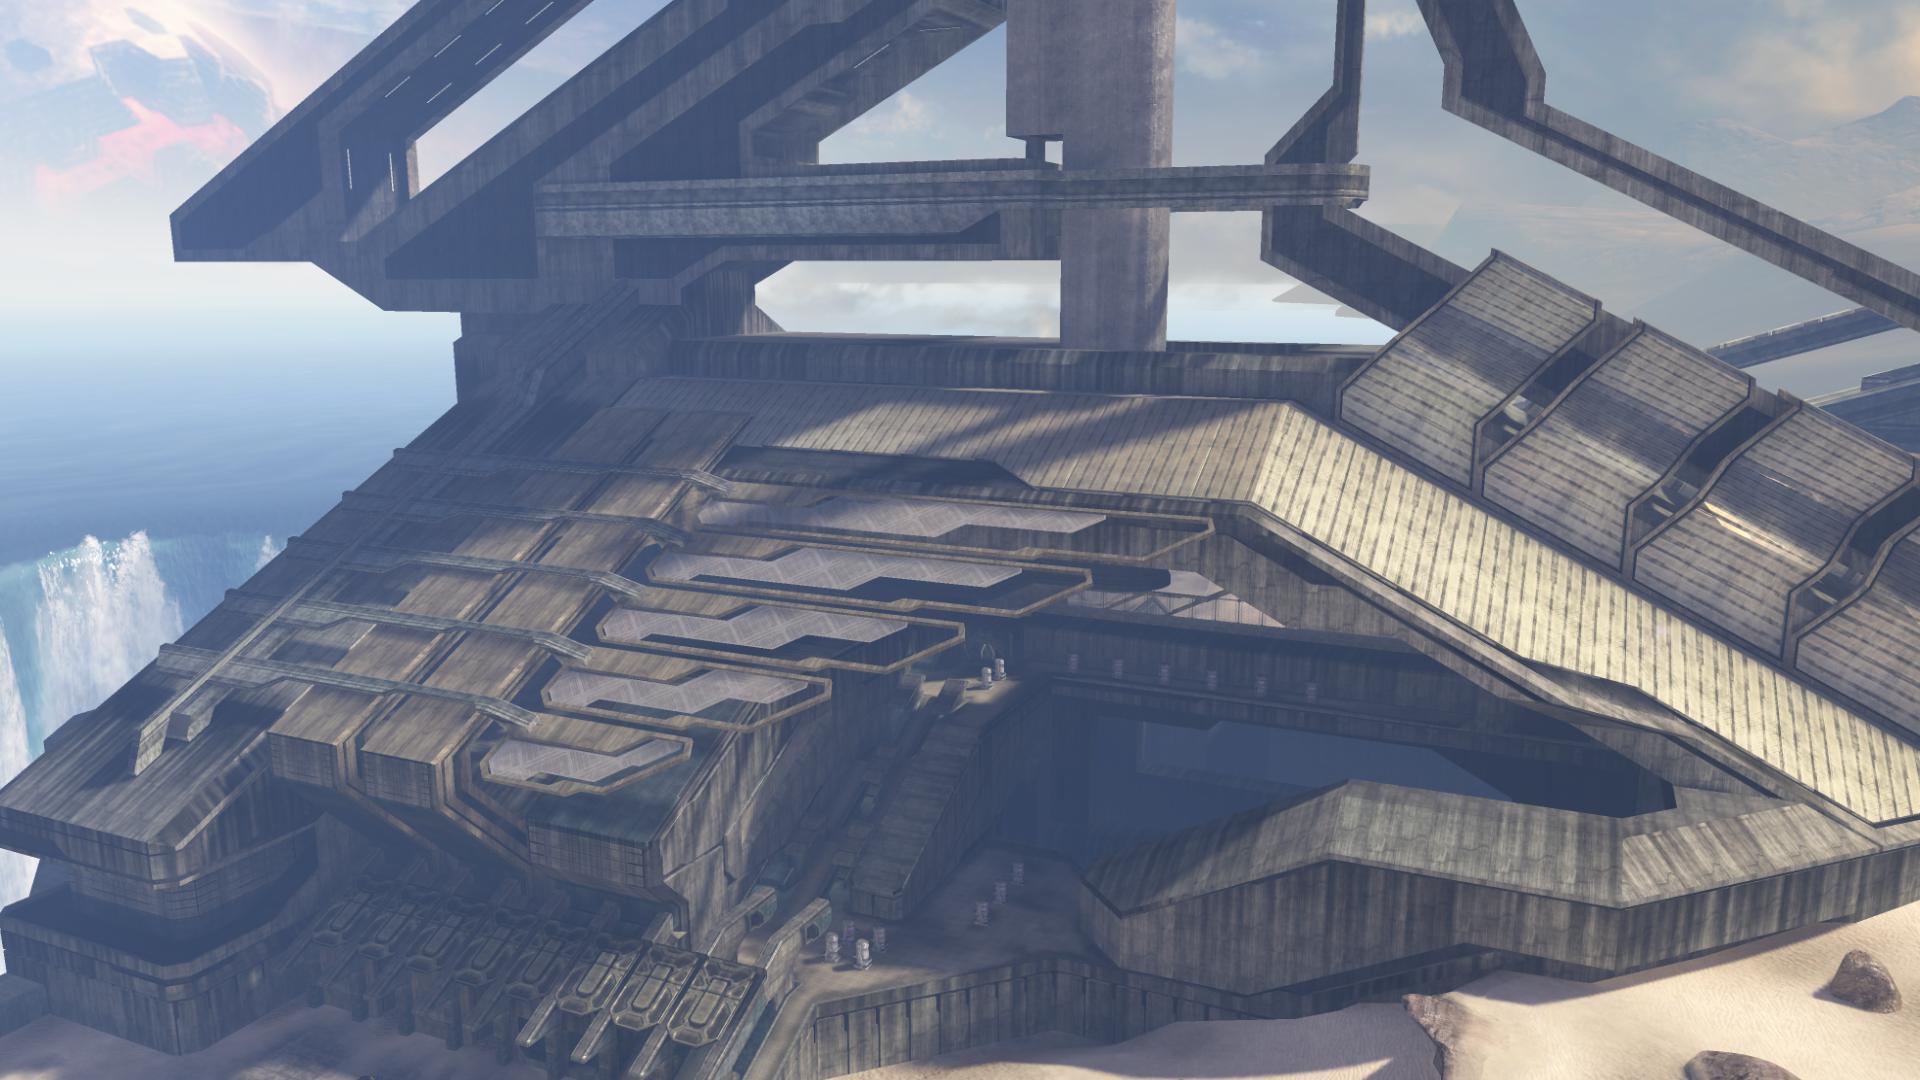
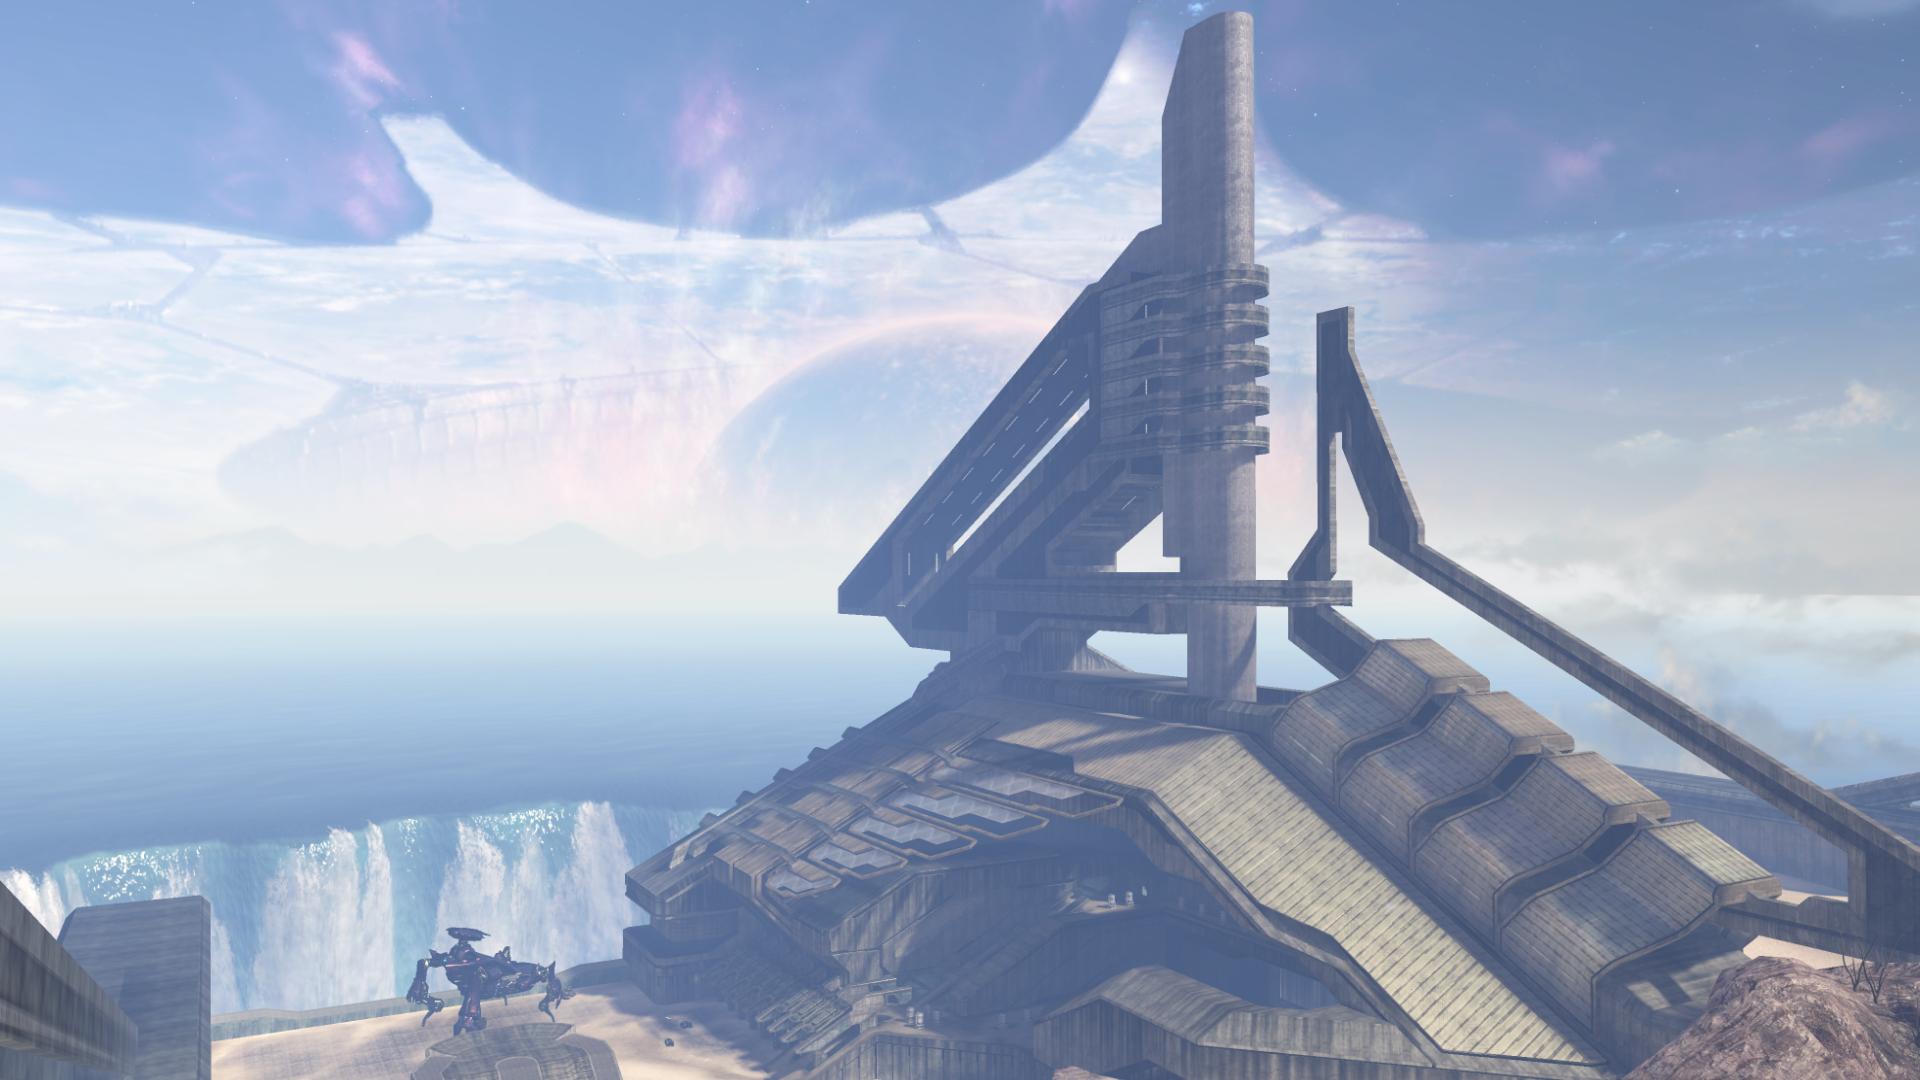
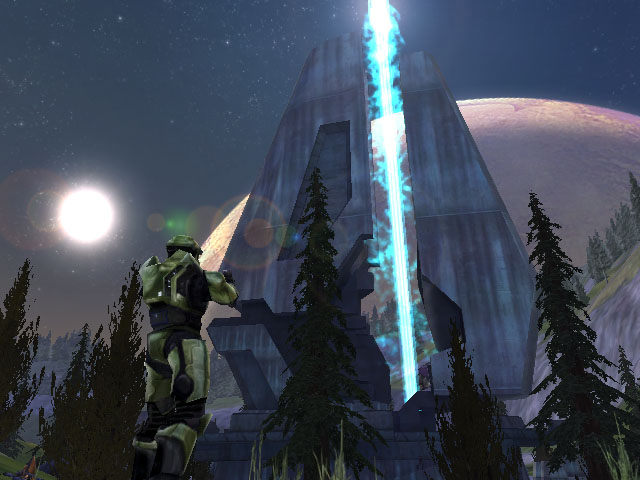
The entire structure is a work of art. So many panels, and beams and coverings… and the two points at the top are unmistakably similar to the structures seen on the second level of the first game (see here). I just can’t even imagine how much time and effort must have gone into designing this building. And the architectural style of the structure carries over into the interior, too, as we’re about to see.
Once inside, the Monitor begins to work on opening a locked door. A Marine questions him, presumably about the delay in getting the door open:
“Hey, what gives?”
“It seems I’ve crossed a circuit.”
“Well, let me have a look.” [The Ark, Halo 3]
He approaches and the Monitor fires his blue laser at the Marine. The Arbiter shouts, “Oracle!” which always sounded to me like he was reprimanding him. Interesting that the Arbiter still calls him Oracle. I don’t know what else he would call him, but hearing him say “Oracle” reminds me of the unique relationship between these two: the Monitor has gone from being a mythical deity, left behind by the Forerunners to provide answers to the Covenant, to now working alongside the Arbiter to stop the Covenant.
I’m sure by now everyone’s seen the Brute that appears to be… relieving himself.
Here, we have another “sleeping Grunt” scenario. This situation occurred a lot during Halo 1, and a bit during Halo 2, as well, but has not been seen as much throughout this game. It touches on the stealth genre – stay out of the line of sight of the enemies that are awake, and take out the enemies that aren’t aware of your presence. If you bump someone accidentally, they’ll wake up and alert their allies. I remember countless times trying to make it through the “Assault on the Control Room” stealth rooms without alerting any enemies. There’s just something extremely satisfying about taking out an entire room of enemies without them ever realizing what’s happened.
Before we leave this room, take a look at the wall:
The unique architecture from the exterior can be seen throughout the interior; seriously, everything about this building is stunning.
At the end of the long hallways up ahead, the Arbiter does something really odd:
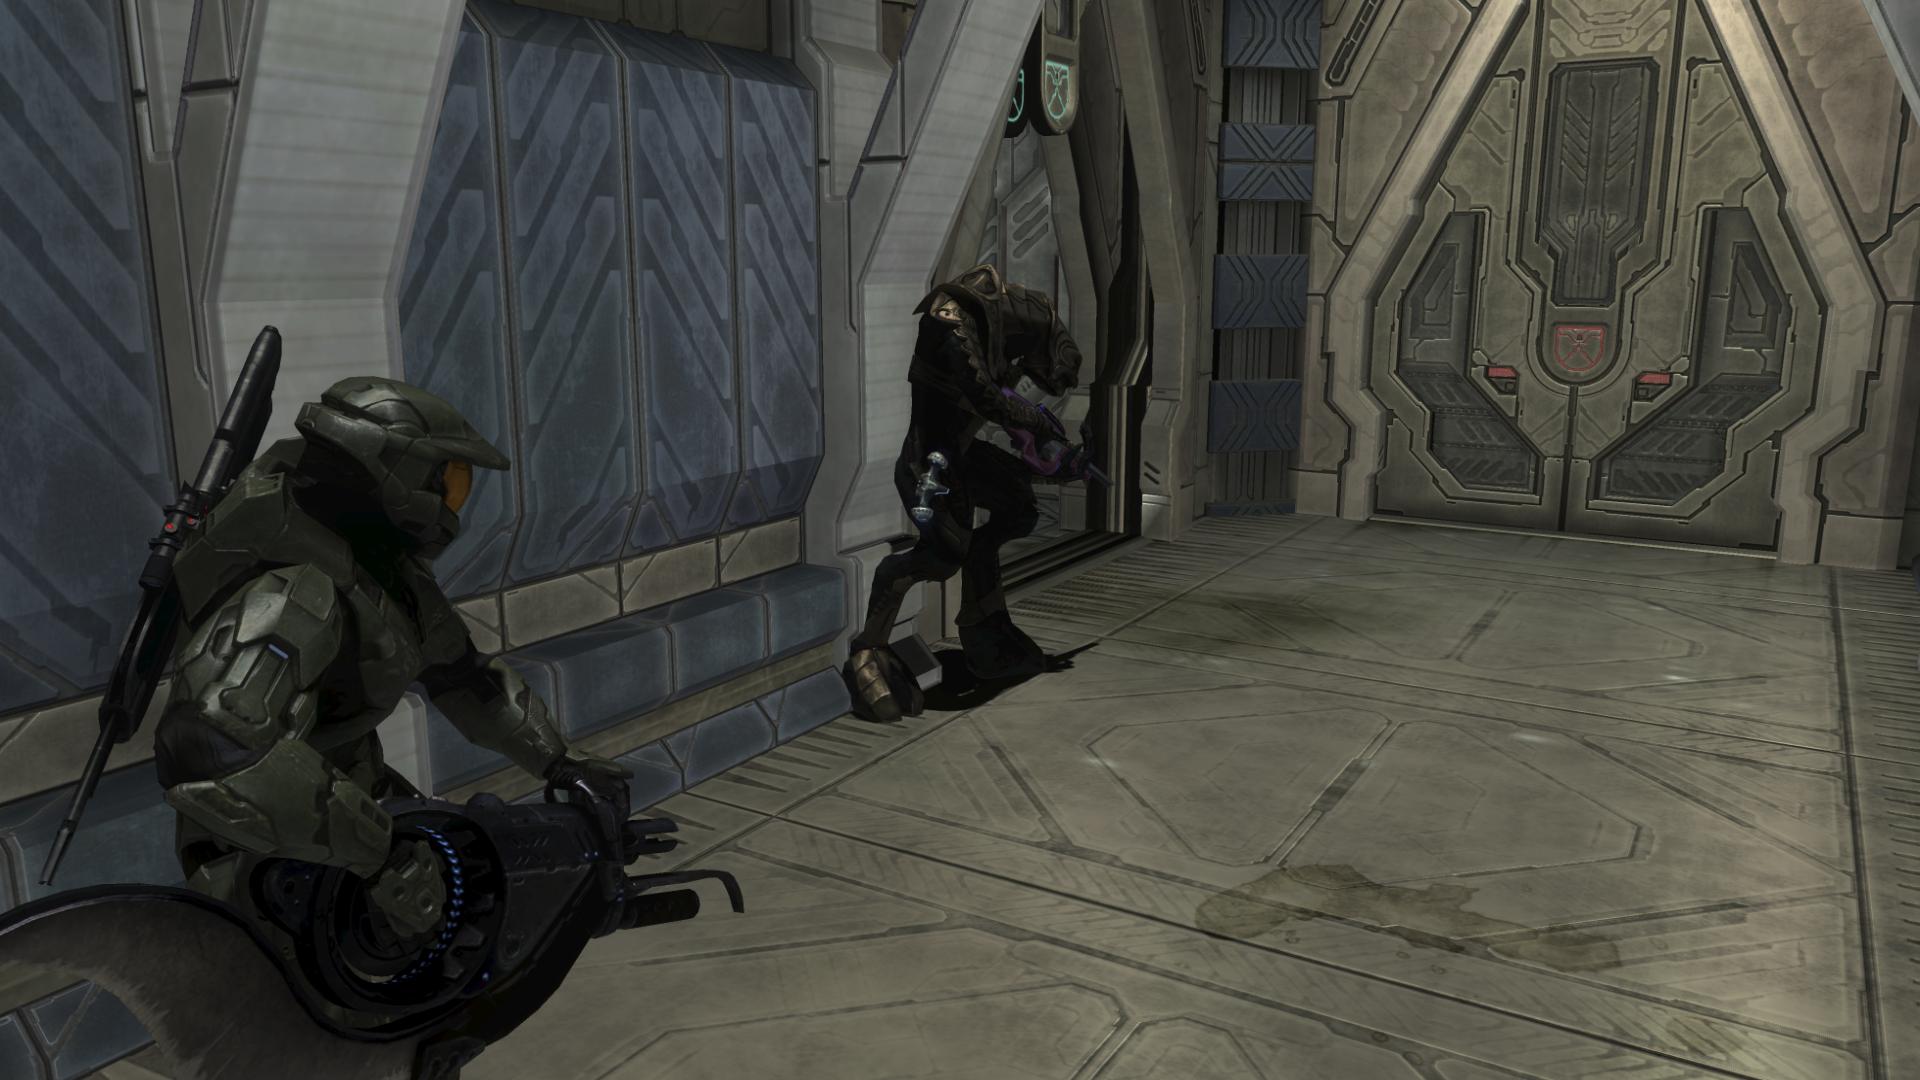
He “posts up,” so to speak, at the entrance to the next room, and will remain there until you’ve entered. You can see it happen – he sticks to the wall and his posture changes. I’m sure he’s done it before with crates and other objects, but he almost always does it here and it is really easy to catch. I think what I like the most is how natural it looks, considering this is an FPS.
The room that was he posted outside of reminds me of a room from Halo 1.
Right after the “Shafted” cutscene in the Silent Cartographer, you enter a room that looks very similar to this one. You enter from a different location, but the overall design is almost identical. It is not a coincidence, considering the fact that you’re in another Map Room, just on a different installation.
Directly beneath where you entered from, the third Terminal can be found. Something really awesome happens here, though: the Monitor will move ahead on his own and fly into the Terminal room; and you can actually hear him engage in conversation with whom we can assume to be either Mendicant Bias or Installation 00’s Monitor.
“Sincere apology. But how-… The archive is intact? Then our makers’ plan-… A what? A foundry?” [The Ark, Halo 3]
More is said between the two, and the entirety of their conversation is logged in the Terminal, the text of which can be found in here, which I linked to earlier, as well. At this point, the Monitor does not know what this installation’s purpose is, and I’m sure he is as interested as we are, which is why he is probing any sort of data terminal that he can find.
Also, let me say that the Terminals have always had a bit of a disconnected feel to them to me, since, while reading them, you’re removed from the game and placed into a first-person perspective unlike anything that has been experienced before in the trilogy. The story contained within them is so deep, so compelling, that it almost does not feel right to even consider it to be a part of Halo 3. Hearing the Monitor speak out loud the words that are contained in the Terminal is shocking; it brings a real feeling of connectivity between the game and the story that’s told in the Terminals.
The Arbiter and a Marine will typically both post up outside of the exitway in the next room.
Remember the grav lifts located inside the center structure back outside? This next hallway is where one of them would come in handy. The Cowbell skull is located in the top-most niche at the bend in the hallway. You’ll need a gravity lift to propel yourself up to that height.
The next room has some Brutes inside acting really strange:
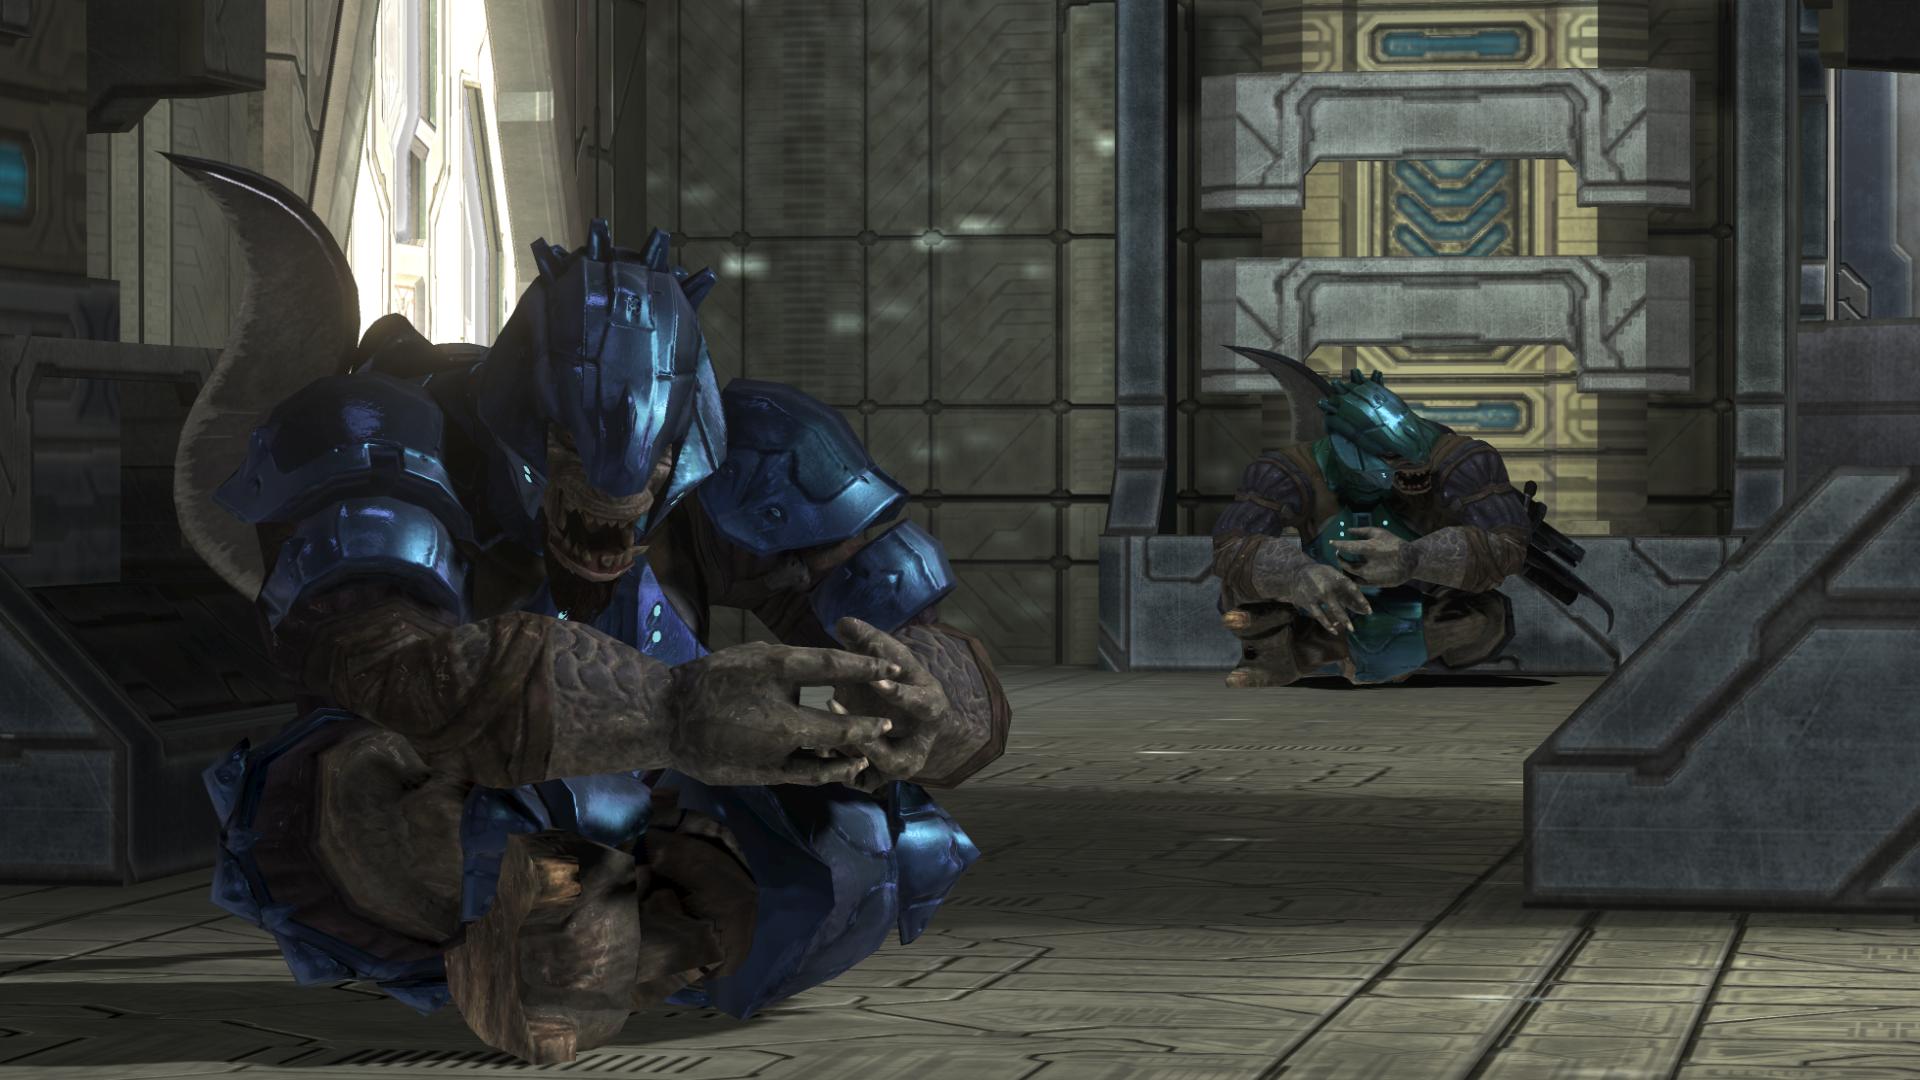
They appear to be sitting cross-legged and making eating motions with their hands. I guess they’re on break? They hop up as soon as you are noticed.
Once outside, you’ll immediately recognize the area as the inspiration for the multiplayer map, Construct. You are now at the front of the structure, looking out over the waterfall. And the waterfall – the aqua blue water, stretching into the skybox of the rest of the Ark… stunning.

By now you’ve probably noticed the ethereal score that usually accompanies Forerunner installations; it is extremely fitting here, as you are about to learn more about the place to which you have followed Truth.
“That’s… our galaxy. We’re beyond the rim!”
“Two to the eighteenth light years from the galactic center, to be precise.”
“What is this place?”
“The Ark.”
“This… is the Ark?”
“I always assumed it was part of a shield installation, but it seems I was mistaken.”
“That’s a first.”
“Not at all. While I had a complete understanding of Installation 04, my makers wisely limited my knowledge of all other strategic facilities. Compartmentalization – in case I was ever captured by the Flood.”
“Can you tell me where we are, exactly?”
“Here!”
“And Truth?”
“Near one of the Ark’s supraluminal communication arrays, I’m afraid. Unfortunate. The Meddler had triggered a barrier; a defensive perimeter around the Ark’s core…”
“The barrier will be difficult to disable; how odd that my makers would place such a comprehensive defense around a single… oh my.”
“What is it?”
“Phantom!”
“Spark! Move!”
“We must get past that barrier! Or the Meddler will destroy all!” [The Ark, Halo 3]
It’s at this point that we are finally told what we’ve likely figured out on our own – that the portal seen on Earth, and the structure below it, are not the Ark. It was alluded to at the end of Halo 2 that Earth was the Ark, or that the Ark was located on Earth – but we were misled. And the purpose behind this installation is still hidden from us – it seems as though the Monitor may have finally figured things out, being able to recognize the symbols on the hologram; but before he can explain, a Phantom flies in with a Grunt manning its interior plasma turret.
Johnson and the Arbiter urge you to move forward:
“Chief, you got a whole mess of hostile air inbound. Get back inside while we take ’em out.”
“Follow the Oracle, Spartan. I will help your Sergeant clear the sky.” [The Ark, Halo 3]
As the Arbiter says that last line, a Banshee swoops in low near him…
He hijacks it and flies off after the Phantom.
“Sir! Pelican’s gonna land one level down!” [The Ark, Halo 3]
When you head back inside, you may hear the Monitor speaking to himself…
“Protocol dictates action; the installation was my responsibility. If my suspicions are correct… no! I must not leap to any conclusions. ” [The Ark, Halo 3]
Guilty Spark is obviously developing an theory of what is happening here on the Ark; a theory that we are not yet privy to.
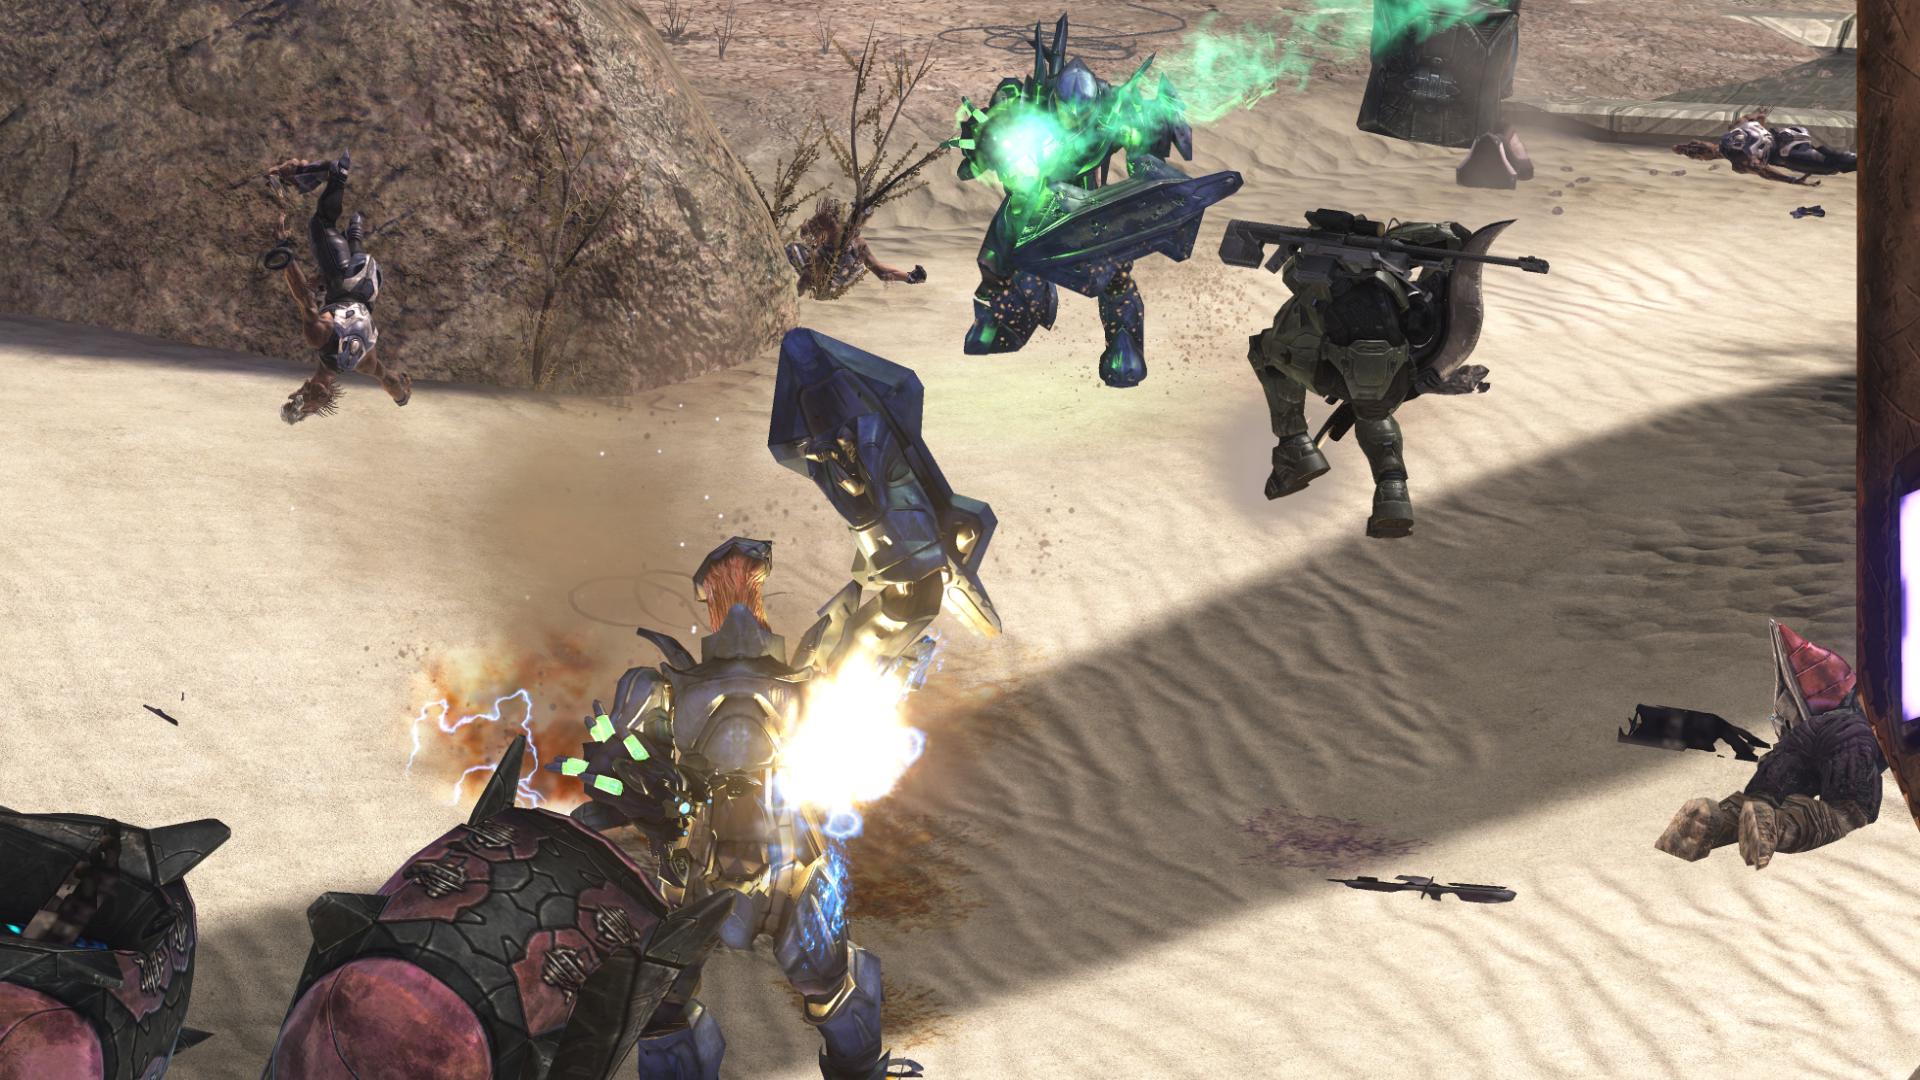
His dialogue usually occurs during the middle of the battle at the bottom of the hallway; a pack of Brutes with Maulers – and one with a plasma turret – await inside a room. This fight can sometimes be difficult, but I think my favorite part of it doesn’t have anything to do with the Brutes: since the level is almost over, now’s a good time to mention how much the Monitor adds to the ambient sound. It is the Halo campaign at its purest to be engaged in a deathmatch with a group of enemies while 343 Guilt Spark flies around humming and saying things like “my ideas just get better and better!” In fact, it is so uniquely, and yet familiar, to Halo, that most players probably don’t even take note of it any longer.
Moving into the next room, a Brute Chieftain declares:
“The pack will feast on you!” [The Ark, Halo 3]
This room gives you a really good chance to see Brute Stalkers with their active camo disabled.
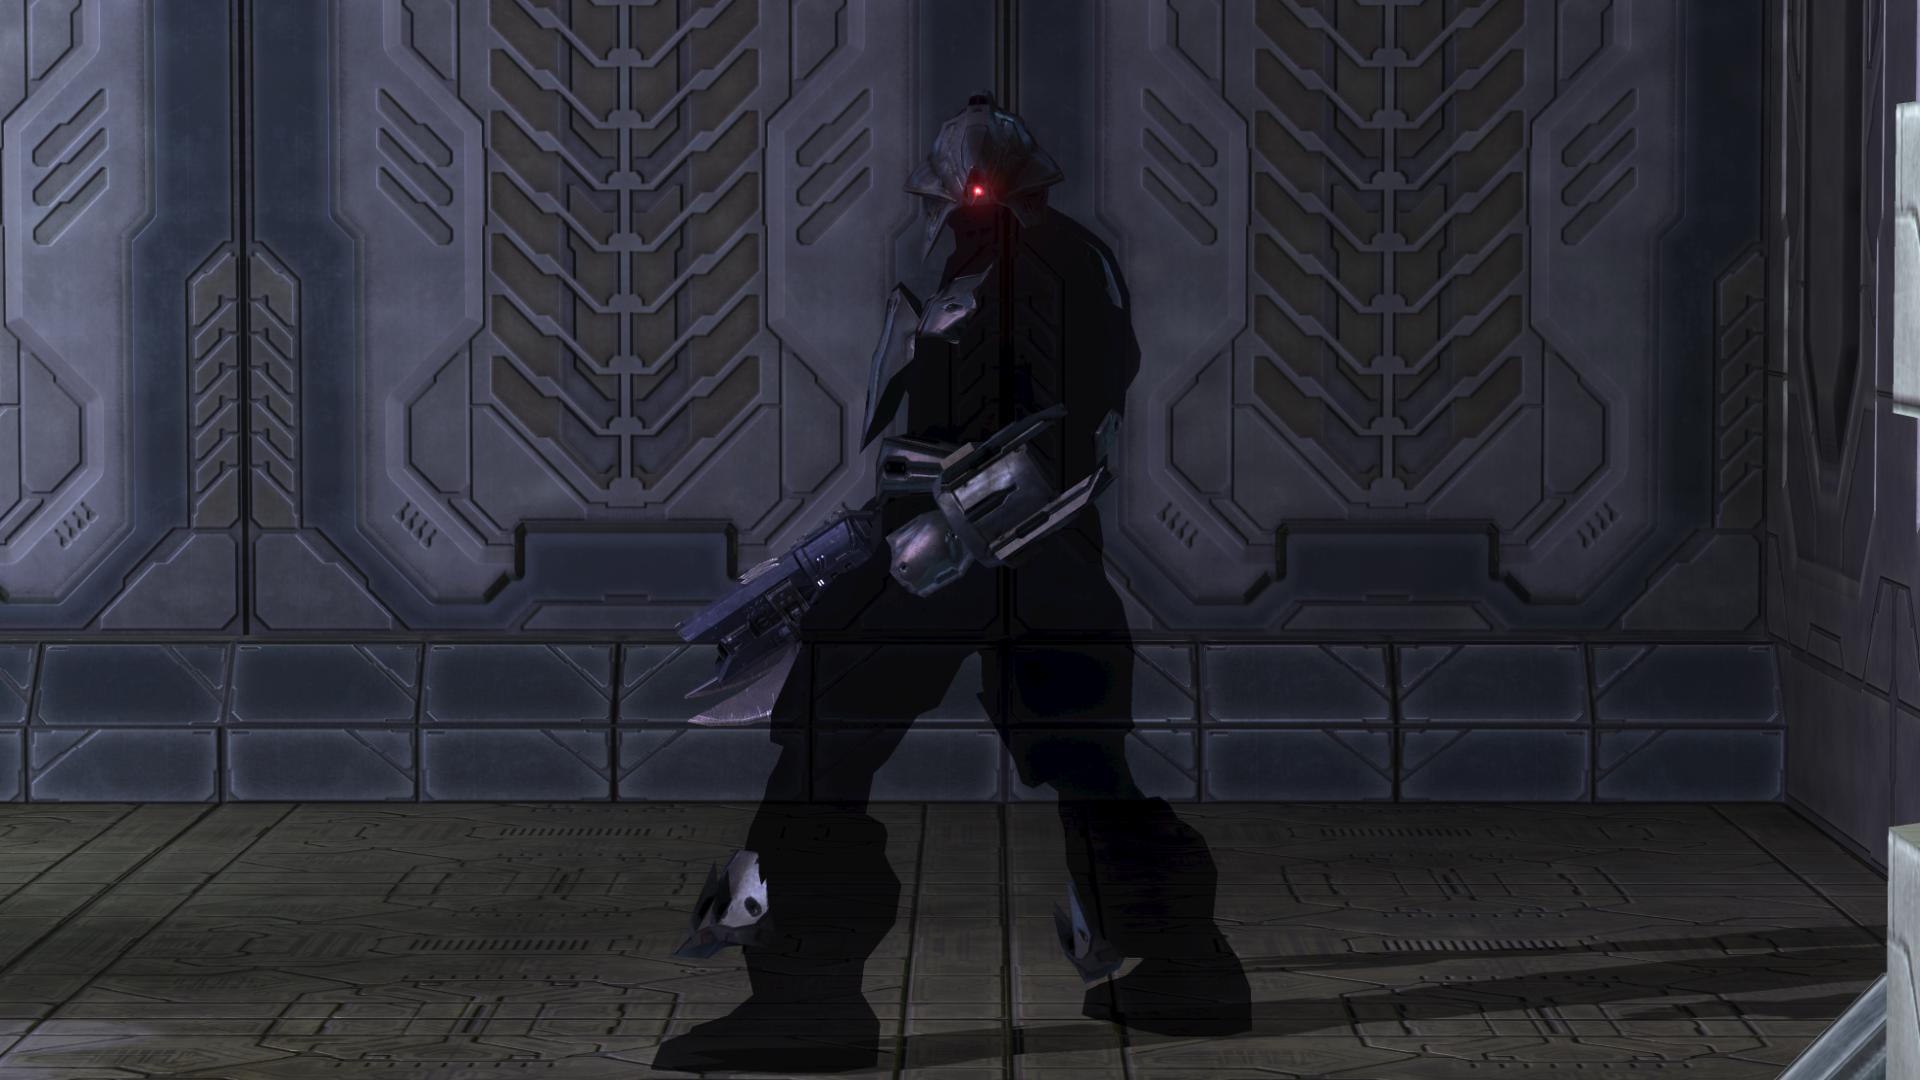
These guys are really interesting looking, but, for whatever reason, they tend to hold off on attacking until… well, until they’re practically dead; it’s rare that any of them have fired on me at all.
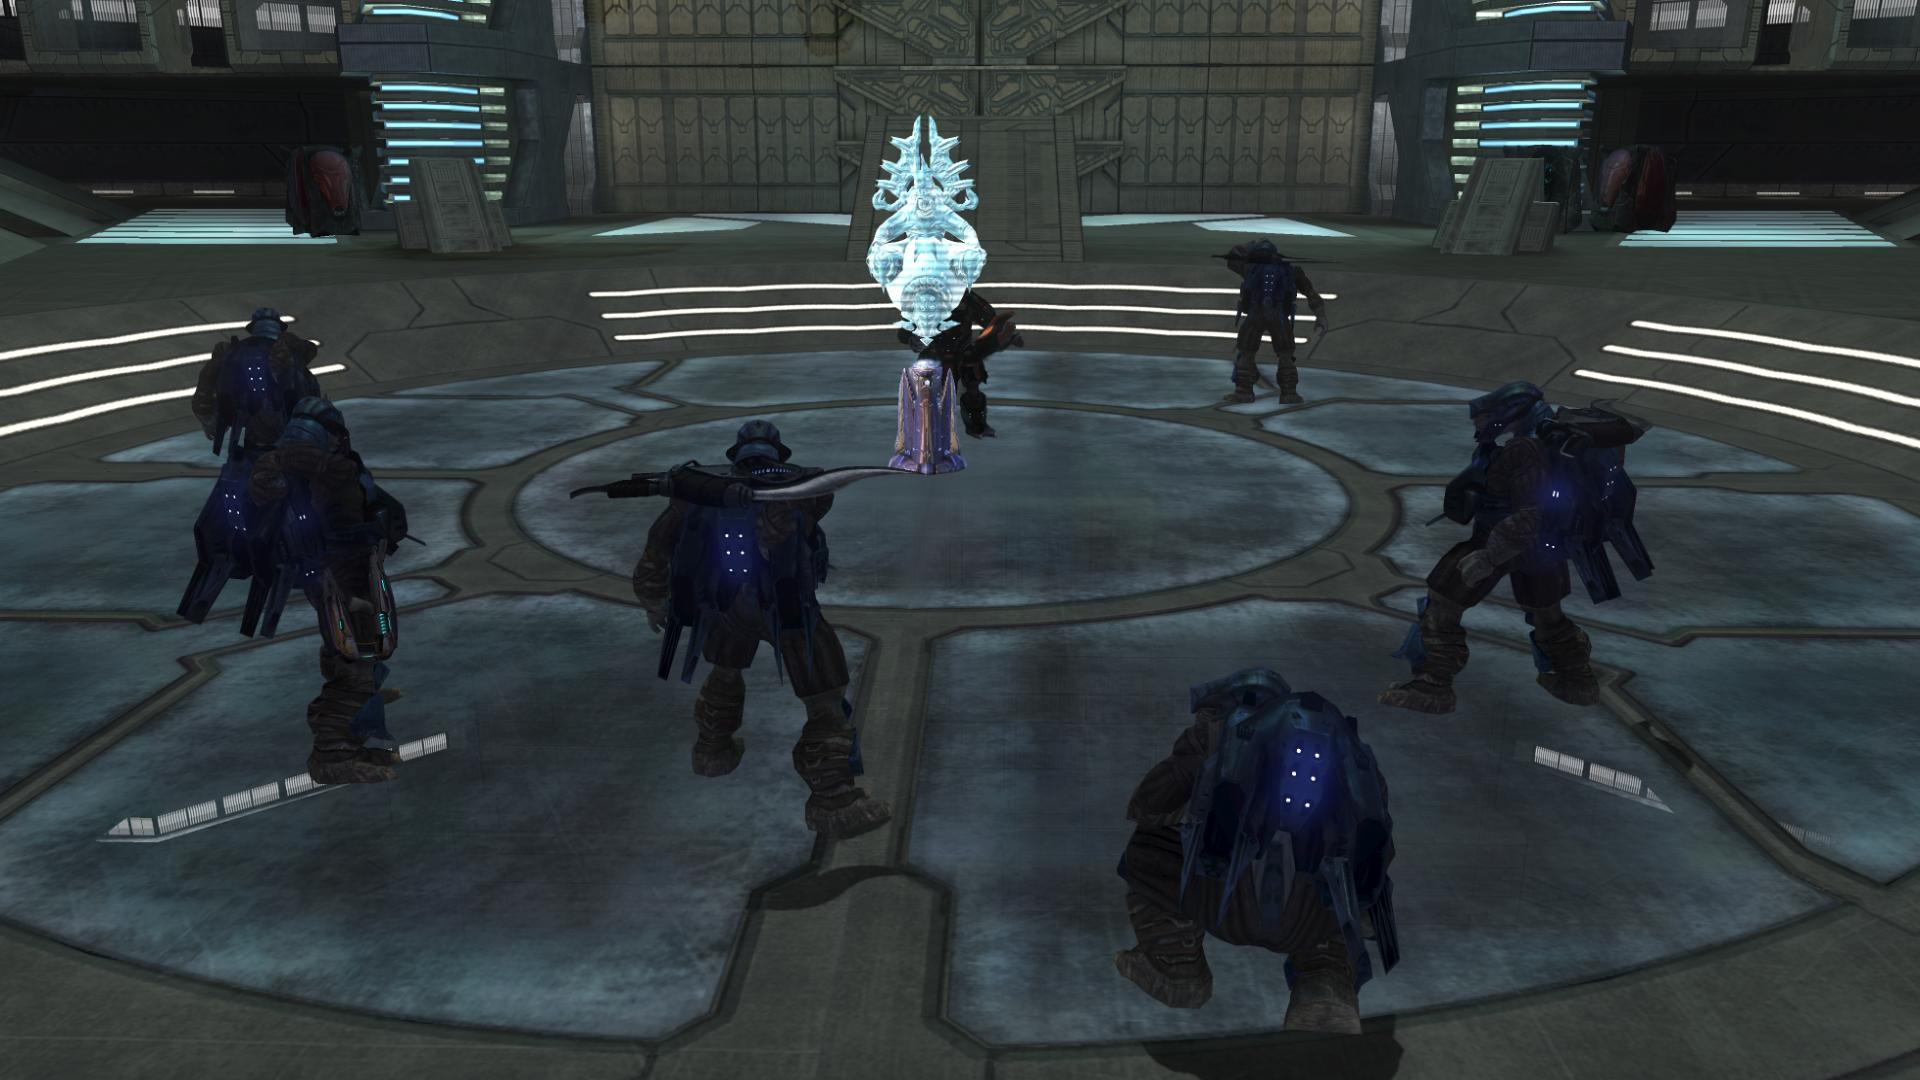
This last fight on the lower level is really great; as you move into the final hallway, you can see through the window that the Chieftain stands in front of a pedestal, with his pack surrounding him in a half-circle. The Brutes with jump packs are forced to keep their Brute Shots resting horizontally on their backs.
As you approach, the Chieftain typically finishes up his primal displays by shouting:
“For the Prophets! Fight me! I’m right here!” [The Ark, Halo 3]
As read in Halo: Contact Harvest [pgs. 344-377], a Brute Cheftain relishes in the chance to defend his honor in a one-on-one fight to the death. This is one of those fights. The Chieftain will not attack you until you enter the circle, and the rest of the Brutes won’t even draw their weapons unless you break their code by attacking one of them.
The Prophet of Truth delivers a short message for the Chieftain while you battle:
“You must win this fight on your own. Failure will bring a fate worse than death: abandonment, as we step forward… without you.” [The Ark, Halo 3]
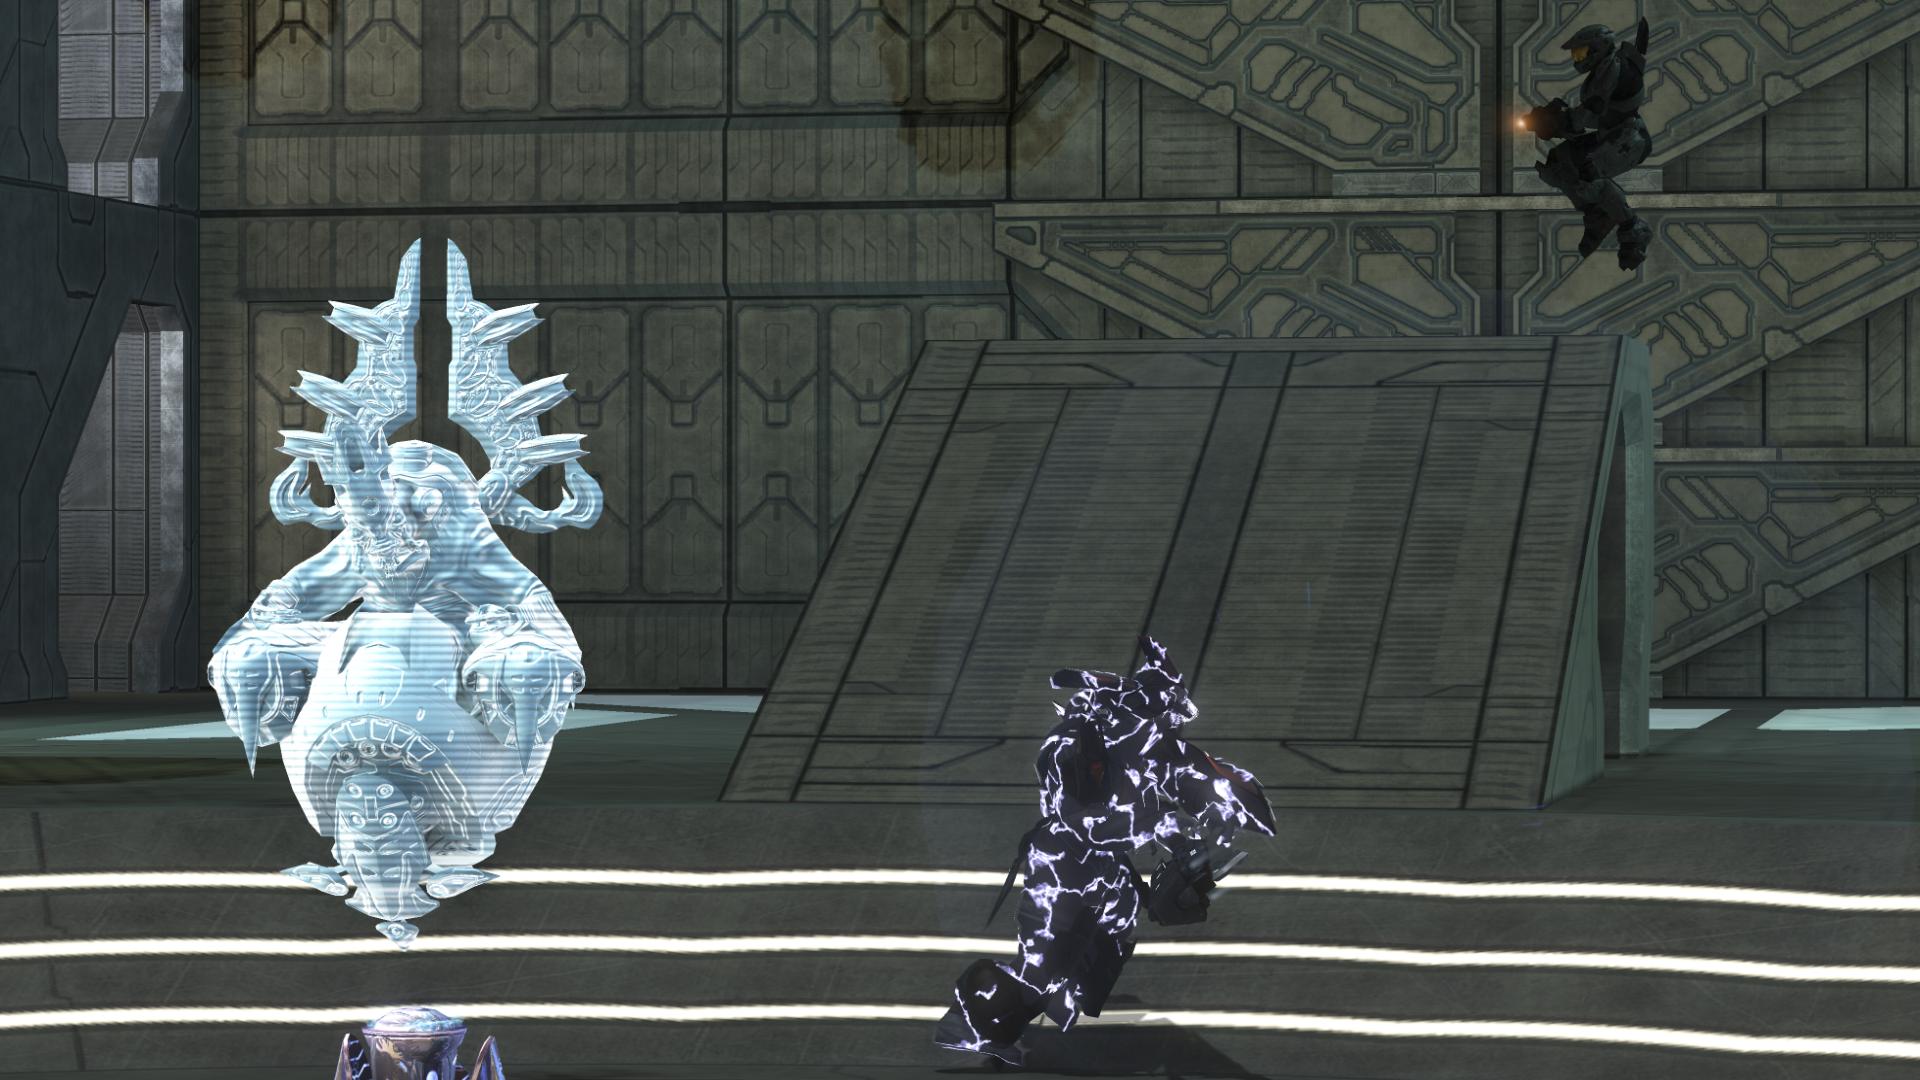
The Brutes watching the fight will shout many things; one of them that I found interesting was “Finally! The demon nears justice!” These Brutes have faith in their Chieftain. I know a lot of people like to use any active camo that they’ve picked up to take out the Chieftain, but I just can’t do that. It’s, in my opinion, one of the best moments in the series; this arena fight with the Chieftain wielding a Gravity Hammer. As the Chieftain’s health dwindles, he’ll deploy his invincibility – nothing to do at that point, but run, and wait for it to expire. This battle is a ton of fun because the Chieftain has a high amount of health, and his hammer is a one-hit KO if it connects… but part of the fun is when it almost connects, since it can send you flying if you were in the middle of a jump.
Once the Chieftain has been defeated, I like to see how many Brutes I can stick before they lift off with their jump packs. Although… I do feel a little bad for them, sometimes: their leader, the one that they’ve placed their complete faith in, has just been defeated right before their eyes!
The last gameplay portion of this level usually ends in an annoying manner, for me, at least. I’m typically low on health, with my shields completely depleted, and one of the two Jackals picks me off before I can get to them.
“ETA, damn quick. Stand by for pick-up!”
“Commander!”
“Johnson, look sharp!”
“I got it!”
“No. Don’t shoot. They mean us no harm. Those units have a priority task.” [The Ark, Halo 3]
“Oh yeah? And what might that be?”
“I really can’t say. Not for sure. But if you allow me to find a terminal closer to the core…”
“No. We must keep the Prophet of Truth in our sights.”
“But what about your construct? Her solution to the Flood? With more data, I might -”
“Arbiter’s right. We have priorities, too. Until we kill Truth, stop the rings from firing… nothing else matters.” [The Ark, Halo 3]
So it seems that whatever the Monitor has discovered will have to wait. Truth’s location has been uncovered, and a final confrontation with the last Prophet draws near.
comment 15 hocus is the name of the pelican also if you look at the pilots neck it is brown not white and the only female that is in the game is white so it IS a male also Cocopjojo I didn’t see a japanese/chinese face on his armor
Anyway good write up Cocojojo
Comment by Joshbutterballs — July 23, 2009 @ 2:45 am
sorry I ment cocopjojo
Comment by Joshbutterballs — July 23, 2009 @ 2:46 am
thanks desert rat 852 i noticed that as well but i used to think it was the Forward Unto Dawn
Comment by Echo-411 — October 4, 2009 @ 5:24 am